
Structures in Revit (II)
Modelling Columns
First thing to do when starting a structure model is to create our project context setting up Datums, that is: Grids, Levels and Reference Planes. We read about that in previous Post: Modeling Structures in Revit I.
Now that we have already established Datums let’s model our first structure’s elements that will be Columns. Why Columns and not Floors or other elements? Learned it from experience!
Columns are a component family which means that are created from a separate file and loaded into a model. Lots of columns families are accessible to us. When it comes to steel columns I suggest to use one of them but if it is of concrete columns with some complex geometry not easily available you can create your own Structural Column Family. See Post: Modeling Structures in Revit III: Pyramidal Pile Family.
Best practice to create a column in a model is in a plan view using “At Grids” placement.
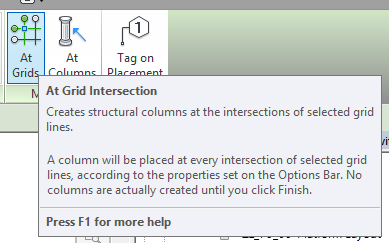
You can always create them “in the space” and then Align it to the Grids, since they have “Move with Grids” option on, they will move with them without needed of locking alignment. But with “At Grids” procedure you can create a huge set of columns at a time.
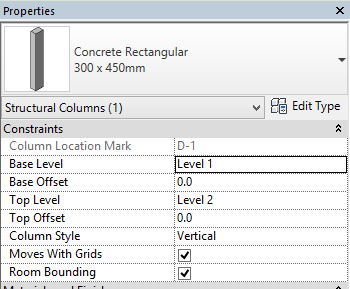
Columns are defined with a Base Level and a Top Level, both can have an offset managed by Base Offset and Top Offset parameters. When placing columns check Level associated to the view where you are creating them, it will be Base Level or Top Level depending if you select Depth or Height at Options Bar. Sometimes occurs that when you create some columns nothing is seen, don’t panic, switch to a 3D View, your elements sure are there, it’s only that Base/Top Level are not properly settled or that Visibility and View Range settings must be modified.
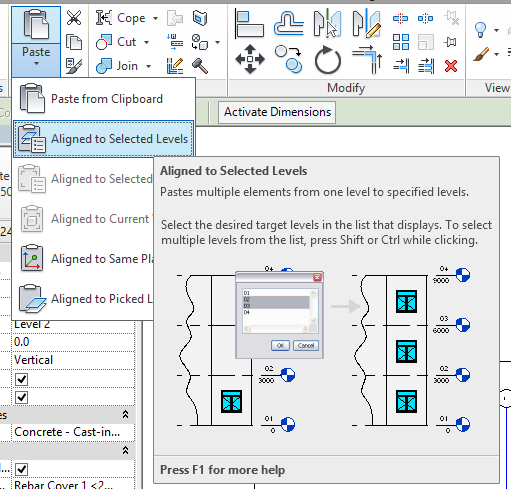
There is a very easy way to copy columns from one level to another: Copy them to Clipboard and then select Paste Aligned to Selected Levels (Modify tab): (that also works for other elements)
To check if columns are correctly placed or have the right type is easier by means a schedule than in other type of view. Yes, if you’ve read some other Posts of mine you already know that I’m a schedule fan! But evidence speaks for itself, have a look to next figure, with these two schedules we can quickly manage columns location and dimensions:
Concrete columns should be modeled floor to floor, enabling them to be scheduled individually. Steel columns should be modeled full height and split once splice locations have been verified by the engineer/contractor/fabricator, be careful on this!
Sometimes occurs that columns doesn’t finish in a horizontal floor, in that case we have to “attach” them to the floor and automatically columns will grow to it. Maybe steel columns doesn’t show a properly cut, no problem, there’s a solution, have a look to Post: Cut beams and columns in Revit. Next image shows 3 columns, all of them attached to floor above but each one with a different Attachment Justification, see Properties window at left.
Well, that’s all. Next trick I learn, next post update, promise!