
Revit Graphics Appearance (IV)
Naming and Using Filters
A recommended procedure for Filter Naming
It’s very usual that in advanced stages of the model, Filter Dialog Box seems to us like a horrible mess where nobody can find anything and solution is always adding a new filter despite there are at least 3 versions for the same purpose.
Let’s try to fix that by suggesting a Naming Procedure for Filters. I bet you prefer a storyboard better than a text, ok then:
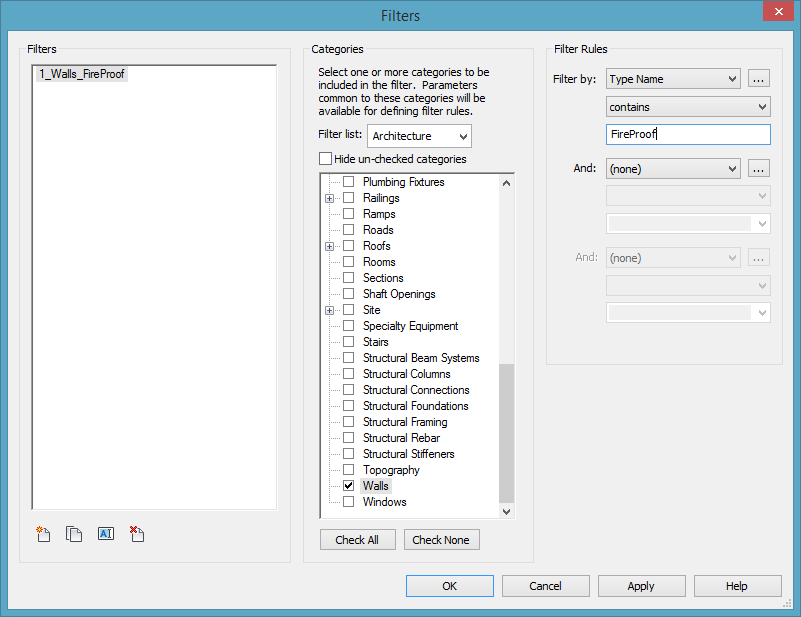
You see we have named this filter: “1-Walls-FireProof”. That’s composed by 3 parts. The “1” will be explained later on. Second part is the Category (i.e. “Walls”) that will be affected by the Filter Rules and third part is a description of the Filter Rules (i.e. “contains FireProof”).
Two recommendations: Do one filter for one Category and choose Filter Rules in the more generic way, I mean it’s better using a “contain” than an “equals”.
Let’s now explain the “1”. The “1” means that the filter is positive, see we have chosen “contains”. Have a look now to next figure:
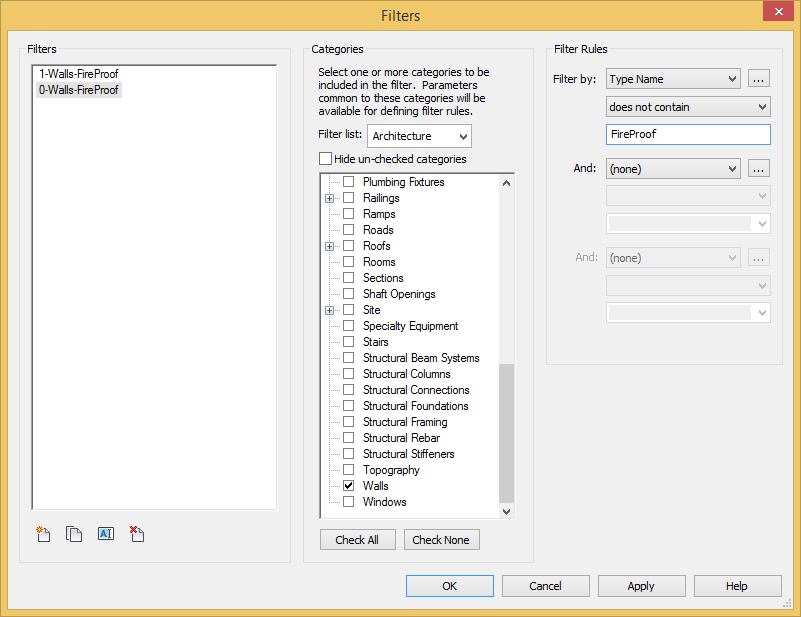
The new Filter: “0-Walls-FireProof” is negative, we have chosen “does not contain”.
Summarizing: “1” means that we are going to operate over the elements according the Filter Rules defined. And “0” that we are going to operate over the elements not according with the Filter Rules defined in the filter name.
Next figure shows and application of these filters:
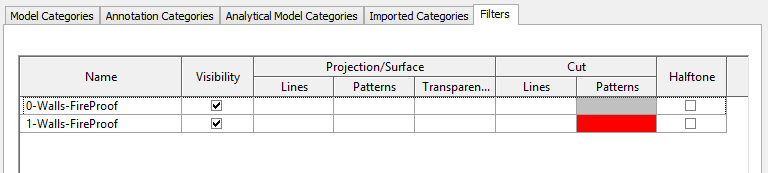
Walls with a Type Name containing “FireProof” will be shown in a Red Solid Pattern and Walls with a Type Name not containing “Fire Proof” will be shown in a Grey Solid Pattern.
Let’s show another example, a filter applying to Sections :
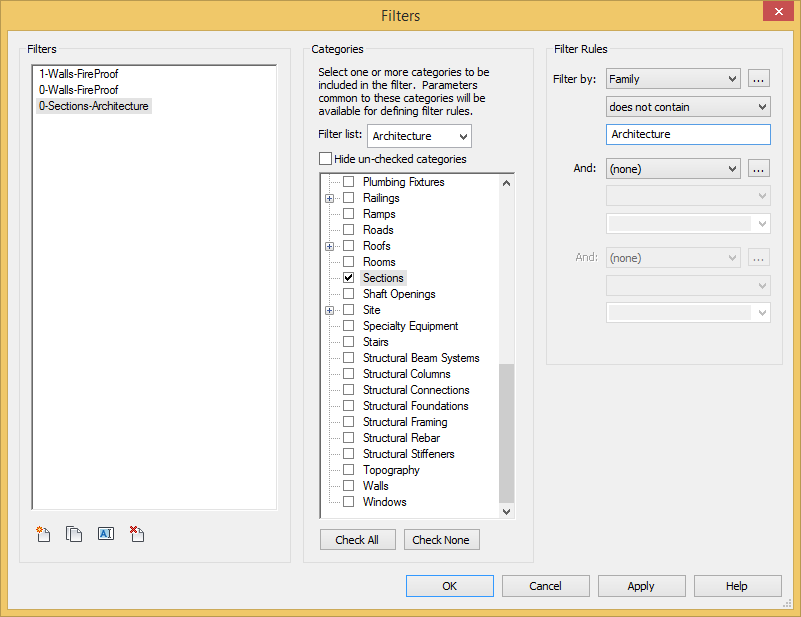

In the view where this Filter is applied, the only Sections to be seen are the Architecture ones cause we have unmarked the Visibility for elements filtered.
I think that’s a clear naming method, please, let me know if you agree!