Base Materials
Brief explanation
BASE MATERIALS
File: VR_UE_Materials_BaseMaterials
Brief explanation
In Modelical we try to improve the workflow between 3D modelling programs and Unreal. With this goal in mind, we try to simplify this process and reduce the time and complexity.
As most of the materials that we use are architectural materials, we don’t need a specific mapping for each mesh. In this sense, we try to use which we have called “World coordinates material”
Also instead of having multiple materials with similar properties on it, we have decided to create a Base material which allows us to set as many properties as we want in that material, and use it for each instance that we create.
Introduction
First step is to clarify which properties are necessary for our materials and can be set in common for different materials. This properties are variable, and are changing through time, but more or less are grouped in two main groups, transformation and appearance.
Second step is to understand that there are some properties that depends necessary on the material and can’t be set externally to it.
Common Properties | Specific Properties |
|
|
With this information in mind, we can deduce that we need to set different base materials depending on what type of material we want to use, because is different to set up a masked material and an opaque one.
Also it is a very clever idea to group common properties in a way that every change will affect all base materials.
Specific Properties
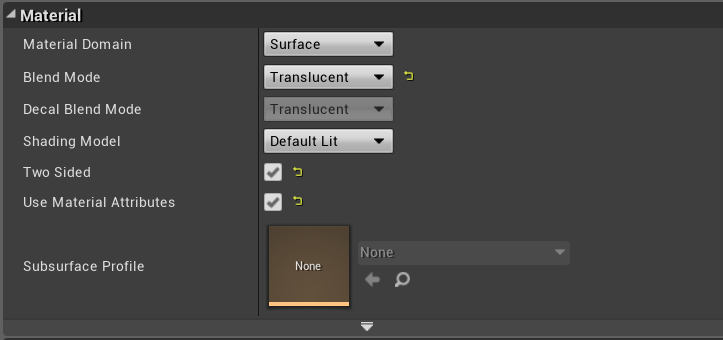
Continuing with our purpose, we need to create a material for each specific property that we want to use, at this step, we can simplify it in three main base materials. This materials are different because its blend mode changes between them:
Base_OpaqueMaterial

Base_MaskedMaterial

Base_TranslucentMaterial
The rest of the properties are shared between them thanks to two custom material functions, each one corresponding with each group:
Base_OpaqueMaterial

Base_MaskedMaterial

Base_TranslucentMaterial

Appearance Function
Starting with the end, let’s explain how Appearance function works:
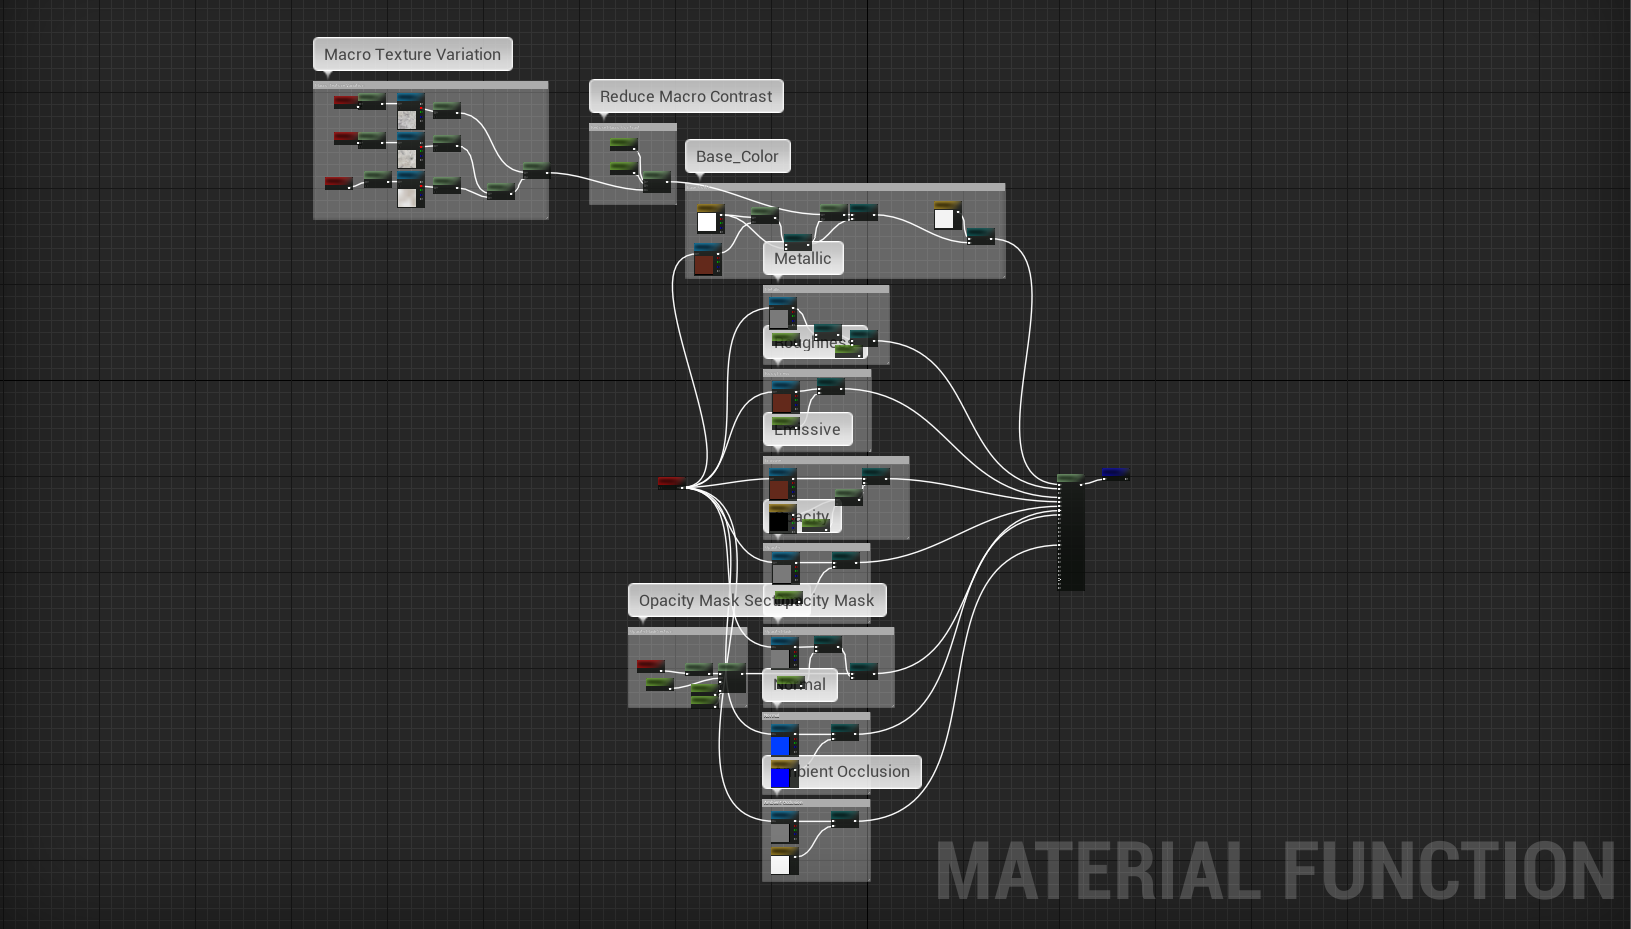
Basically, we have several groups of parameters that can be enabled or disabled with a switch parameter, some cases are more complex than others, depending on the amount of detail that we want to add to the material, the perfect example of this complexity is the base color group.
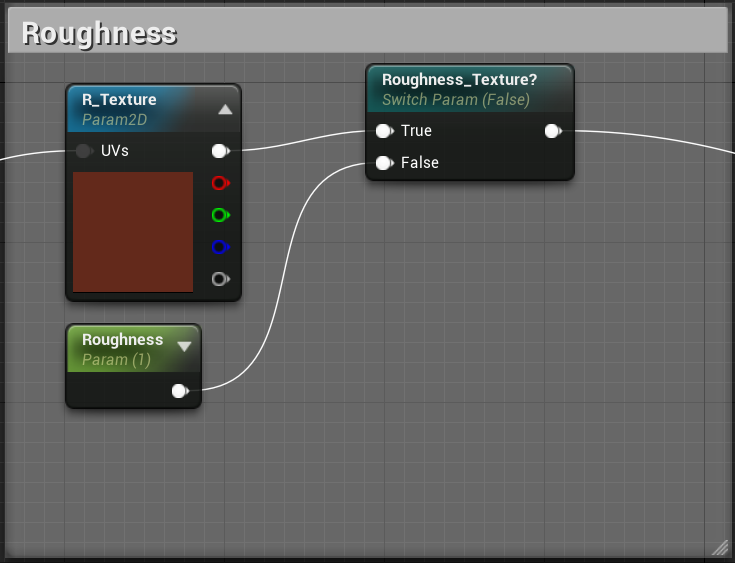
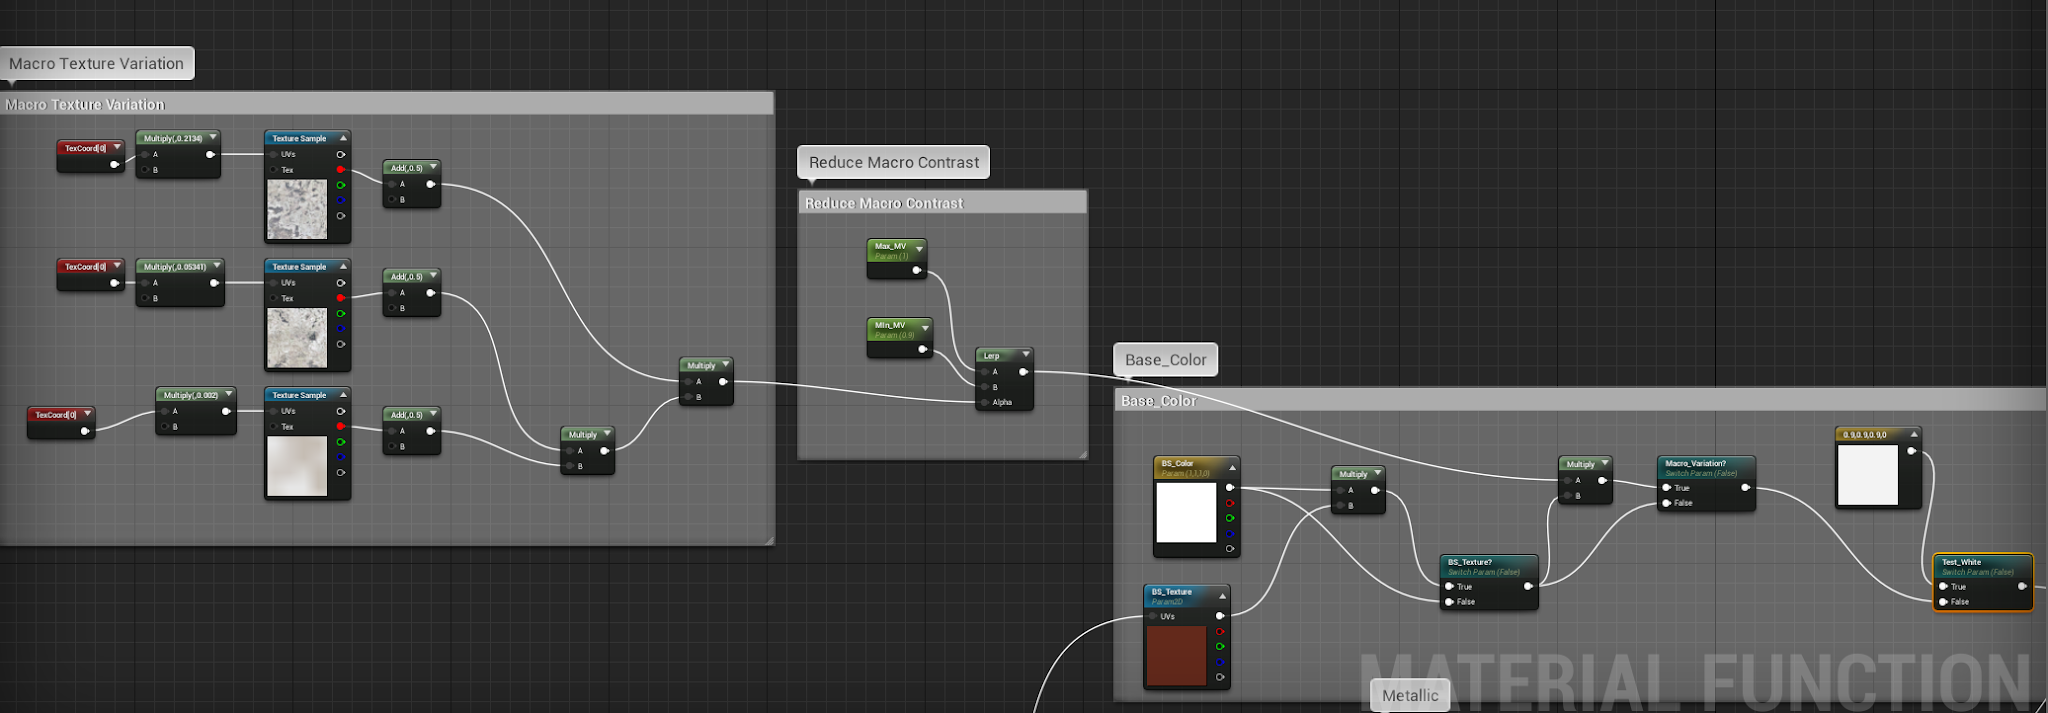
The result is that when you create an instance of the base material you have a lot of boolean parameters that you can enable or disable to add more information or just skip it.
Everything disabled:
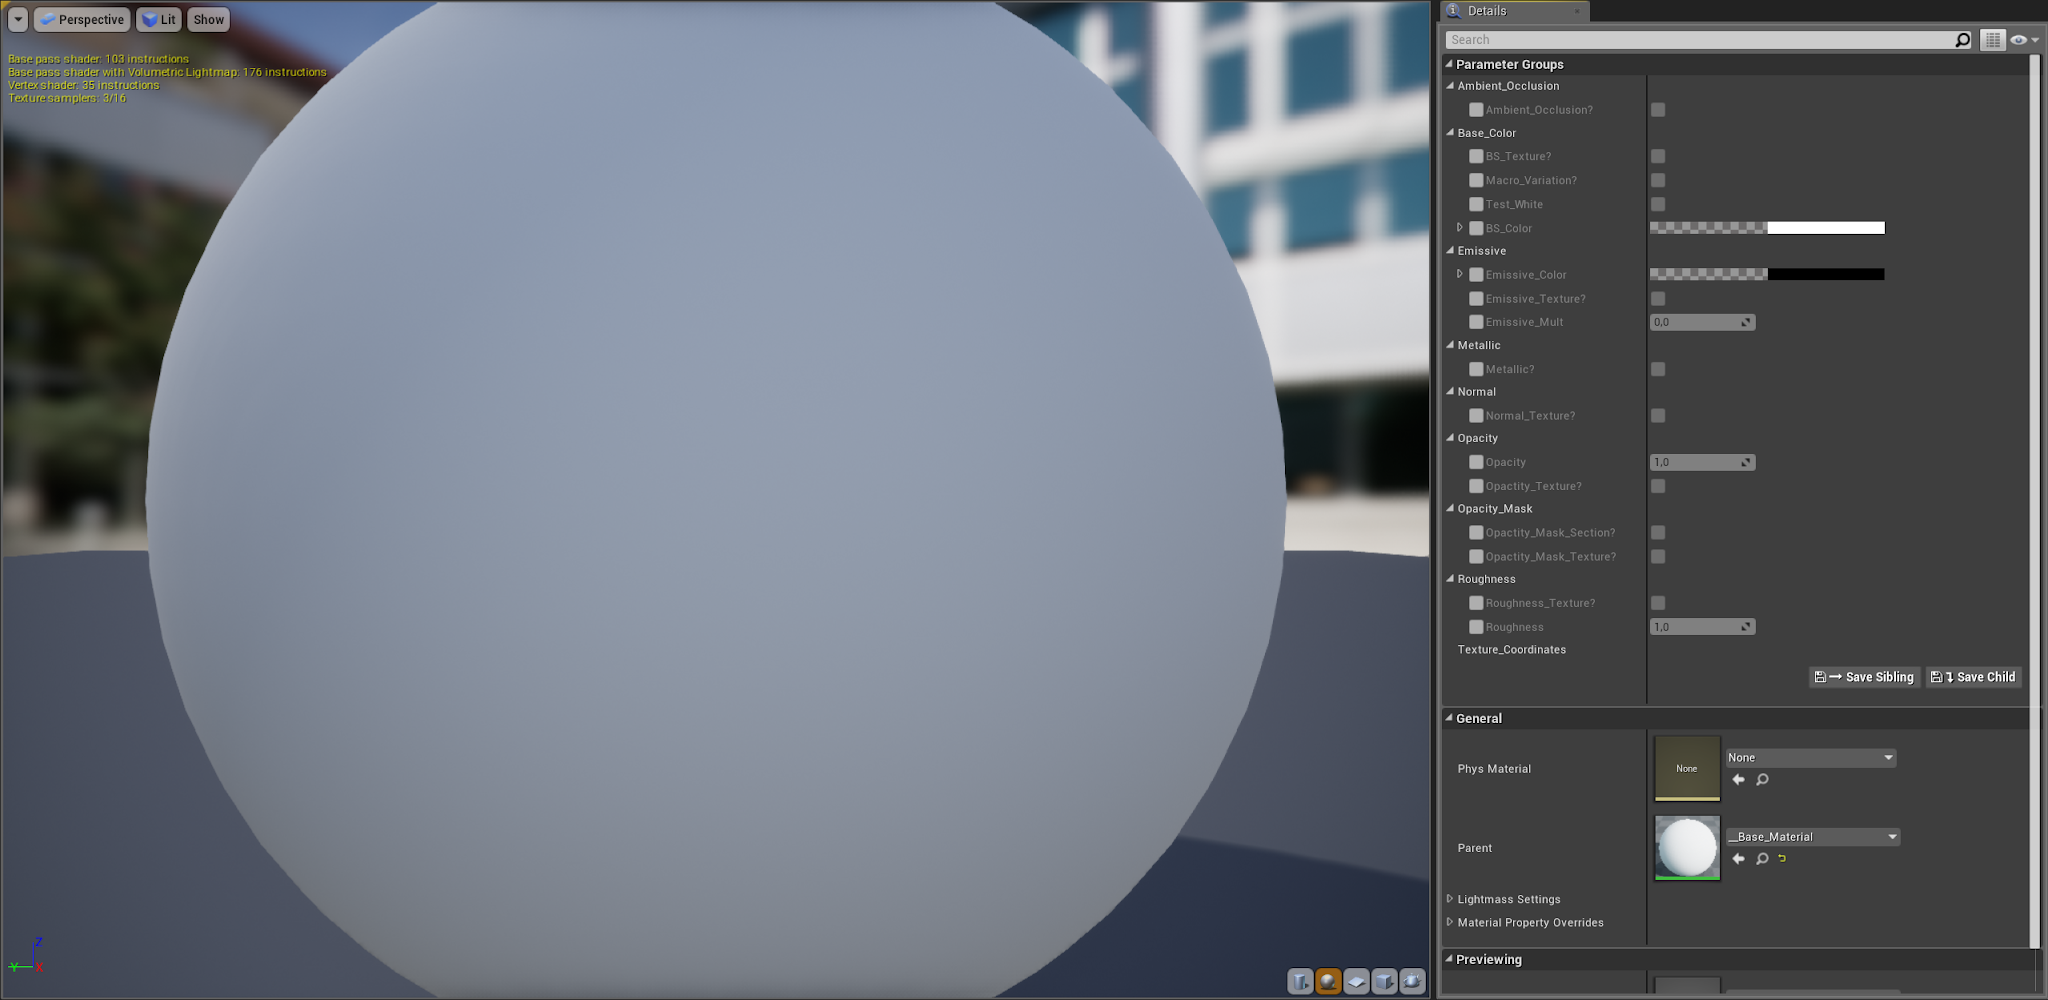
Everything enabled:

This process improves its performance in conjunction with Substance materials, because Substances designer create amazing textures, where you can edit some parameters, and then you just to use those textures in the base material.
Transformation Function
Transformation function is a set of parameters that allow us to modify the UVs of the appearance function, so if we aren’t using any texture we will not be able to set any parameter.
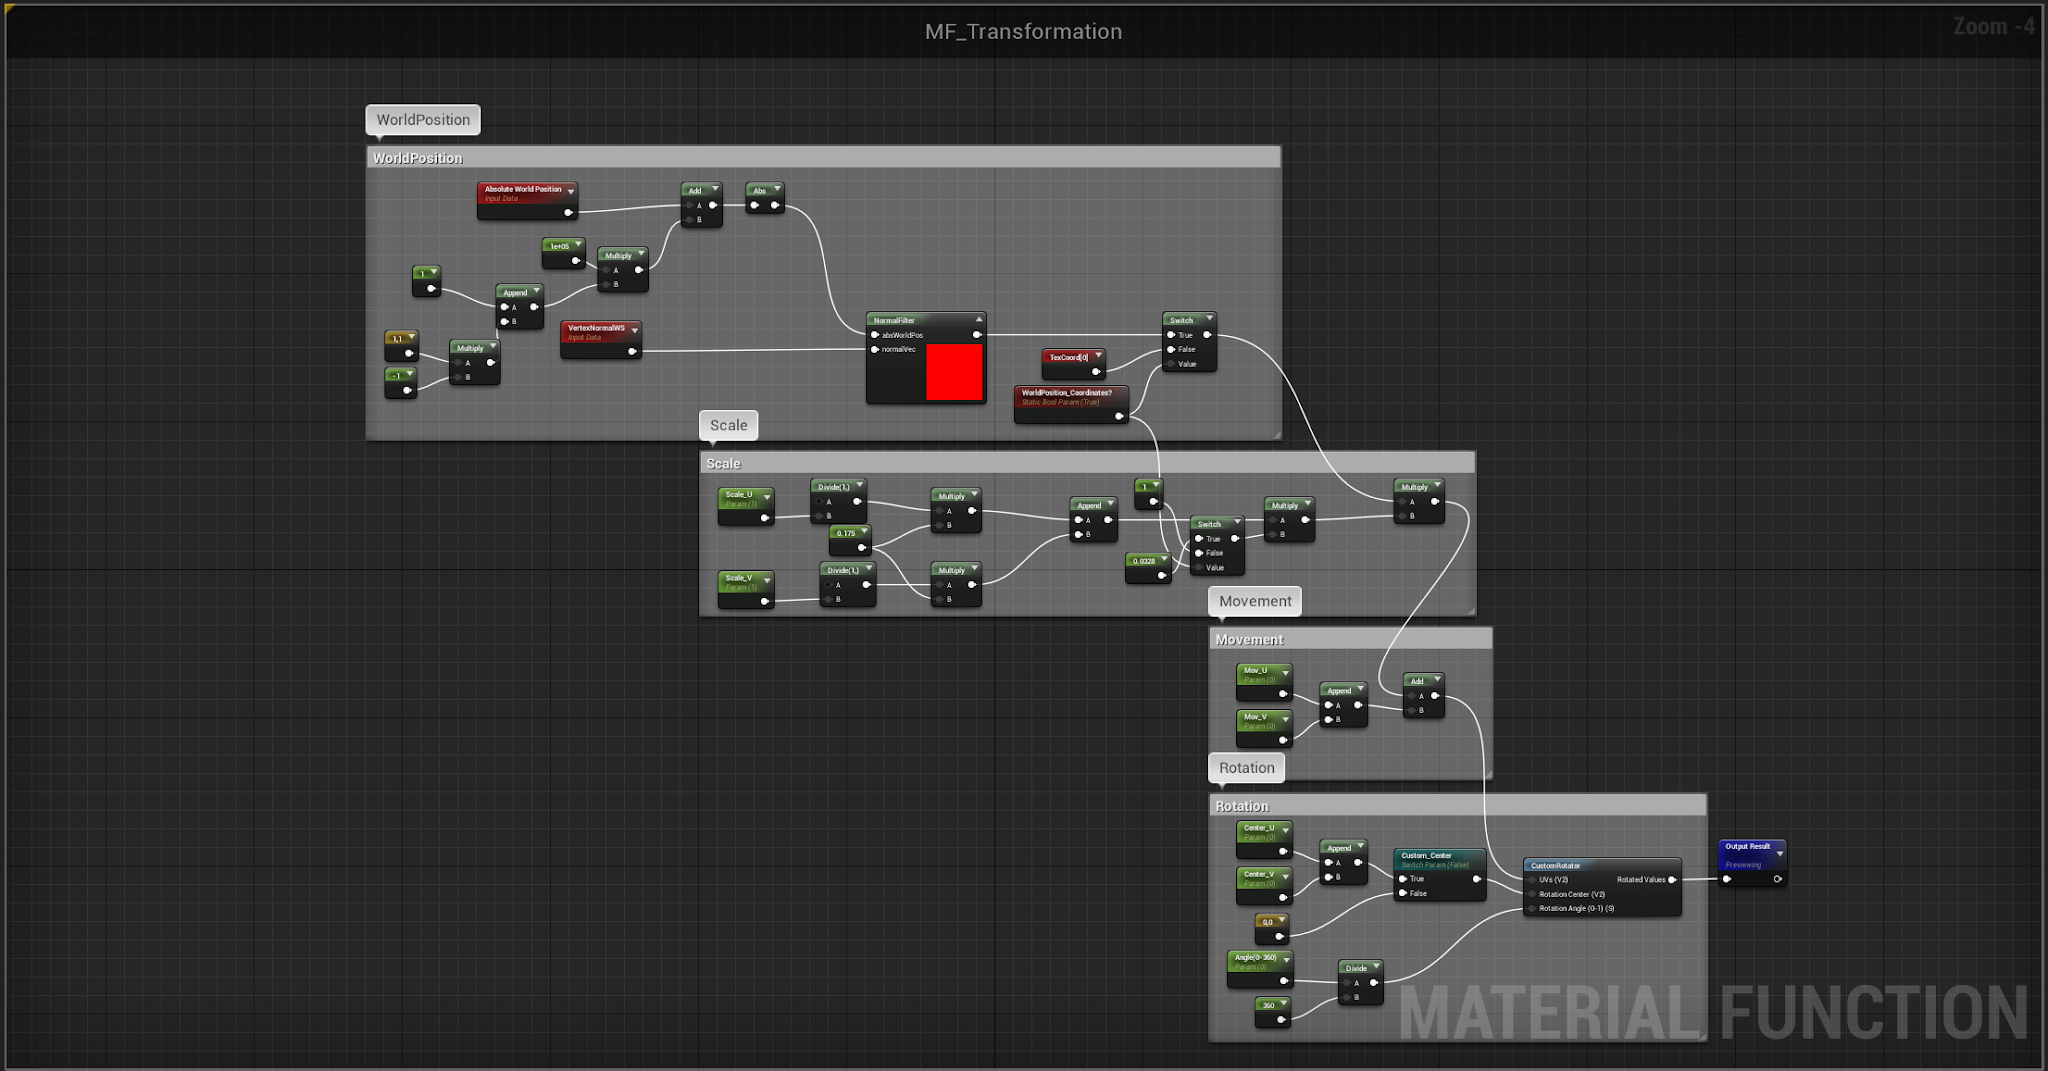
It’s necessary to explain a couple of ideas:
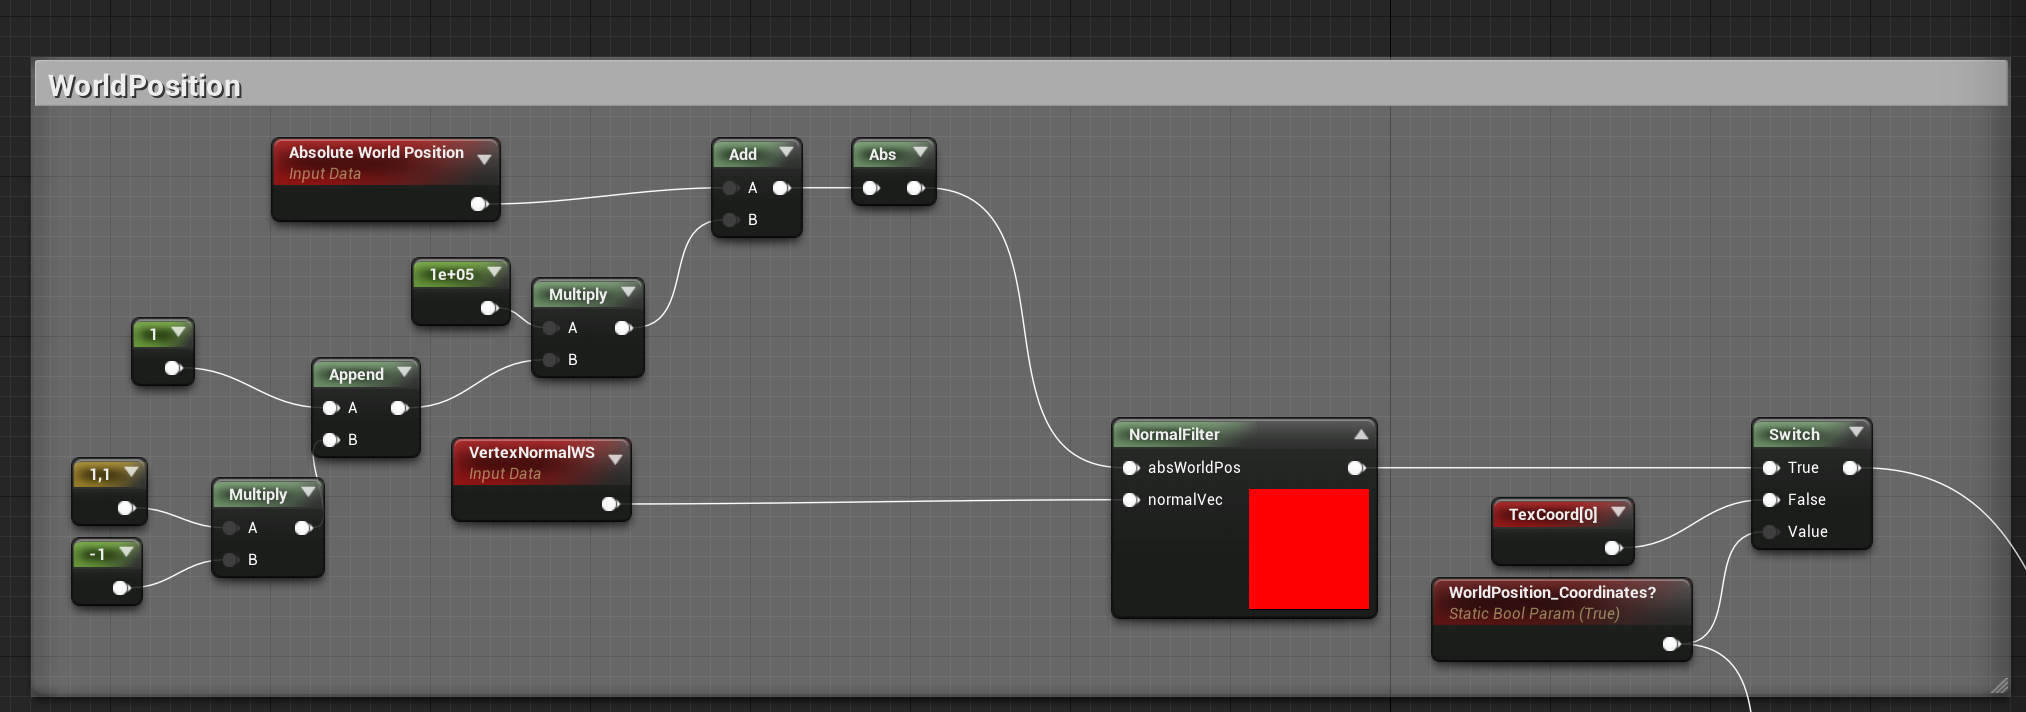
Use of Absolute World Position instead of TextCoords
This option can be changed with a checkbox and the rest of the function keeps working anyway.
The main point of this, as explained before, is to set the material parameters independently on the meshes that uses the material. That allows us to work faster with materials and manage the scale of the texture without think on corresponding meshes.
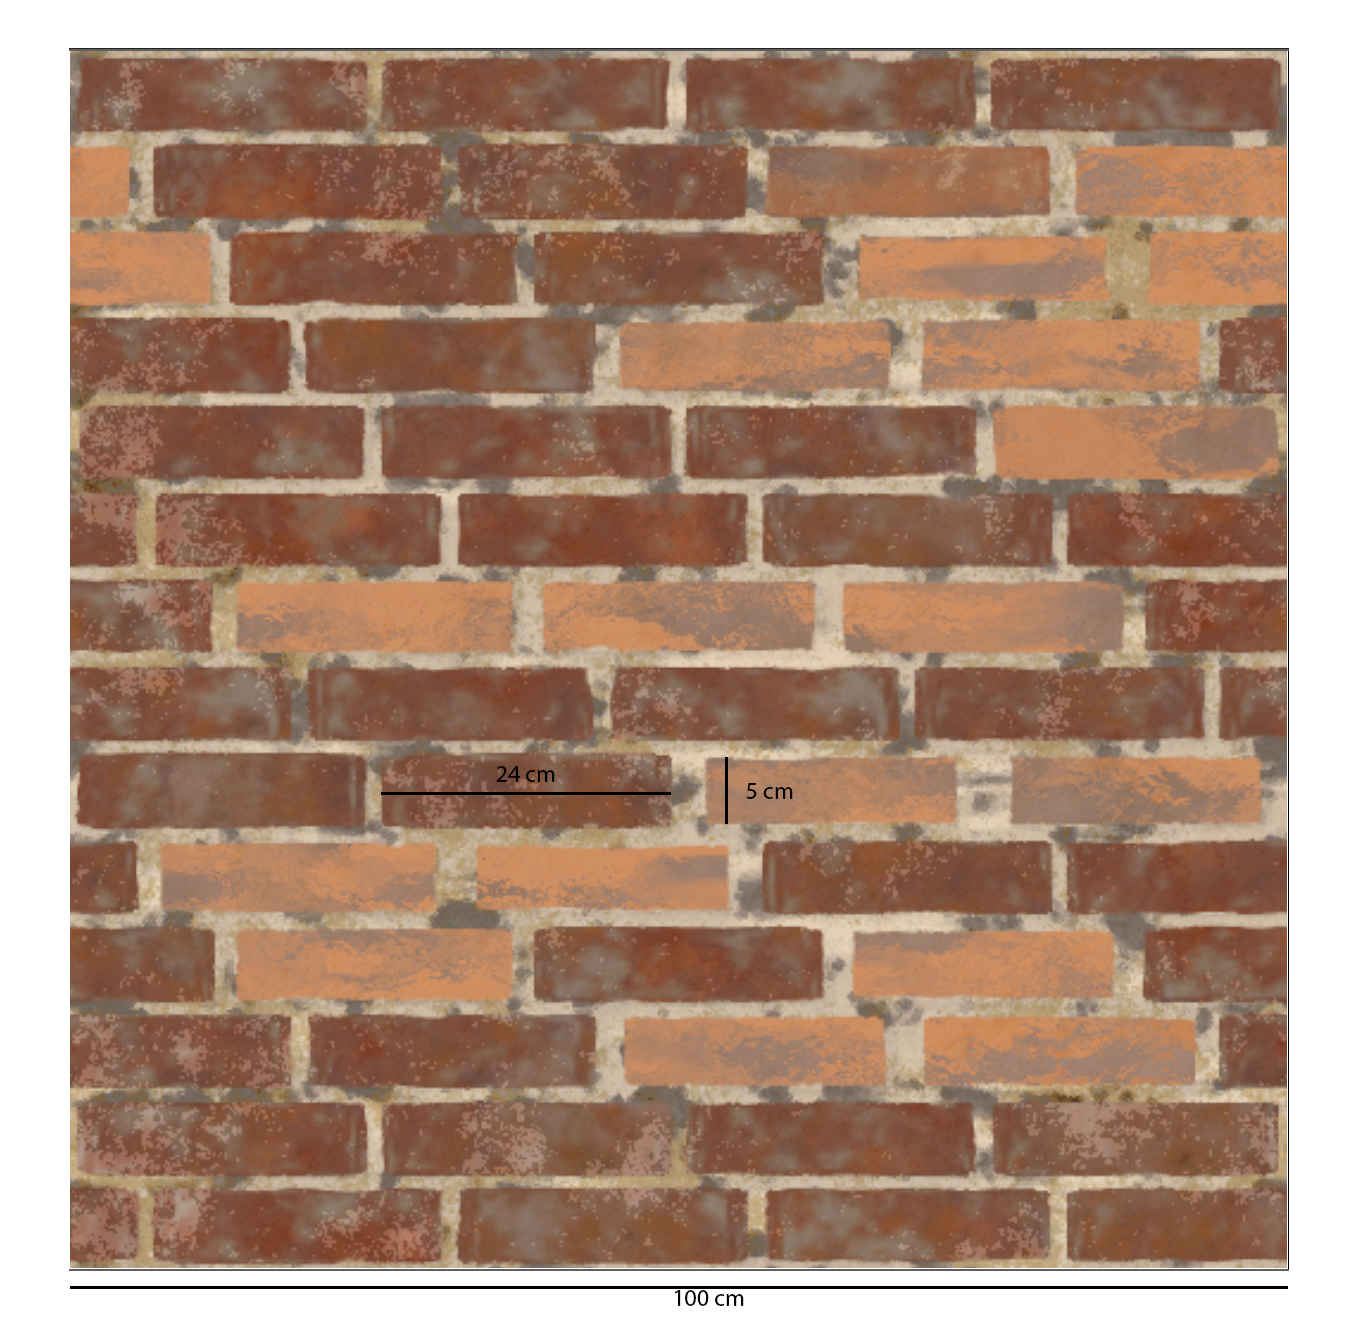
Texture measures as scale
In order to set up the scale of the material, we need to decide how we measure the scale of each material. Our conclusion: use the real scale represented in the texture, for example, in this texture we can know the measure of a single brick and use it to get the total width of the texture, and these value is which we will use to set the texture scale.