

Export to DWF
Revit Workflow
Export to DWF
Objectives
- Understand the customized settings before exporting to DWF.
- Be able to create a DWF, modify it and import markups in the RVT file.
Prerequisites
- User has basic skills in BIM modelling with Revit Software, and understands the language used.
Description
Design Web Format (DWF) is the Autodesk method of publishing design data. DWF files let you share design information securely and easily. Using DWF format, you can avoid unintended changes to project files, and you can share project files with clients and others who do not have Revit. These files are significantly smaller than the original RVT files, making them easy to send by electronic mail or post to a web site.
In addition when you export to DWF, you can choose what data you want to export and therefore be more accurate when it comes to transmit the information to the rest of the agents involved.
DWF vs DWFx
The differences between DWF and DWFx today are reduced to the digital signature. Only DWFx format supports digital signature, if you want to add the signature to a DXF, the only way is to save it as DWFx.
They contain the same data although DWFx files are larger than corresponding DWF files.
Currently, the Microsoft XPS Viewer does not support views containing 3D content, password-protected content, restricted content, or georeferenced map coordinates. In the Microsoft XPS Viewer, when attempting to open views containing any of these unsupported features, a warning directs you to view the DWFx file in Design Review.
Export 2D files
You can export all Revit views or sheets to 2D DWF files. If you export multiple views in a project to a single DWF file, in Autodesk Design Review you can click a link to jump to a related view.
To include element-specific information in a 2D DWF file, you must ensure that the visual style for selected views is set to Hidden Line or Wireframe (the Shaded style uses raster processing for images, so once exported you cannot select individual elements in the DWF file), and go to the DWF export settings, to make sure the ‘Element properties option’ is selected.
Export 3D files
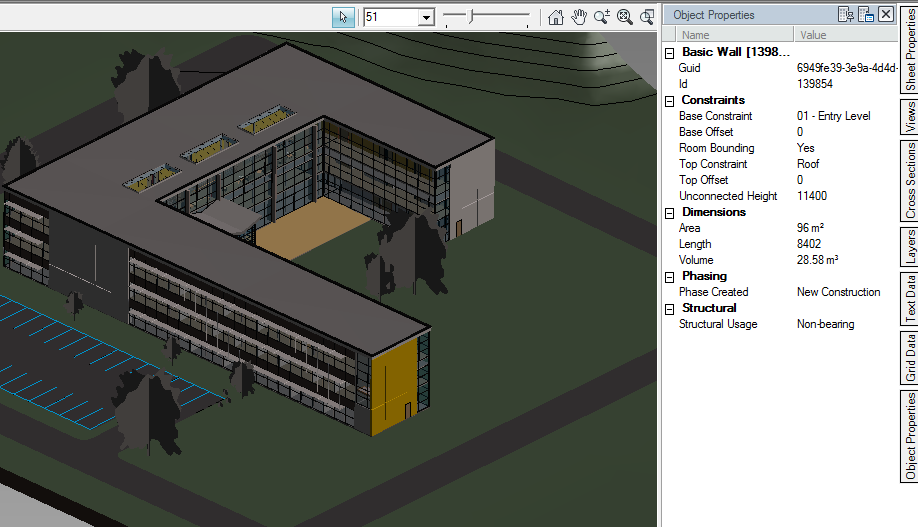
You can export 3D views to 3D DWF files. Using Autodesk Design Review, you can open a 3D DWF file and manipulate the 3D representation of the building. You can rotate the building, zoom in on a portion of it, select an element and make it transparent to see what is beneath or behind it, and so on.
Although most lines are exported to 3D DWF files, hatch lines are not exported.
Revit automatically includes object data for elements in 3D DWF files.
Procedure
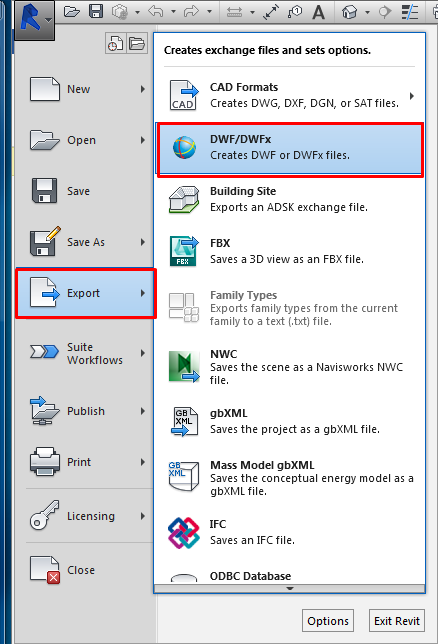
Export to DWF is done from the Menu>Export>DWF/DWFx
From this window, we should select the views/sheets to export, and select export configuration that will be used.
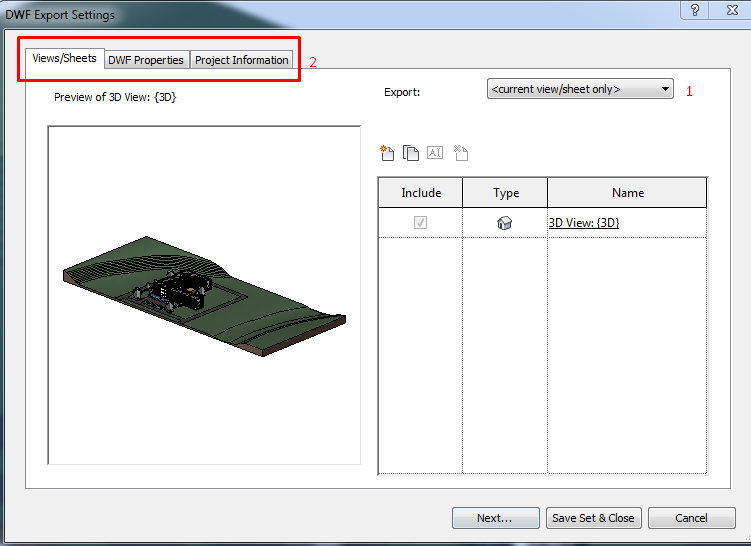
Export settings menu
Select elements to be exported
You can export to DWF both views and sheets as in DWG export settings.
Select the views/sheets to export from the drop-down Export menu. There are two options:
- Current view/sheet only: this option only export the view that is active at that moment.
- In session view/sheet set: this option allows us to choose between views and existing sheets.
In any case, the selection of views and sheets can be recorded to be used later as a set of views/sheets.
Export properties tab
Go to the DWF Export Settings:
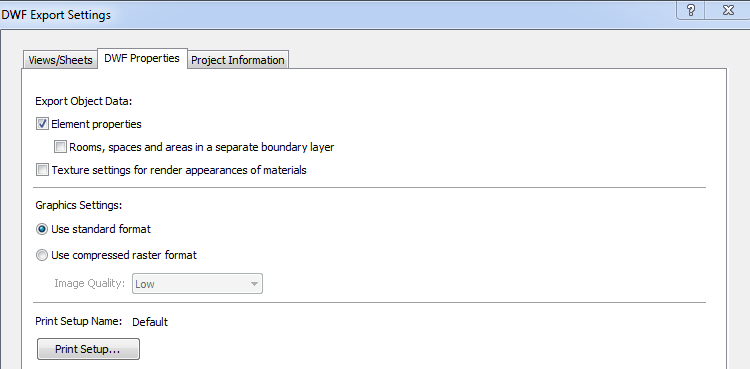
Export Object Data
Object data can only be exported for views whose visual style is set to Wireframe or Hidden Line.
Element Properties:
When you export to DWF, the export data for each element includes instance properties for all types of parameters, including shared parameters, project parameters, family parameters, and system parameters.
However, the export data for each element includes type properties for system parameters only. It does not include type properties for shared parameters, project parameters, or family parameters.
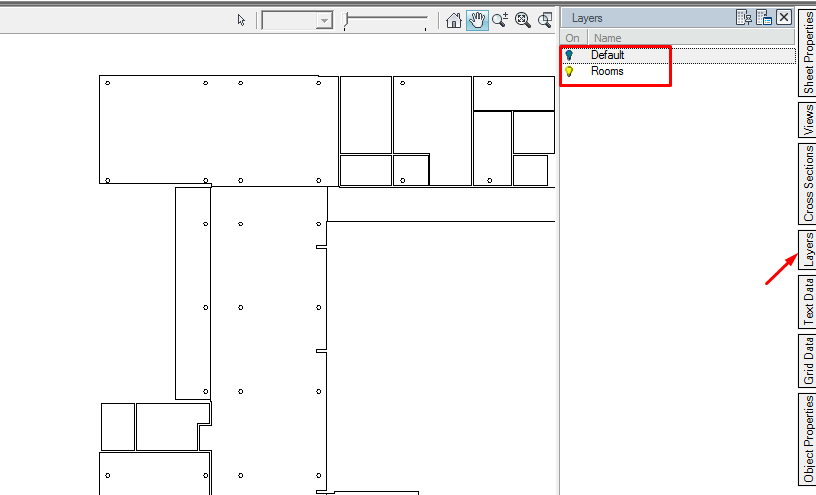
Rooms and Areas in a separate boundary layer: room and area properties can be exported separately from the geometric representation, so that individual rooms and room data can be viewed isolated.
Texture settings for render appearances of materials: this option only applies to 3D DWF export. For 2D DWF export, the model in Realistic view mode will be rasterized when exported to DWF regardless of this setting. With this option, the views omit material texture defined as part of render appearances.
Graphic Settings
Use standard format to export as PNG files. Use compressed raster format to export using a compressed JPG format. Select a low setting for Image Quality reduces image file size in most cases.
Print Setup
The Print Setup Name displays the name of the current Revit DWF Exporter settings.
- Click the Print Setup button to modify settings
- See ExportToPDF guideline
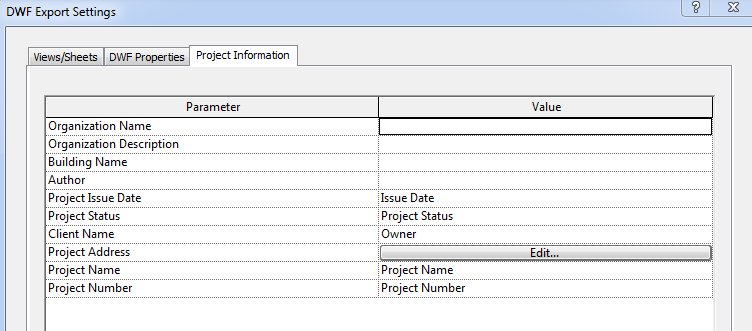
Project information tab
To edit or add project related metadata, click the Project Information tab. If this information is changed, the data is saved to the exported DWF files and to the project in Revit as well.
Revision and edition of a DWF file
The DWF format can be viewed with Autodesk Design Review (free software) or directly by opening it in Internet Explorer, without having the viewer installed.
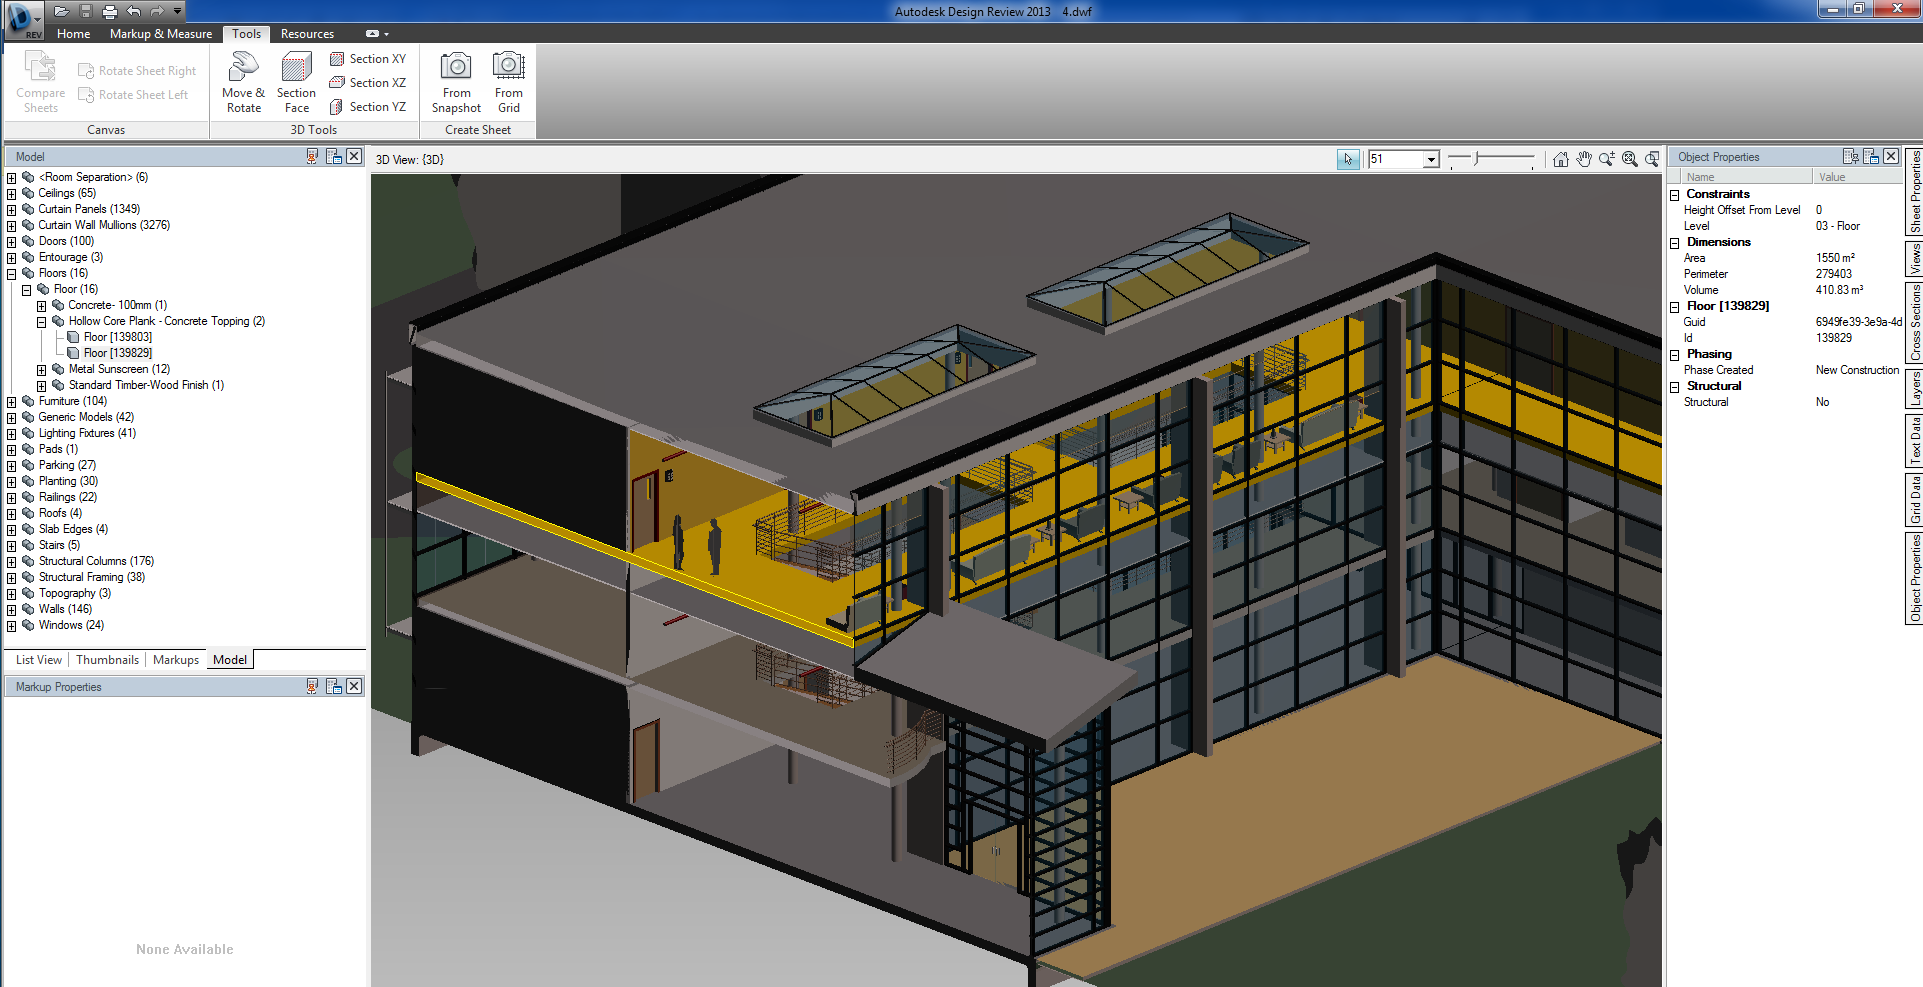
Exporting a model from Revit and opening it in Autodesk Design Review allows the user to view comfortably across its geometry. Even sections can be done.
Perhaps the most interesting tool is the review tool since it allows to save the history of revisions and comments added by different users.
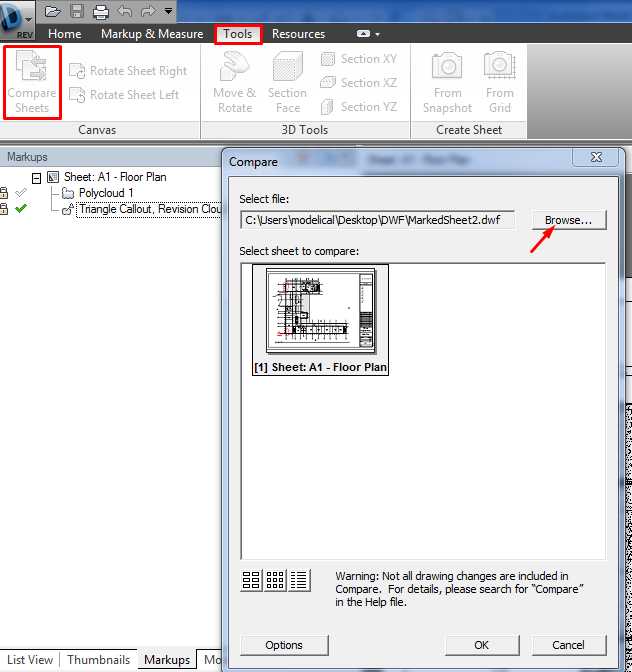
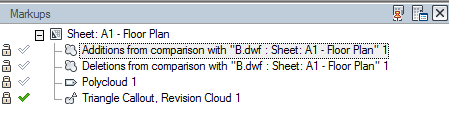
Compare sheets
3D section
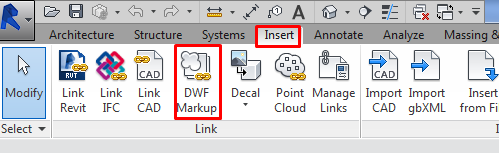
Link DWF Markups
You can export sheet views as DWF files, mark up the files, and then link the markups back into the project. Because they are linked, the Revit file and the DWF file remain synchronized with regard to the markups.
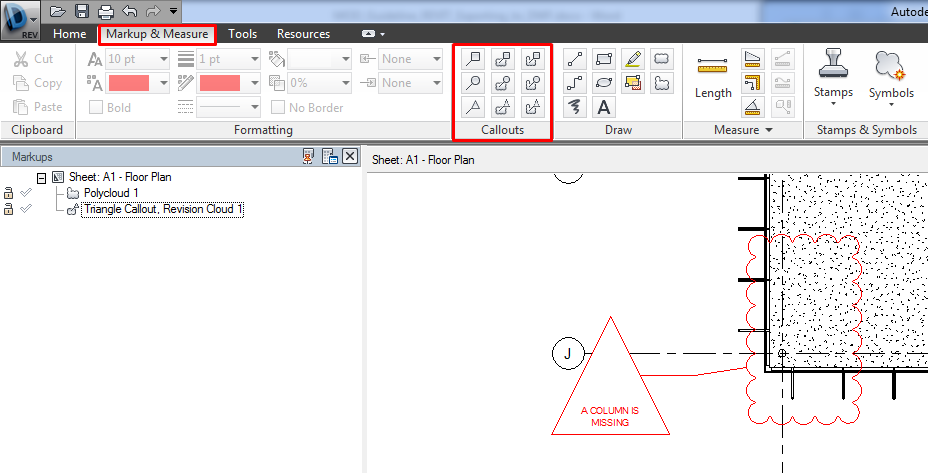
Export the sheet and mark up the DWF file:
Return to Revit and click Insert >DWF Markup
If the sheet name from the DWF file is the same as the sheet name from the Revit file, then the Revit sheet name is automatically filled in the Revit View column.
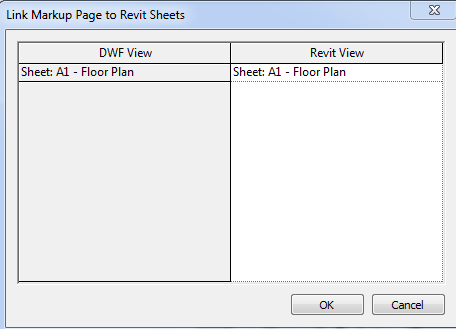
If the Revit sheet view name has changed since it was exported to DWF, the Revit View column displays <Not linked> next to the DWF sheet view.
If the Revit View value is <Not linked>, select a Revit sheet view (click the box below the Revit View column, and select a name from the list).
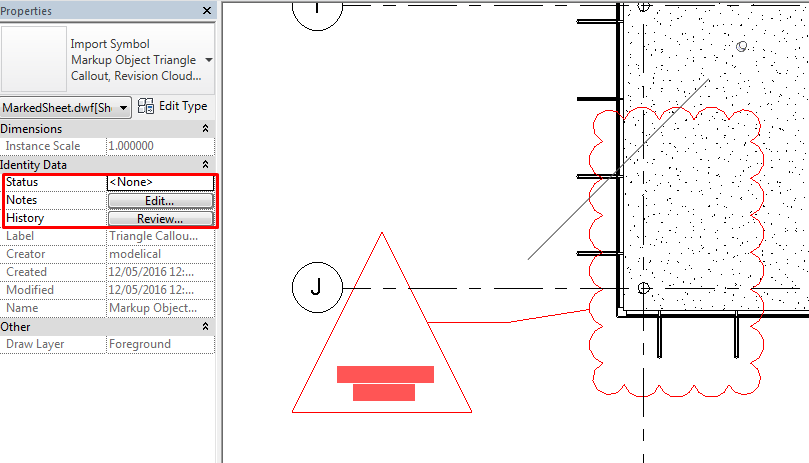
The DWF markups are placed on the sheet view as an import symbol. The markups are pinned, which means that you cannot modify their position, and you cannot copy, rotate, mirror, delete, or group them.
If markups were created in Design Review using its markup tools, then you can modify some markup properties in Revit.
Change status and add notes for markup: select a markup object that was created in Design Review. On the Properties palette, modify the Status and Notes properties if desired.
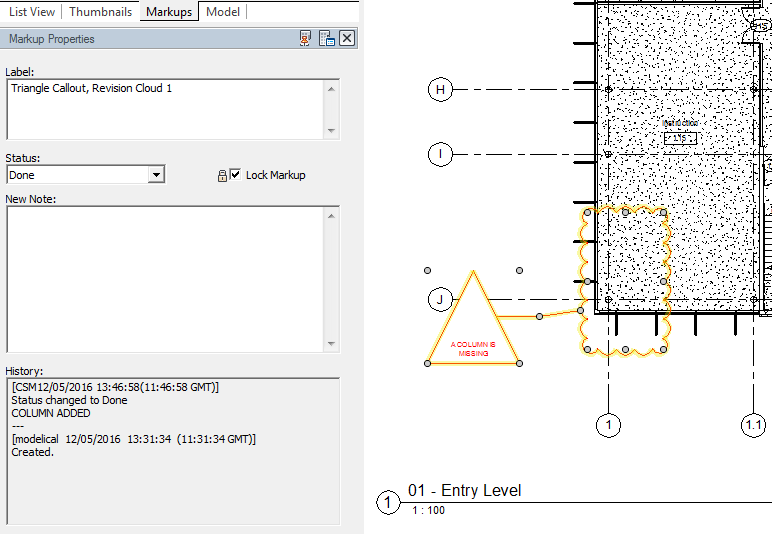
Save the Revit file: the changes can be viewed in the DWF file by selecting the corresponding markup object.
You can Manage MarksUps from the manage links menu in Revit: click Save Markups. The next time the DWF file is opened, it will contain the changes to the markup objects.
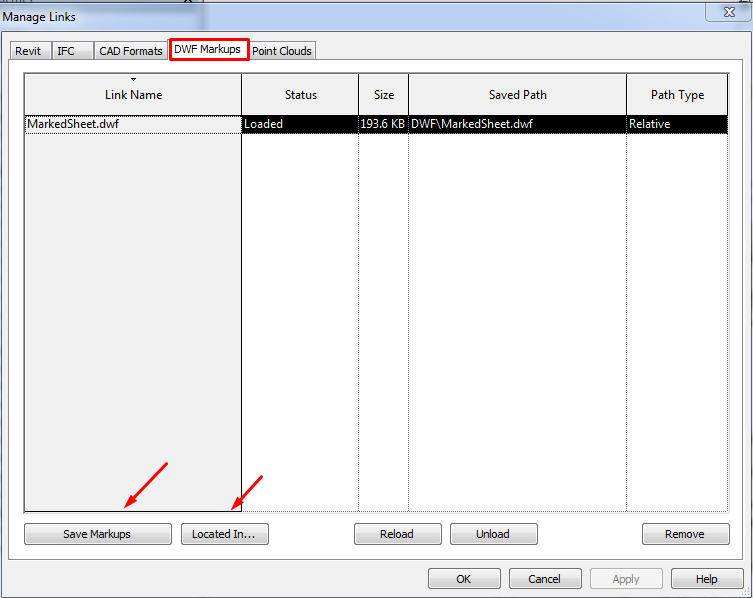
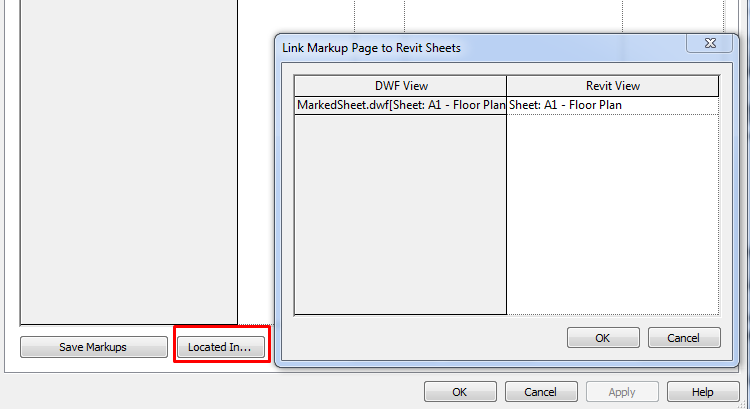
Click Located In to see the sheet view to which the DWF file is linked.
Tips&Tricks
- In DWF Composer, the markups are based on the default origin points: 0,0. DWF Composer and Revit origin points are the same. If the markups are not in the same position and they are shifted or offset, it is because the title block family is not at the same point as the default origin points in Revit.
- Currently the Export Object Data function only exports object data for vector image views. Views exported as raster images (required for shaded views or shadows) do not export the information.
Conclusion
- DWF is a format developed by Autodesk for distribution and efficient communication of information between those officers who need to consult, review or print your files.
- DWF files are not editable. DWF files are smaller and faster to transmit than design files than CAD formats.
Associated Files
- ExportToPDF
- ExportToDWG