
IFC4 based automations for Verde
IFC4 based automations for Verde
Objectives
Given the model of a building in IFC4 format, automate the computation of two Verde indicators with an open standard, cost free and vendor-neutral tool. The installation and configuration of the programming interface is part of the objective.
Prerequisites
User has:
- The attached IFC4 files: IFC4_ReferenceView.ifc, IFC4_DesignTransferView.ifc
- Administrator permissions on its computer to install Anaconda
- Installed Google Chrome
- General comprehension of the python language
- General comprehension of the IFC schema
Introduction
There are many programming interfaces capable of automating operations upon IFC. Anaconda presents several advantages:
- It allows to visualise graphically the IFC
- It’s cost free
- It’s vendor-neutral
In this guideline we lead you through the setting and configuration of the programming interface, a first interaction with IFC files and the development of two python functions which compute Verde indicators.
Key concepts
Anaconda: is a free, open-source platform that allows you to write and execute code in the programming language Python. It is by continuum.io, a company that specialises in Python development.
ProjectJupyter: plugin for Anaconda, it allows users to create and save code notebooks in a local server.
IFC Standard: it defines the IFC schema, it organises IFC entities and sorts their properties in Property Sets and Quantity Take Offs.
Package: it’s the fundamental unit to organise our code. Package examples are Lark or IfcOpenShell in Anaconda.
IFC Open Shell: package with classes and functions to operate upon IFC files.
IFC.js: javascript package useful to create webpages with IFCs.
Namespace: a unique name for all the objects that a certain user develops in python.
Label: field that allows to identify a package, they are part of the URL that Anaconda assigns to the package.
Virtual environments: conceptually is a parallel environment that relies on a specific python version, any package we install inside it will rely on such python version. Virtual environments coexist without interaction between each other, and help keep the dependencies required by a coding project separate. They are stored in a folder in our PC, by default Anaconda saves them at C:\Users\username\anaconda3\
Procedure
1. Configure our programming interface
First step is to install Anaconda. At this point it’s important to know which python version we will work with. If we use a mistaken Anaconda installer we will have to uninstall it and install it again, as indicated in the Tips & Tricks chapter.
For this exercise we will install Anaconda 2020.02, suitable for python 3.7. We download the installer and execute it.
After installing we verify the installation. We execute Anaconda Prompt:

At the Anaconda Prompt console, we write these three commands, each followed by an Intro:
- conda list: the packages list should appear, each with its version
- python: it will show us information from Python Shell installation
- quit(): it will quit Python Shell.
We have verified the installation. Now we can create an alternative virtual environment with the python version of our interest. For this exercise: python 3.7. To do so, we type this line in Anaconda Prompt: conda create -n myenv python=3.7 anaconda
We now have a virtual environment suitable for our development. Let’s install upon it the packages we will need: IfcOpenShell and Lark. To do so, we execute these commands in Anaconda Prompt, each followed by an Intro:
- activate myenv
- conda install -c conda-forge/label/cf202003 ifcopenshell
- conda install -c conda-forge lark
At this step Anaconda will ask us several questions, they will all require a yes/no answer, “yes” being the default option. Anaconda will write this as follows: [y]/n?
We will answer the default suggestion to all of them: we pulse Intro.
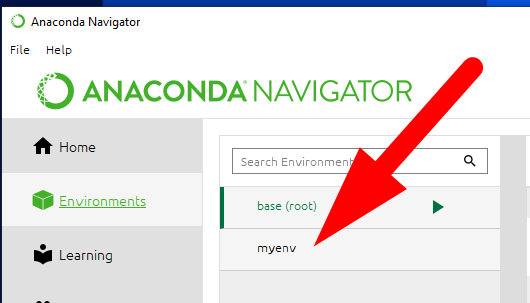
To verify the installation, we type conda list + Intro and ensure that Ifcopenshell and Lark appear on the list of installed packages. If that happens, we have successfully installed the packages. Now we can close Anaconda Prompt, open Anaconda Navigator, go to Environments and click on our alternative virtual environment:
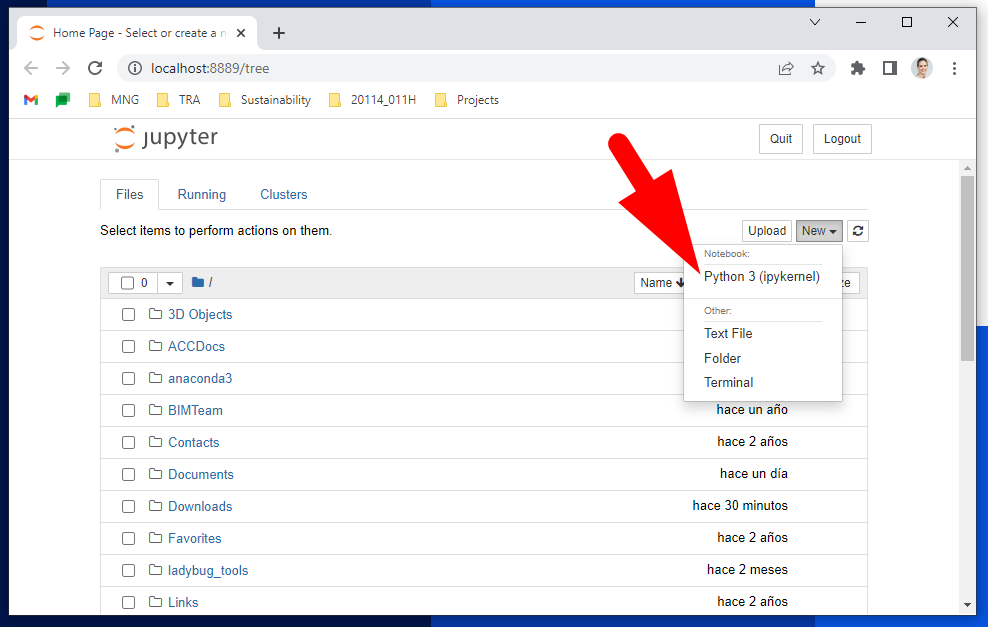
Then go to the Home page and launch JupyterNotebooks:

Anaconda will create a local host in our computer and direct us to it. In there, we’ll be able to create a new notebook:
In that notebook, we type these lines to import all the libraries we will need:
import sys
import uuid
import ifcopenshell
import ifcopenshell.util
import ifcopenshell.util.element
from ifcopenshell.util.selector import Selector
import ifcopenshell.geom
And press Ctrl + Intro. A number should appear between the square brackets on the left:
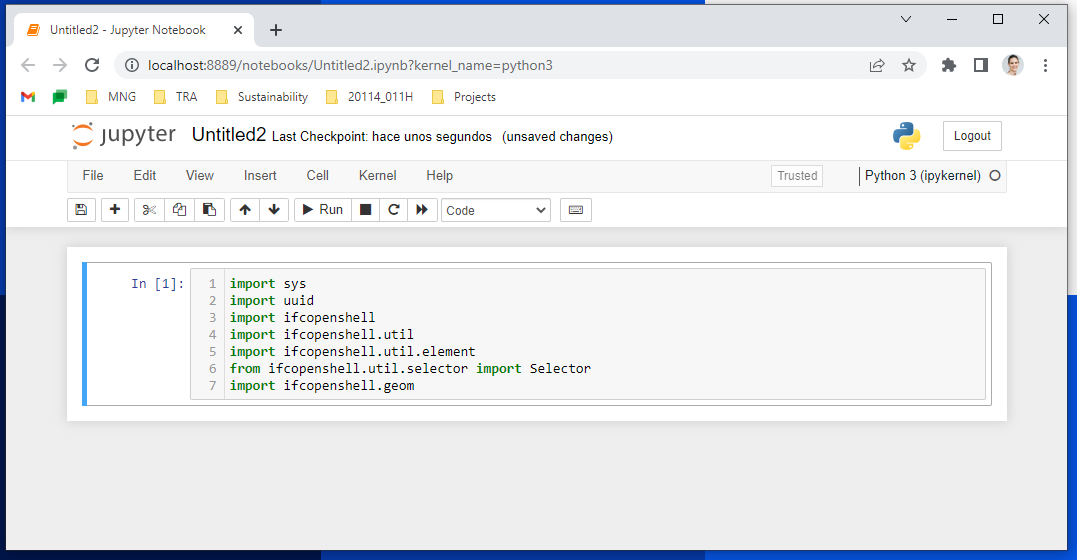
If the output looks like the image above, we’re ready to go!
If you have any trouble please go to chapter Troubleshooting.
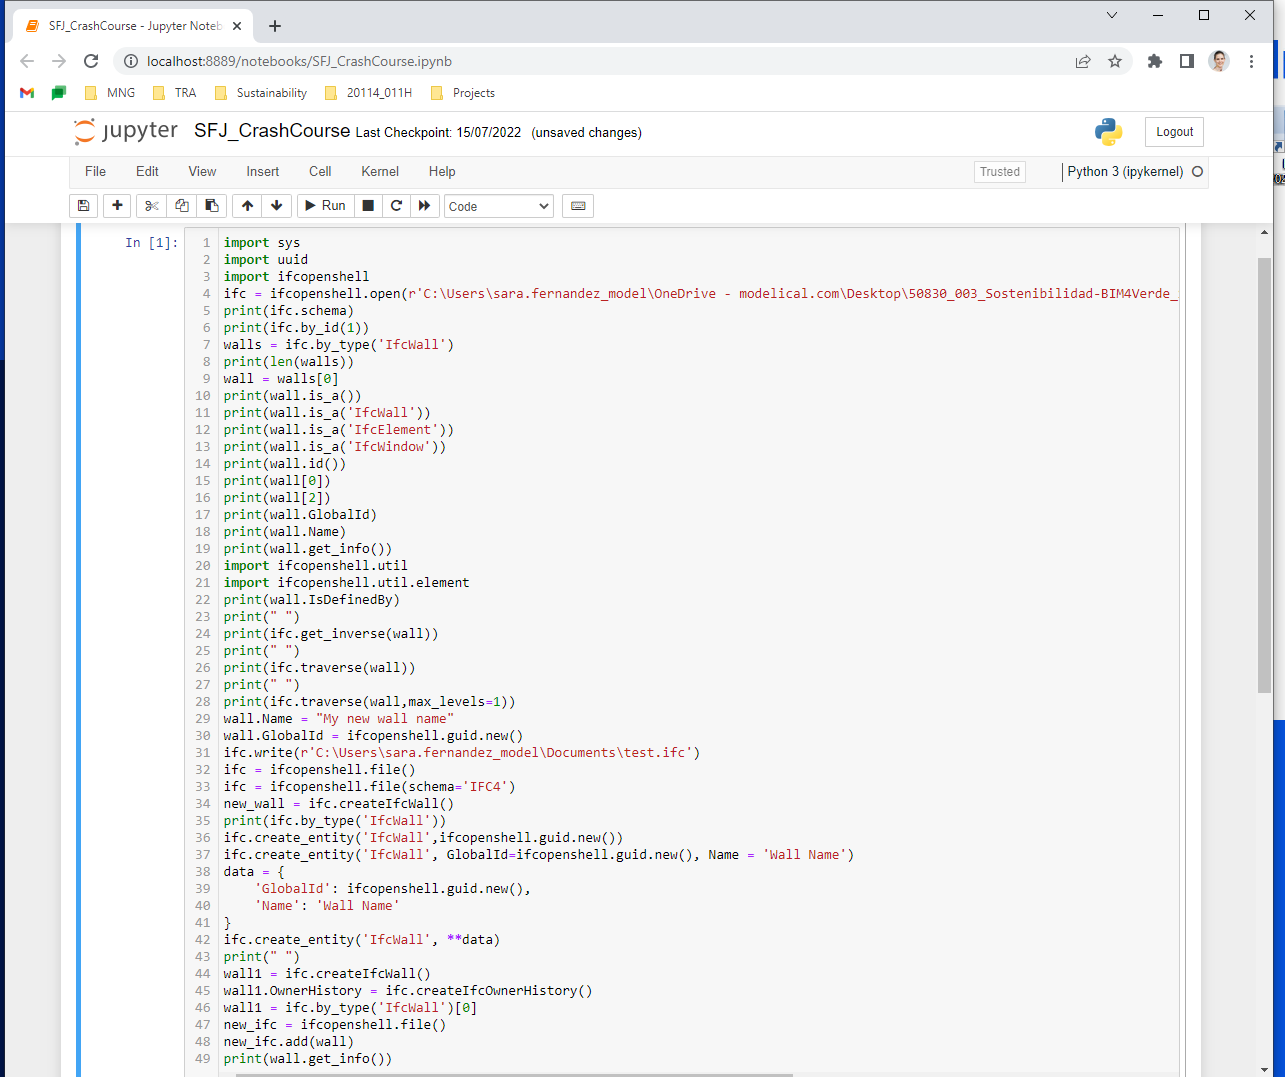
2. Learn to perform basic operations on an IFC file
At this point we can start asking questions to our IFC. We can use the file attached: IFC4_DesignTransferView.ifc. Follow this crash course and explore! You output could look like this:
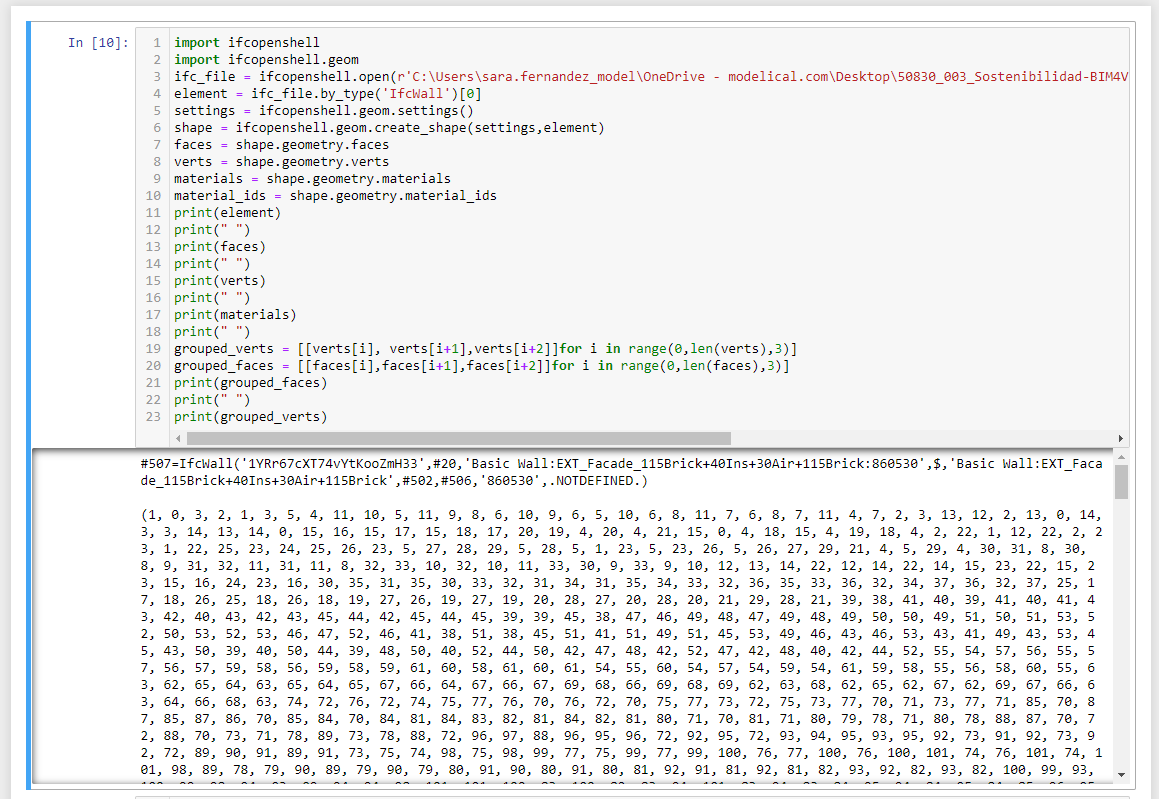
Then we can perform basic geometric queries. Again, please follow this course and have fun! your output could look like this:
3. Compute Verde indicators
At this point we have configured our programming interface, we have also got familiar with basic queries upon IFC. Now we can develop the automatisms that will compute our Verde indicators.
Each Verde indicator will require us to gain specific programming skills. With the first one we will learn to access Property Sets, Quantity Sets and their properties. With the second one we will learn to process material layers. Let’s go for it.
3.1 Indicator PE09 Light contamination
Our goal is to report the light contamination of our project, following Verde criteria. According to Verde, the light contamination level equals the highest Upper Light Output Ratio installed outside the building. The Upper Light Output Ratio of a lamp is the light percentage that gets directed to the sky.
Our starting point is an IFC4 file which fulfils:
- Has been exported using Model View Definition: Reference View
- Lamps are of category IfcLightFixtureType
- Lamps are characterised with the Property Set ExternalLightFixture, property ULORinst_(%) (upper light output ratio). Value according to UNE-EN 13032 for photometric data measurements
- Exterior lamps have the string ‘EXT’ inside their name
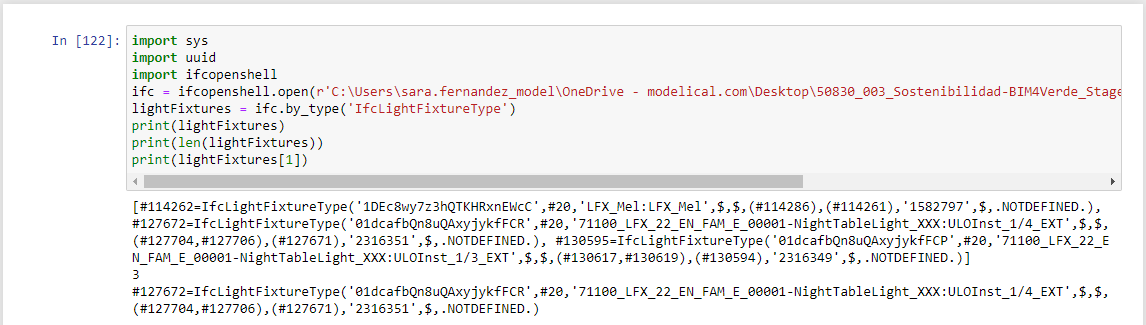
Let's develop a function that evaluates the light contamination of our project. In our Jupyter Notebook, we collect all lamps:
We ensure they are characterised with the property set ‘ExternalLightFixture’ and property ULORinst_(%). To do so we use a method of IfcOpenShell:
ifcopenshell.util.element.get_psets(myLight)
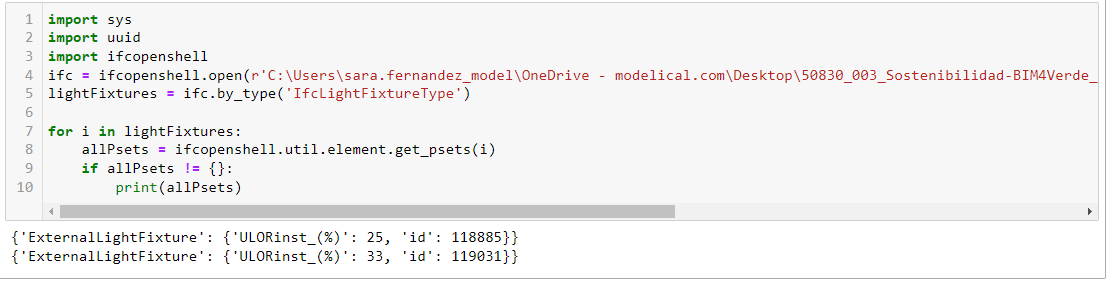
To access this property of the PSet, we complete the method as follows: ifcopenshell.util.element.get_psets(element)[‘Pset or Qto name’][‘property name’]
Applied to our case this is: ifcopenshell.util.element.get_psets(element) [‘ExternalLightFixture’][‘ULORinst_(%)’]
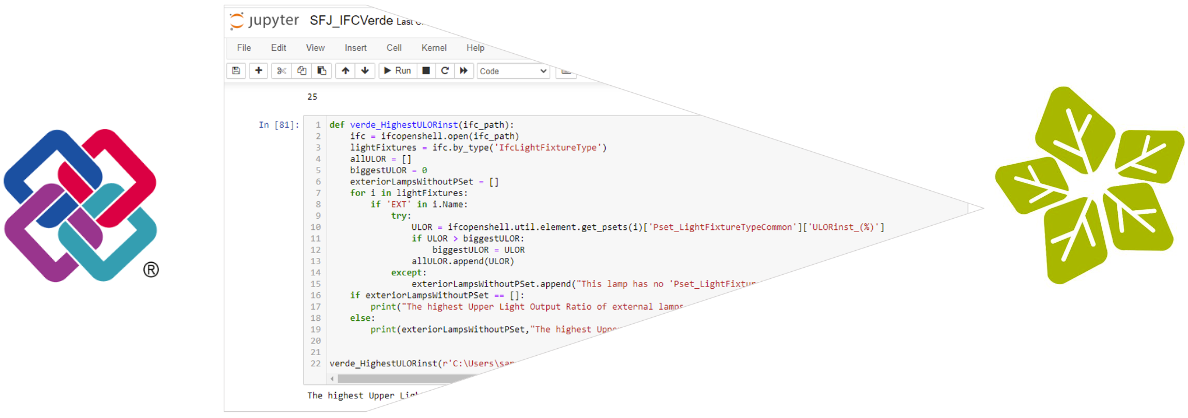
With this knowledge we can develop the function that reports the highest Upper Light Output Ratio of our project:
Beware that function names cannot contain special characters such as ( ) or %.
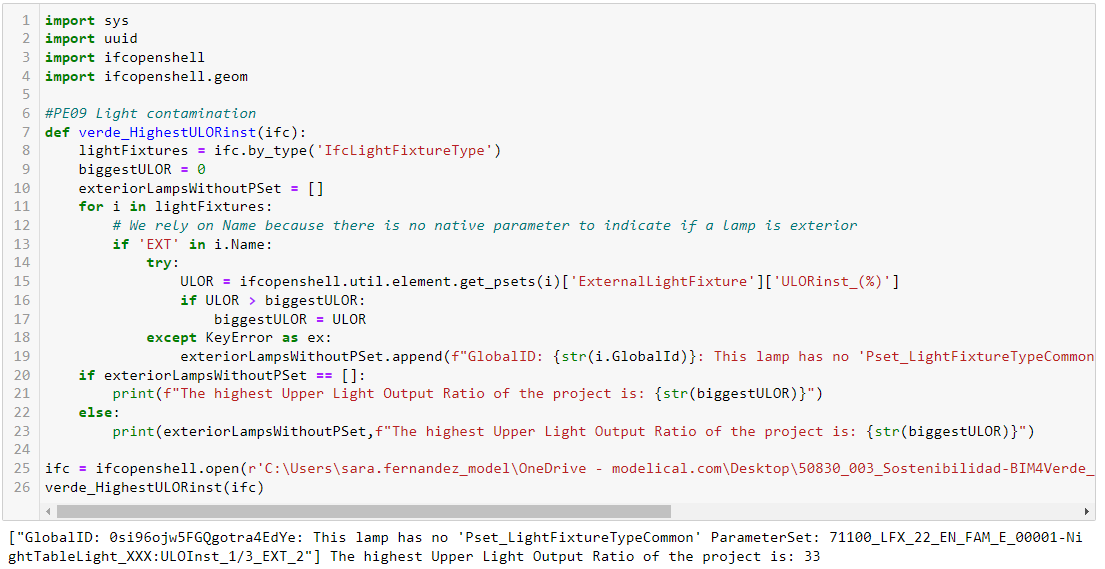
Using the given IFC4 file, our function warns us that there’s an exterior lamp without the property ULORinst_(%). It also reports that, for the rest of lamps, the highest Upper Light Output Ratio of our project is 33%. We should proceed to complete the missing parameter in the IFC, execute again our function and write the ULORinst_(%) parameter in Verde excel evaluation tool, cell H280, sheet PE, for release VERDE Edificios 2020 (Rev. DIC 2021).
3.2 Indicator PE08 Heat island effect
We will develop a function which reports: the area of exterior floors which have a vegetal layer of depth >= 5cm.
Our starting point is an IFC4 which fulfils:
- Has been exported using Model View Definition: Design Transfer View
- Exterior IfcSlabs indicate so in the native property IsExternal, hosted in the Pset_SlabCommon
- IfcSlabs are characterised with the Qto_SlabBaseQuantities, property GrossArea
- Floor layers have materials applied, exterior vegetal materials contain the string ‘Grass’ inside their name
Our function must:
- Collect all IfcSlabs
- Evaluate if they are exterior based on their name
- For exterior IfcSlabs, process their layers
- Collect the area of all slabs which contain a layer of depth >= 5cm whose name contains ‘Grass’
- Report the addition of such areas
Let’s go for it:
Our starting point is the entity IfcSlab, we want to process its layers. The property IfcSlab.HasAssociations relates a slab with its layers.

One of its associations is the entity IfcRelAssociatesMaterial, this entity has the property IfcRelAssociatesMaterial.RelatingMaterial, which allows us to access its materials.
When we query this property, IFC answers with two types of entities: IfcMaterialLayer and IfcMaterialLayerSet.
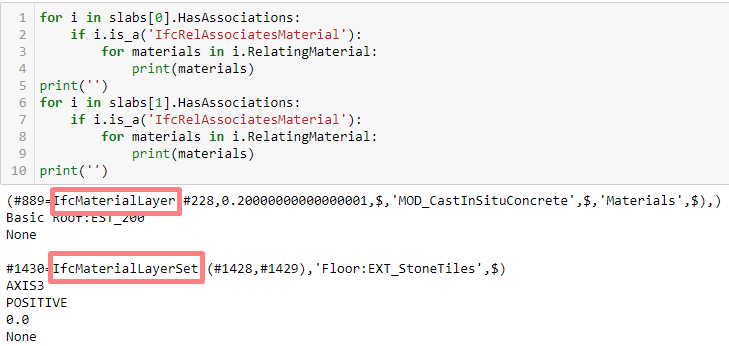
The entity IfcMaterialLayer already reports its name and depth. Entity IfcMaterialLayerSet reports its layers with the property IfcMaterialLayerSet.MaterialLayers:
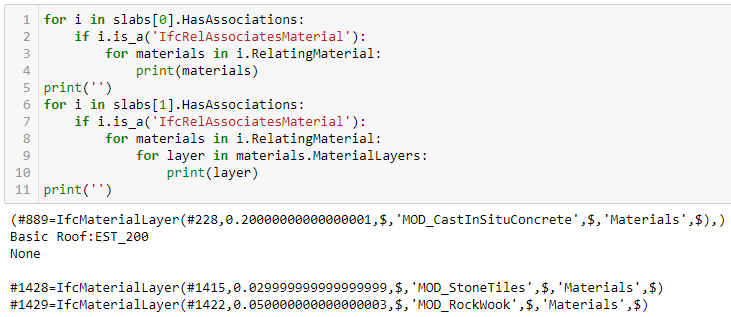
To summarise, we have accessed the slabs layers following this hierarchy:
- IfcSlab.HasAssociations > IfcRelAssociatesMaterial
- IfcRelAssociatesMaterial.RelatingMaterial > IfcMaterialLayer / IfcMaterialLayerSet
- IfcMaterialLayerSet.MaterialLayers > IfcMaterialLayer
IfcMaterialLayer has depth and name. This is the final data we want to query.
Now we can develop a function that reports the addition of all external floors with a vegetal layer of depth >= 5cm:
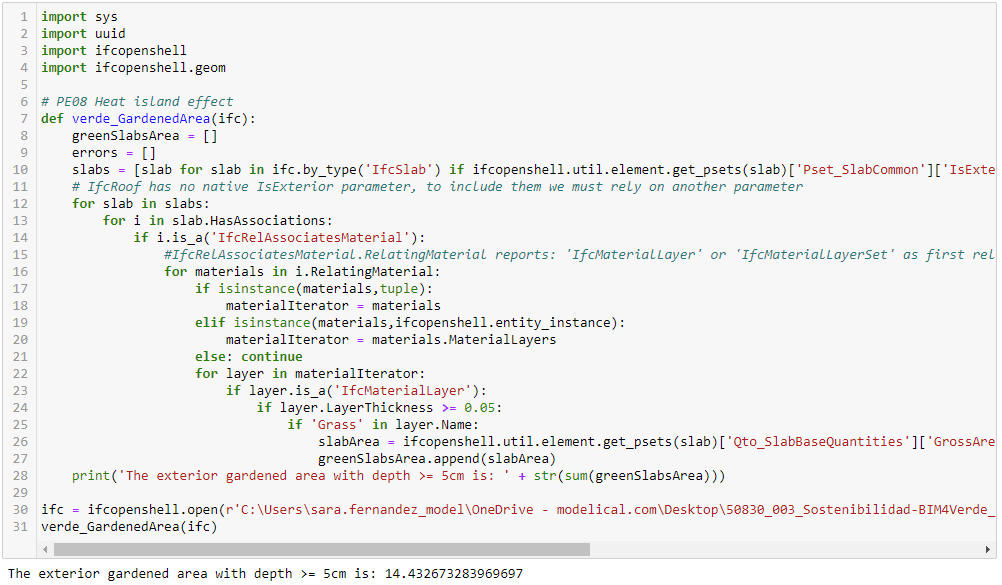
The result reports: The exterior gardened area with depth >=5cm is: 14.43 units. As the project is expressed in metres, this measurement stands for 14.43 m2. This is the answer to the Verde indicator, and should be written at cell H234, sheet PE, for release VERDE Edificios 2020 (Rev. DIC 2021).
Summary
With this guideline we have learned to automate two Verde indicators with an IFC4 model of our building, using Anaconda, a cost-free and vendor-neutral tool. First we installed all required software, then we learned to perform basic queries, and ultimately we developed two python functions which compute Verde indicators.
Along this process we’ve realised several key points:
Anaconda is a cost free IFC authoring tool. We can create, cut, move, enrich, delete and transfer objects between files. This fact opens to debate the future of private tools.
Depending on the purpose, we’ll need to rely on different Model View Definitions (MDV). MDV Design Transfer View generates richer files, they must allow project development. MDV Reference View is intended to generate project deliverables, at this stage, much design information is omitted, therefore files are lighter.
A debate has been raised on the issue: should we save custom properties in Common PSets? To our interpretation the Building Smart does not forbid so. Nonetheless, new PSets are required to be identified in their name, we assume the same should be applied to new properties. Therefore, we opt to save new properties in new PSets, for the sake of clarity and consistency.
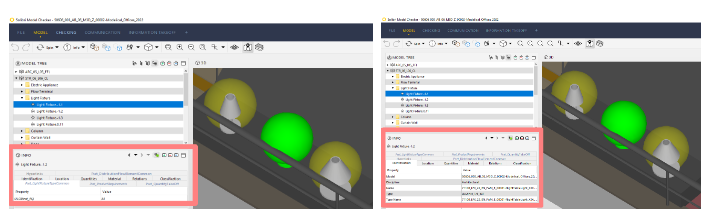
Several IFC viewers are not ready to consume IFC4. In this regard, our experience concludes that BIMVision reports better results than Navisworks or Solibri.
Tips & Tricks
Troubleshooting
UnsatisfiableError: The following specifications were found to be incompatible with the existing python installation in your environment.
We might face a scenario in which a package supports a different python version than the one that Anaconda instals. If this happens, the solution is to install an Anaconda version suitable for the python we need, then create an alternative virtual environment with the python version of our interest. For example, imagine we need python 3.7 for IfcOpenShell, albeit Anaconda has installed python 3.9, the solution is:
- Uninstall Anaconda suitable for python 3.9
- Install Anaconda suitable for python 3.7
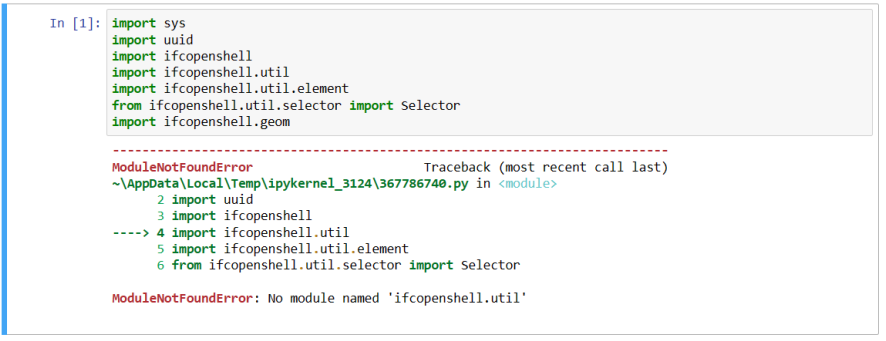
ModuleNotFoundError: No module named ‘ifcopenshell.util’
This issue was addressed by Dion Moult. Here goes a detailed explanation:
When a package gets updated, Anaconda takes some time to realise. If we happen to install such package in Anaconda in that time gap, Anaconda will install a deprecated version of the package. The solution is to look for the updated version of the package at its original source, and substitute our deprecated version with the updated one.
At the image we see that this has happened with package ifcopenshell:
The solution is to:
- Download the updated version of ifcopenshell at the original source.
- Type these lines inside your Jupyter Notebook and look for the path in which the package is saved. This is the path to the deprecated package:
- In your computer, go to the path of the deprecated package and substitute the folder by the one you downloaded, in our case the folder is called “ifcopenshell” (the download will provide a .zip folder, unzip it before substituting).
- Restart your computer.
- Open Anaconda Navigator > myenv > launch Jupyter Notebooks, create or access a Notebook, write again the imports and type Ctrl+Intro, the issue should be fixed.

I want to know which python version is using my alternative virtual environment.
Launch Jupyter Notebooks, create a new kernel and execute these commands:
from platform import python_version
print(python_version())
Press Ctrl+Intro. The answer will be the python version you’re using.
References
Example of installation of package IfcOpenShell in Anaconda.
Step by step guide to use Anaconda Navigator.
Guide to verify Anaconda installation.
Searching properties in PSets: minute 27.
Standard IFC4 Design Transfer View: source 1.
Standard IFC4 Design Transfer View: source 2.