
Materials in Revit (I)
Materials use and management in Revit
Materials in Revit (I) - Materials use and management
Objectives
- Learn what materials are in Revit.
- Learn how materials are created and used in Revit.
Prerequisites
- The user knows how to use Revit.
- The user has notions of modelling and knows the language used.
Introduction
Materials are often a neglected aspect of our models, as it is often difficult to determine how much work and detail to put into the development of our materials libraries and their application. It is necessary to plan in advance to know what should be the minimum aspects to be configured. It is not the same to generate a material for architectural visualisation as it is for quantification in measurements.
This guide is divided into two parts, in this first part we will start with an overview of the possible uses of materials in our models, and we will see how to create and edit materials in Revit. In the second part of this guide we will see how materials are applied to the different elements of Revit according to their nature, as well as possible uses in project documentation.
What is a Revit material
Materials are a special type of entity in Revit that has a set of properties that allow to regulate aspects related to the visual and physical behaviour of a given element.
The main function of Revit materials is to regulate the appearance of different elements in views and rendered images. However, they are also a powerful tool that allows us to extract precise measurements. In addition, by being able to include physical characteristics about their behaviour, the use of materials allows us to carry out calculations about the behaviour of our projects at a thermal or structural level.
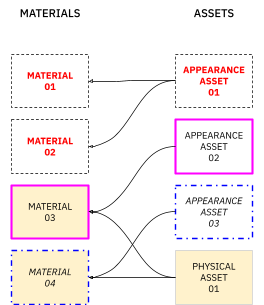
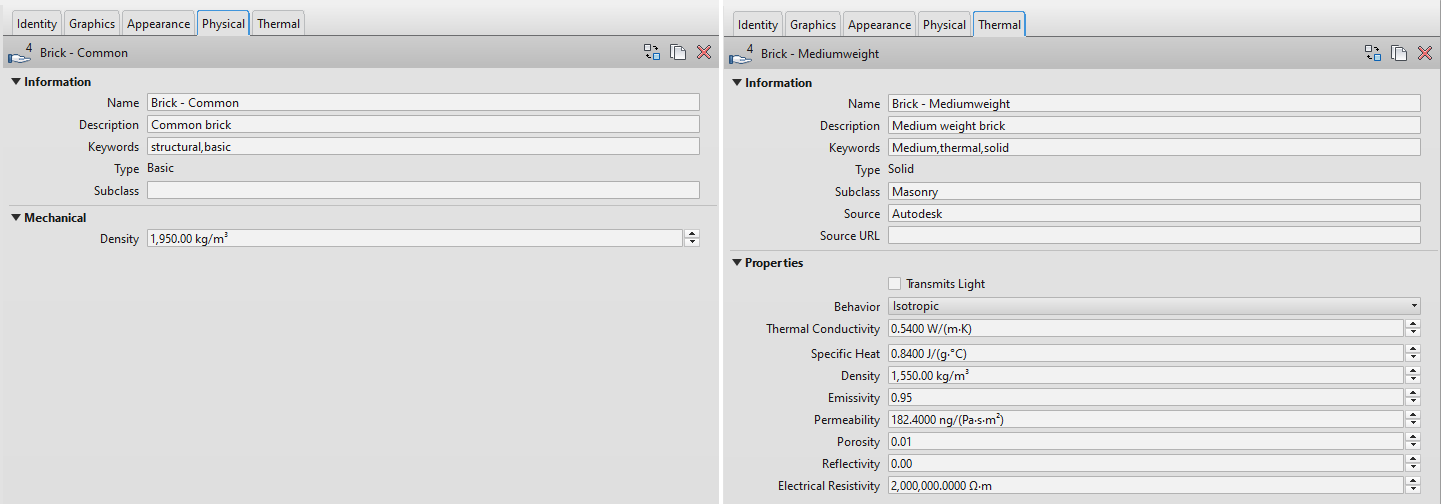
Each material in Revit is defined by a series of property groups or Assets that define each of its characteristics.
We can find the following groups of properties in our materials:
- Identity: identity information about a material, such as name, manufacturer description, cost, etc.
- Graphics: graphical characteristics that control the appearance of the unrendered view. This includes the colour and pattern displayed both on the surface and when slicing an element.
- Appearance: the appearance shown in a realistic view.
- Physical: the physical properties to be used for structural analysis of an element.
- Thermal: the thermal properties used for energy analysis.
The first three groups of properties (Identity, Graphics and Appearance) are fixed for any material and cannot be deleted, only modified, as they are created by default when generating a new material.
The last two (Physical and Thermal) are Assets that are not created by default and can be created or deleted at any time. If no structural or energetic analysis of the model is going to be carried out, it is normal not to use them.
Use of materials in Revit
General usage criteria
The way in which materials are used in Revit can vary greatly between different projects and, therefore, the level of information required can also vary. It is therefore necessary to keep in mind the intended use of materials when working on a model.
Thoroughly filling in all material properties may be a waste of time if they are not going to be used; on the other hand, not paying enough attention to material properties that will be needed later on may be a bigger problem, as a complete revision of all materials will have to be done afterwards.
Which properties will be used and the minimum level of information required will be determined by the BIM uses of the model, which should be clearly stated and detailed in the project's BIM Execution Plan (BEP).
As a general criteria, the need to define the materials in the elements of our project will depend on several factors:
- The phase of the project: in the Basic Project it is normally not so important the materiality of the elements, but their geometry. When moving on to the Executive Project phase, we should allow a significant amount of time to define the materiality of the different construction elements.
- The type of construction element: in general, it is very useful and recommendable to define the materials that make up the layers of walls, floors, roofs, pipes, ducts, etc. That is to say, linear or surface system families. It is not usually so useful to define the specific material of each part of a door, which we can perfectly well leave with a generic material.
- The type of project: it is very important to know the level of detail we are working with. In an urban planning project we will need to know the materiality of the different surfaces that are proposed, in an architectural project, it will be very important to define the layers of walls and floors, and in an interior design project we will have to correctly define the materiality of a table, the knob of a door or even a curtain.
Related to the different parts of the materials explained above, we can classify the possible uses of materials into four levels:
- Information level.
- Graphic level
- Visualisation level
- Calculation analysis level
Information level
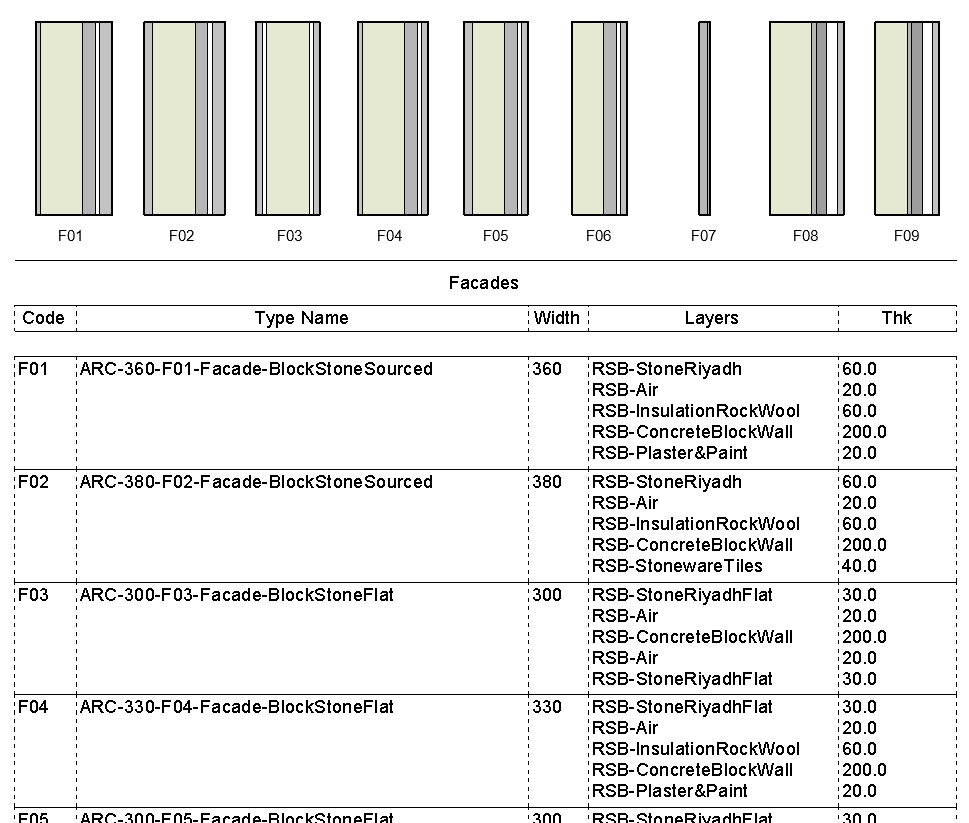
The properties related to this level are listed in the tab "Identity". In most cases, the material name is an important property, which will be used to identify the composition of construction elements (such as walls or slabs). It is desirable to establish a nomenclature criterion for naming materials, in general, a concise and descriptive name can be of great help.
As an example, the table shown in the image, included in a partitioning detail plan, allows a simple understanding of the different typologies, using the name of the material of the wall layers:
If BIM uses such as measurement extraction, cost estimation or supply chain management are considered in the project, other material properties such as "Manufacturer", "Model" or "Cost" will also be important.
Graphical level
This level refers to the graphical representation of materials in drawings and other views. Therefore, this is a relevant aspect in almost all projects. It is controlled from the "Graphics" tab.
Visualisation level
This level is related to the display of materials in perspectives or renderings. It is controlled from the object properties or aspect assets associated with the materials in the "Appearance" tab. It is an aspect that is often neglected, due to its greater complexity and the fact that it generally does not add much value. In projects where the model is intended to be used for visualisation, there are generally two situations:
- The model is exported to a different software, better prepared to develop renderings or virtual experiences, such as Unreal Engine, Unity 3D, 3ds Max,.... In these cases, the aspect properties are rarely useful, as these specialised programs use their own systems and material libraries. Therefore, it is the information level that becomes more important than the visualisation level to ensure the correct exchange of information. If we are dealing with an external contractor, the minimum information required and a nomenclature and coding system should be agreed, to facilitate their work and avoid misinterpretation.
- The model is used to quickly obtain images or virtual walkthroughs "work in progress", for monitoring or coordination purposes. Although Revit's visualisation capabilities are limited, its rendering engine or external plugins such as Enscape or Twinmotion, allow us to easily obtain this type of visualisations, with sufficient quality for use in coordination meetings, follow-up reports, work sessions with clients, etc. It is in this type of cases where it may make sense to pay attention to aspect assets, although we must take into account the objective and quality required, and strike a balance between the work and effort required and the expected increase in value.
Calculation analysis level
This level refers to the material properties needed for analyses such as structural calculations or energy simulations. If the project does not contemplate the use of the model for any of these purposes, we can generally forget about the information included in the Physical and Thermal tabs.
Materials management in Revit
Material Browser
What is the Material Browser
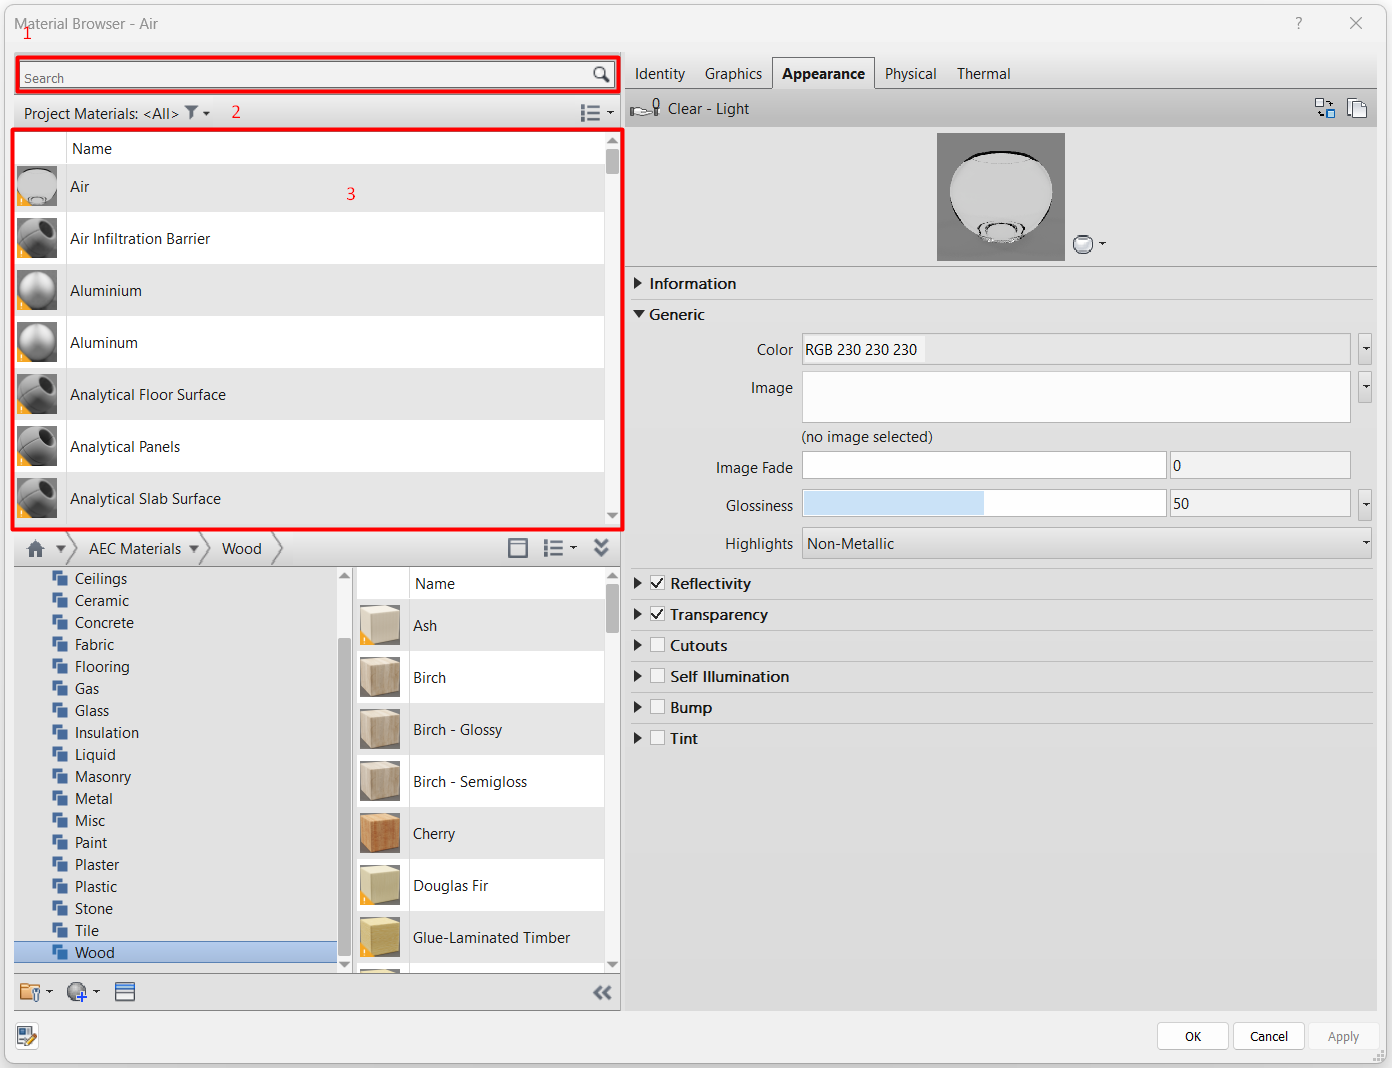
The Material Browser is the tool through which we can configure our entire library of materials.
It allows us to create new materials, edit their properties, or browse through the material libraries we have in our project.
To access it, go to the Manage > Configuration > Materials tab.

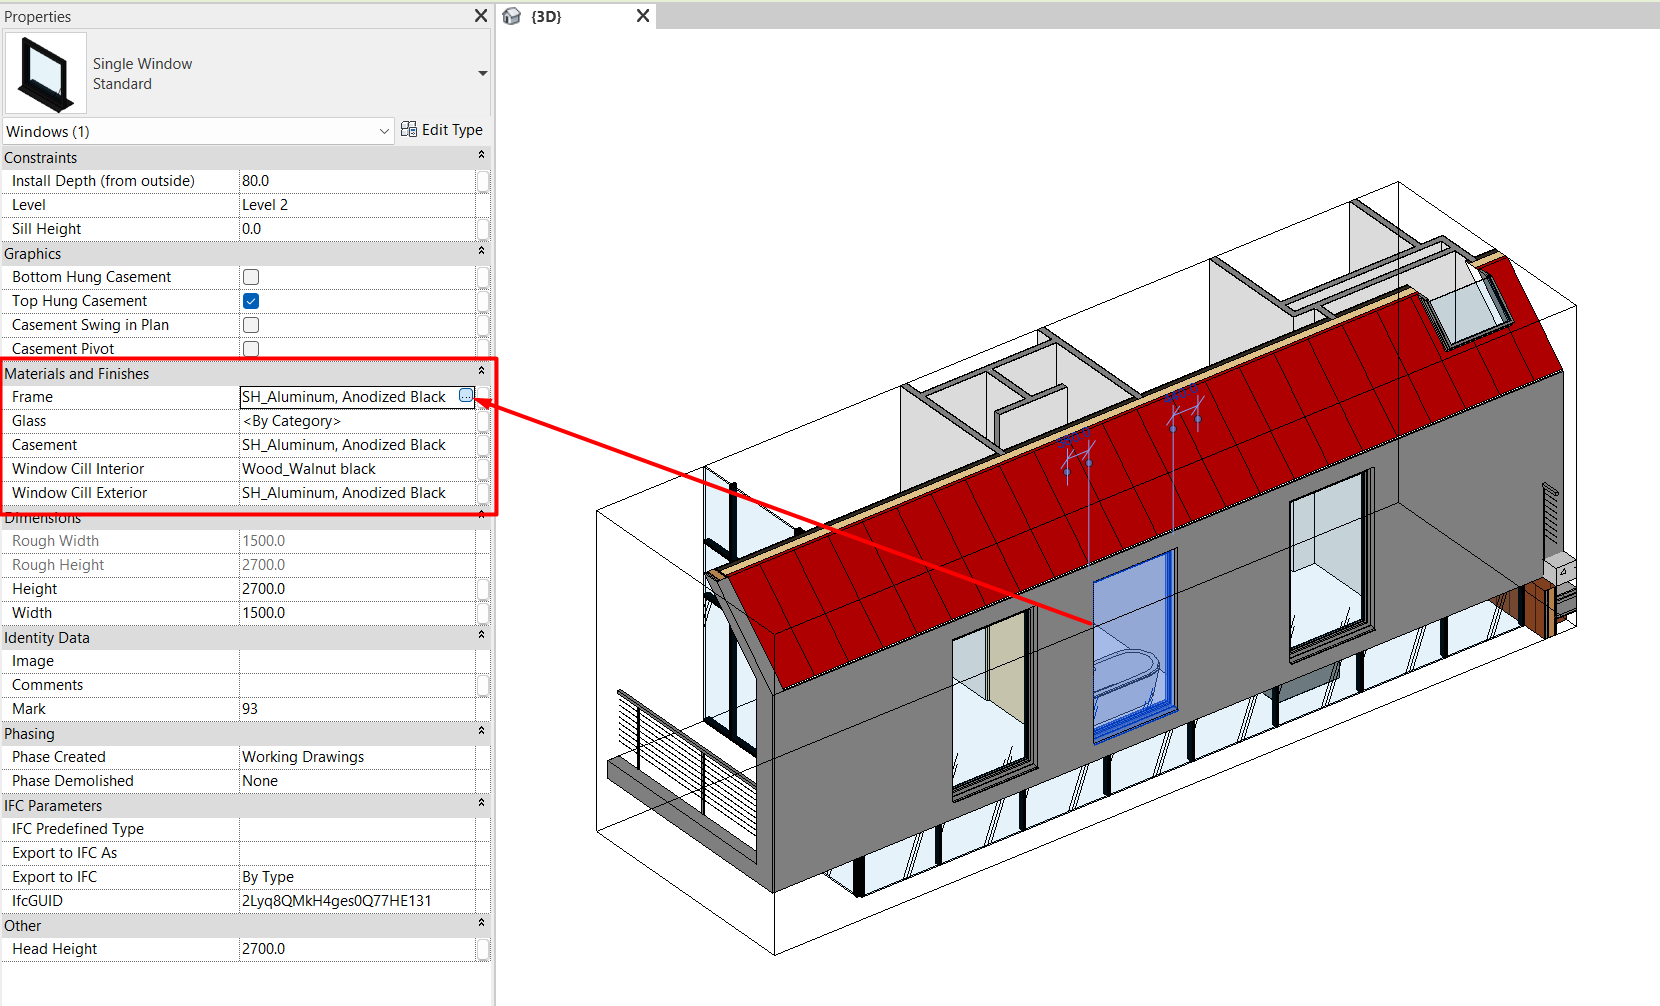
We can also access the material browser by clicking on the button that appears to the right of any parameter of type "Material and Finishes" of any family of our project, either of type or of instance.
Composition of the Material Browser
The materials browser window is divided into four parts:
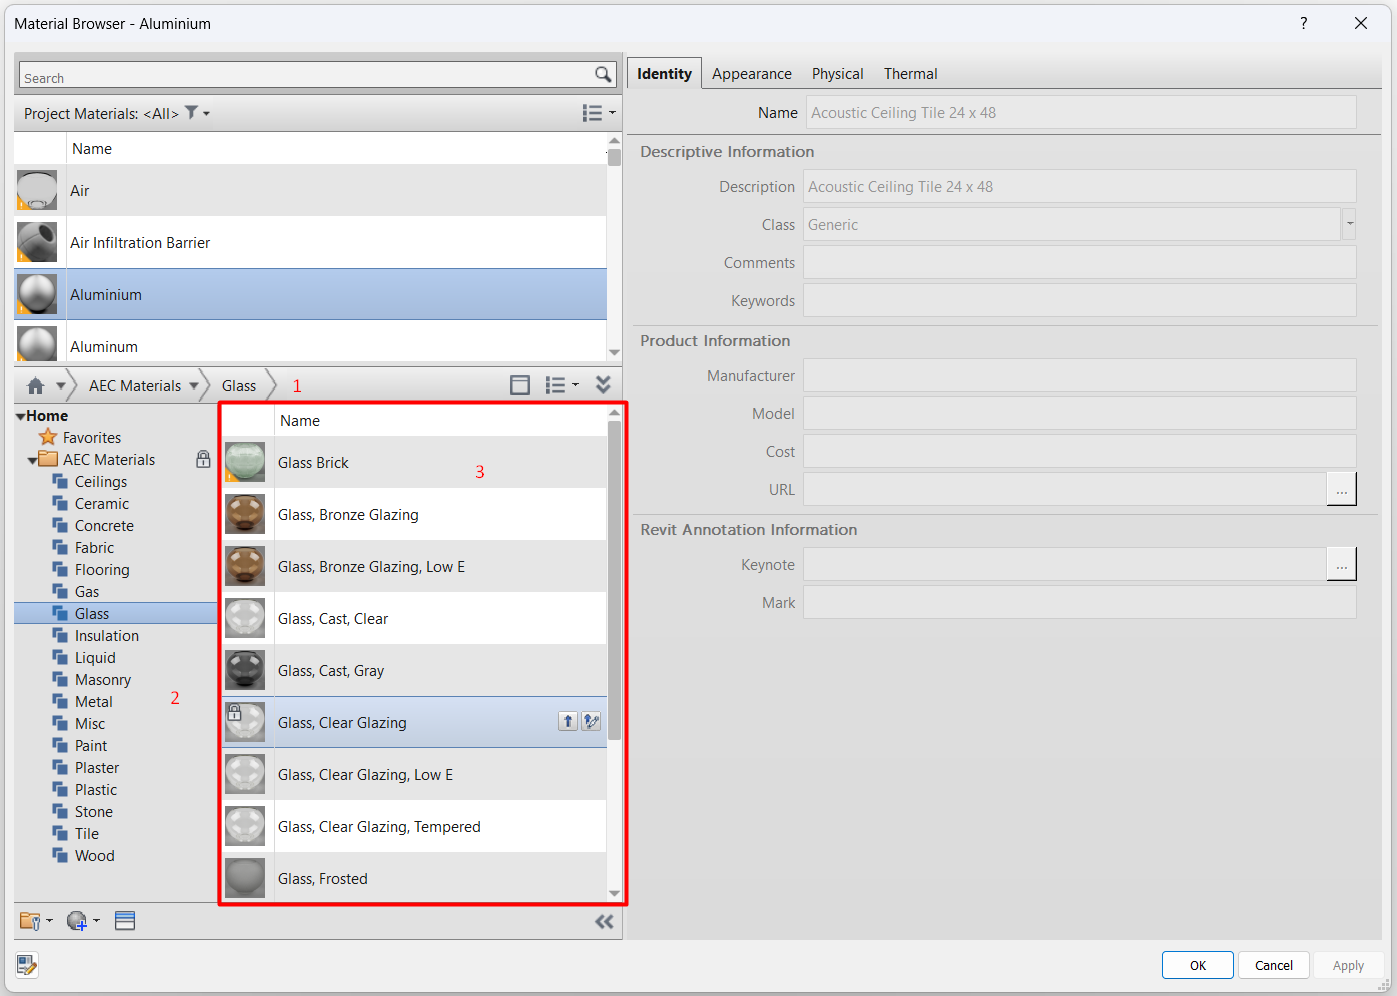
- Material Finder: allows us to browse through the existing materials in our project.
- Material library: allows us to navigate between the different libraries of materials that we have loaded in our file.
- Toolbar: allows us to create or duplicate materials in our model.
- Material editor: allows us to edit all the characteristics of each of our materials.

Creation of materials
To create new materials in Revit, go to the material browser toolbar:
Material creation: this button allows us to create a new empty material or duplicate an existing one.
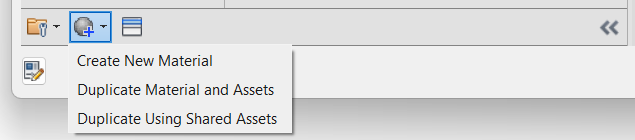
- Create New Material: if we create a new material, it will only have the indispensable assets (Identity, Graphics and Appearance).
- Duplicate Material and Assets: duplicates an existing material and its assets, making them independent from the original material. This way, if we modify the assets in the new material, they will not be modified in the original material, and vice versa.
- Duplicate Material Using Shared Assets: duplicates the existing material and its assets, making them dependent on the two materials. This way, if we modify the physical or thermal assets in one of the materials, they will be modified in both materials.
This can be interesting if we have, for example, different types of concrete in a project (HA-25, HA-40, etc.), we will probably want them to be different materials with a different description and coding, but their appearance and thermal properties should always be the same.
Editing materials
In most projects, regardless of whether or not we have an advanced material library, we will most likely need to perform multiple material visualisation tests on some of our elements.
On the right side of the material explorer is the material editor. Here we can edit all the properties of our materials.
At the top part, a series of tabs appear, corresponding to the different material assets, which we have already named at the beginning of this guide. As we have already mentioned, when creating a new material, by default only the Identity, Graphics and Appearance tabs will appear. With the cross-shaped button (+) that appears on the right we can create the rest of the assets of the material, Physical and Thermal, in case we need them.
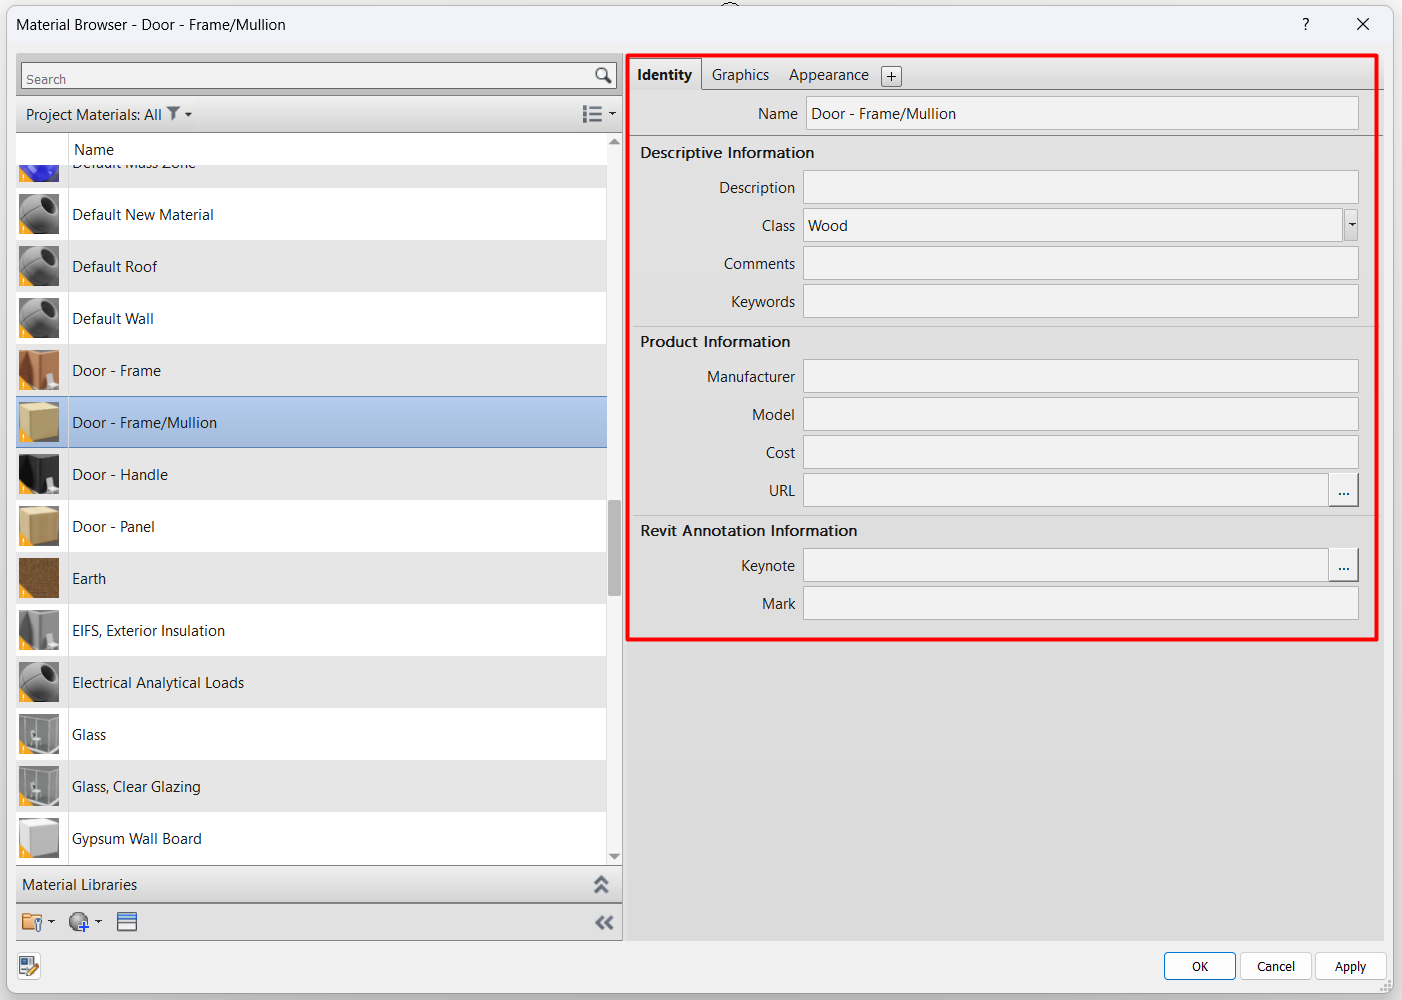
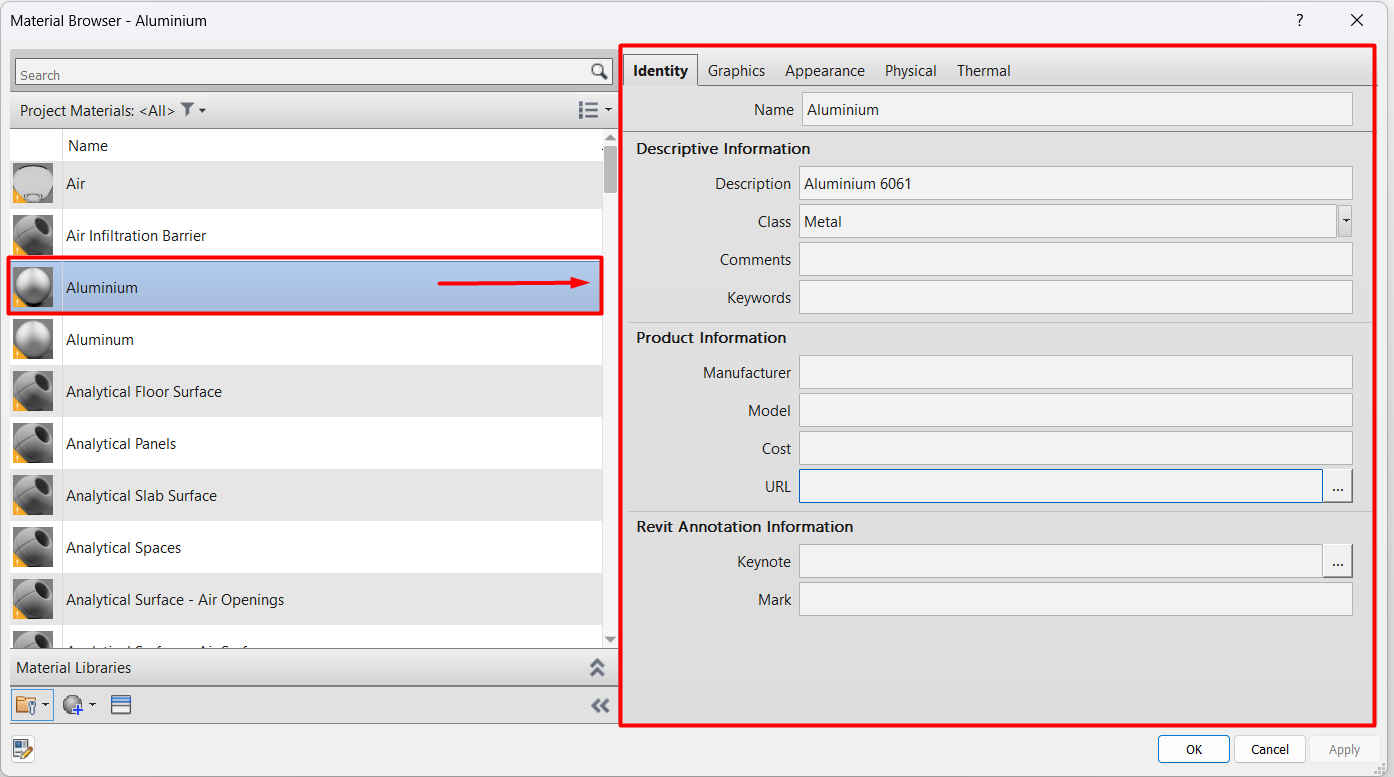
Identity tab
Here you can configure the name of the material and other text attributes. The key point is that these properties do not affect the graphical representation or display of the material, they are only information properties. They are therefore useful for organising, classifying or keeping track of the materials in the model.
The parameters that we can manage are:
- Name: defines the name of the material. It is compulsory that all the materials have one and they cannot be repeated.
Descriptive information
- Description: allows us to add a description to the material, if we consider it appropriate.
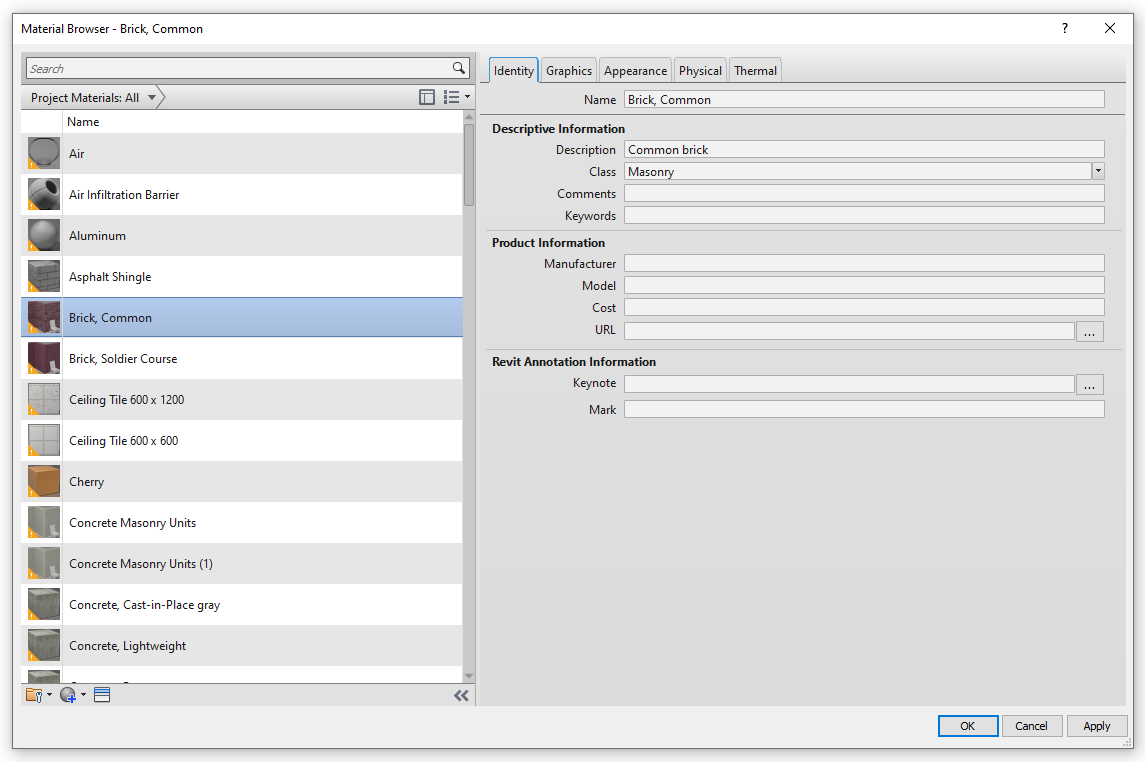
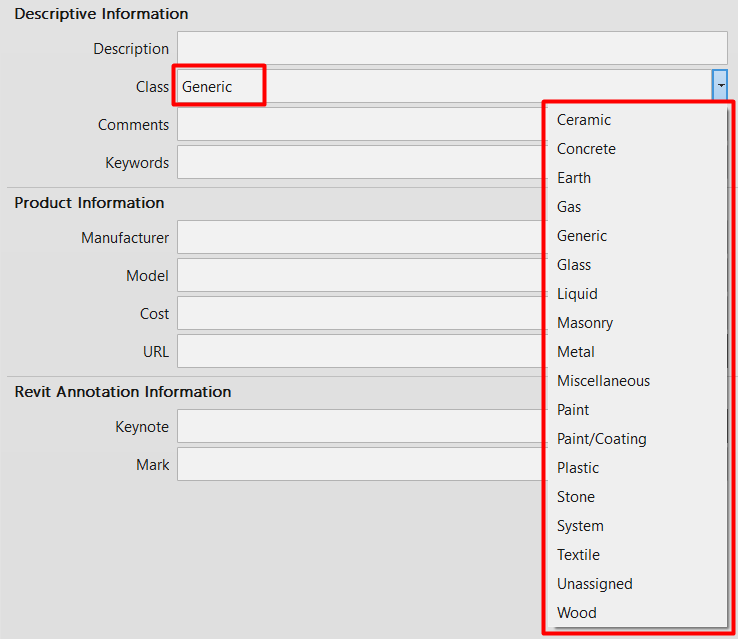
- Class: defines the class of the material. It allows us to choose from a series of predefined options. In case of not specifying any, the Generic class is selected by default.
As mentioned before, in the materials search engine we can filter the different materials existing in the file through their class, to facilitate their search, so it is advisable to assign different classes to our materials according to their nature to facilitate their search.
- Comments: in case we want to include any comments in our material. Almost all Revit elements have this parameter, which acts as a 'catch-all' and allows us to add any type of information we consider.
- Keywords: allows us to define a series of identifiers for the material.
Product information
- Manufacturer: who is going to build the element, if any.
- Model: model code of the element, if any.
- Cost: price of the material, according to the units fixed in the project. It is useful in order to obtain an estimate of the model.
- URL: link to the product website, if any. For most of the materials in a project, we will not fill in this parameter.
Revit annotation information
- Keynote: Allows us to specify a material keynote. Very useful for documenting the materials of our project in drawings. For more information, see our Keynotes guideline.
- Mark: allows us to define an identification for the material, it is not a mark in the sense of manufacturer. It is useful for the management of materials by means of planning tables. There should not be two materials with repeated marks, if it happens Revit will give you a warning indicating that there is an error caused by this, although it is true that it is usually a minor error.
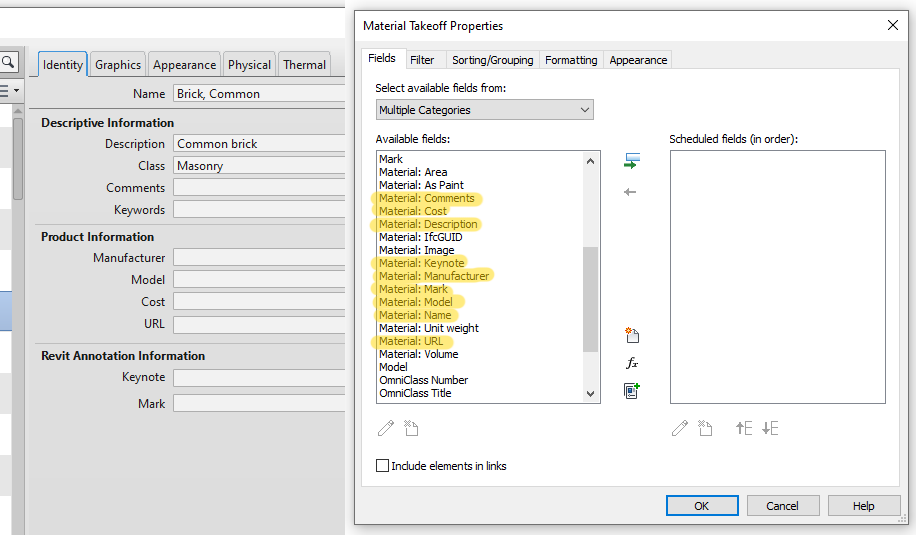
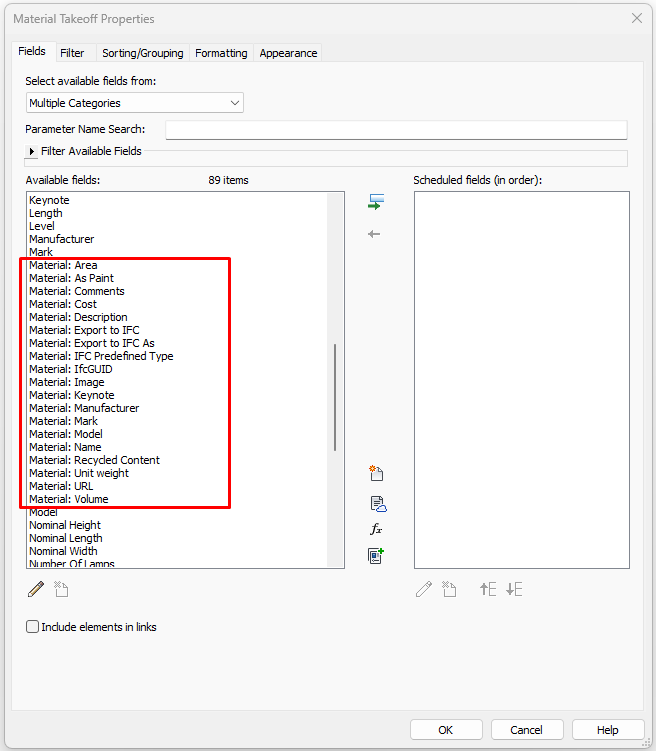
As can be seen in the following picture, all these properties can be included in material schedules. We will go into this type of planning tables in more detail later on.
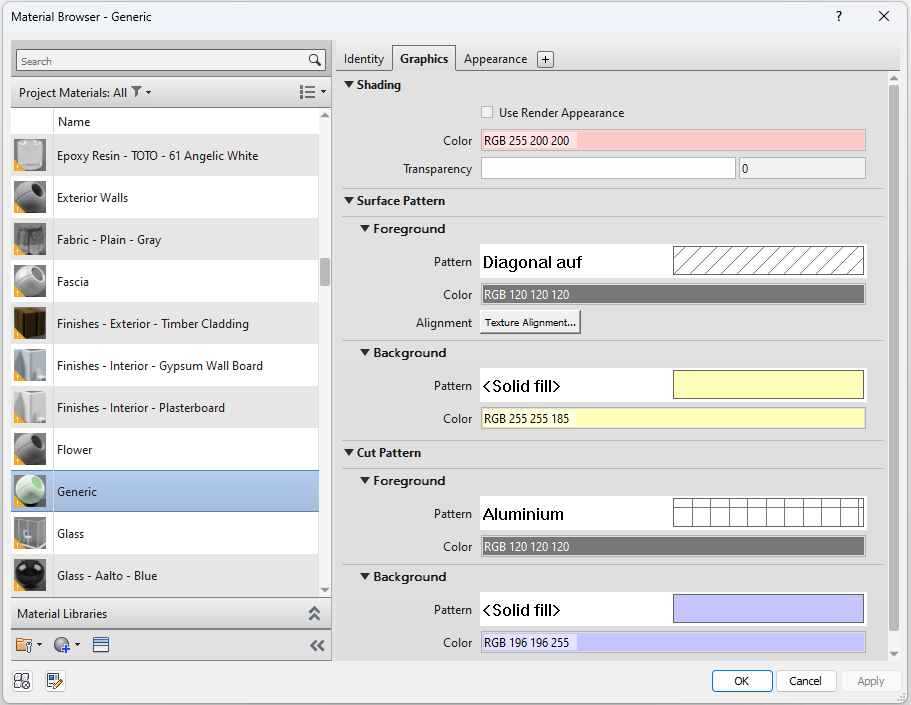
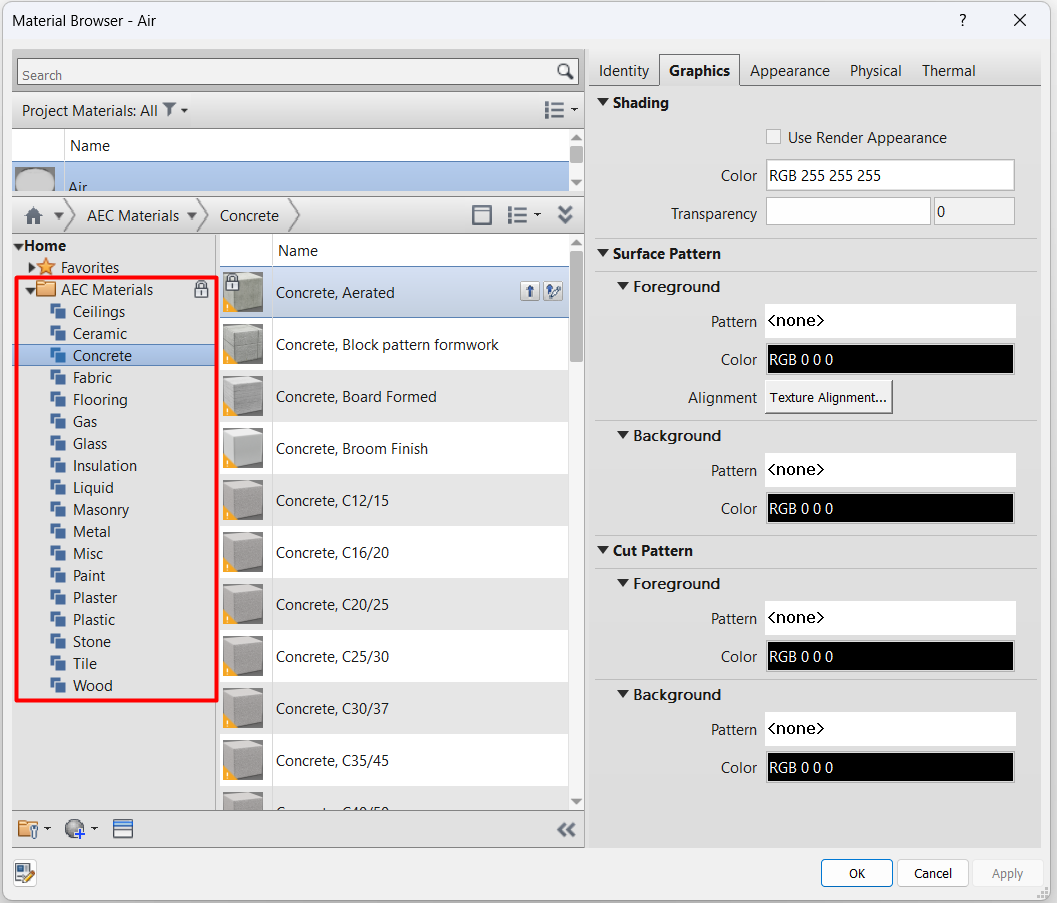
Graphics tab
These properties determine the graphical representation of the material in non-rendered views.
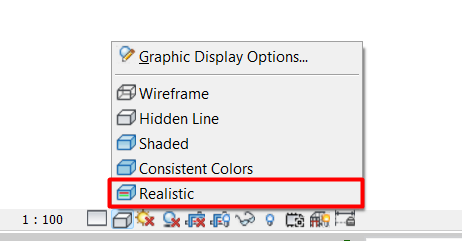
This means that the configuration we have in this section will only affect the views we have with one of the following display styles:
- Wired
- Hidden line
- Shading
- Coherent Colours
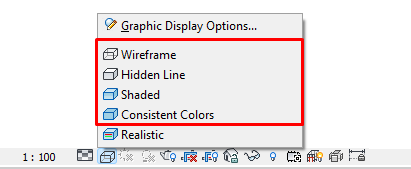
The 'Realistic' style will take the colour settings from the 'Appearance' asset, which we will see in the next section.
The Graphics tab is divided into three parts:
- Shading
- Surface Pattern
- Cut Pattern

Shading: is the default colour of the material whenever:
- The selected visual style is 'Shading' or 'Coherent Colours'.
- The face of the element does not have the Surface Pattern or Cut Pattern applied as a priority. This depends on each Revit category.
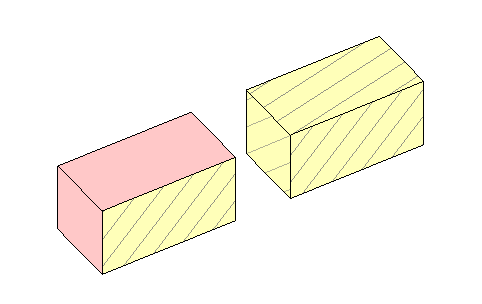
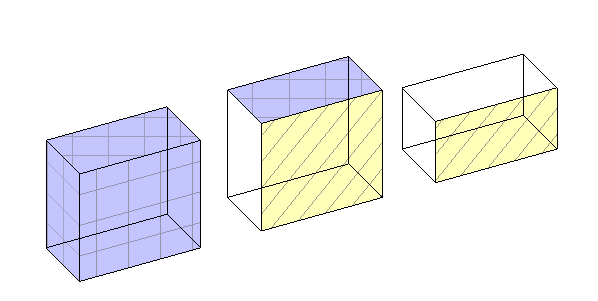
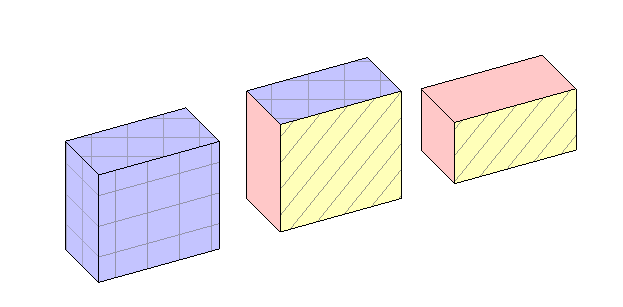
For example, in the image below, the two elements have the same material applied as in the image above; however, the element on the left is a wall and the element on the right is an in-situ component modelled as a box with the same dimensions. In the case of the wall, Revit configures the outer faces of the wall with the surface pattern and the rest using the shading pattern.
In the case of the box, all the faces are set up using the surface pattern.
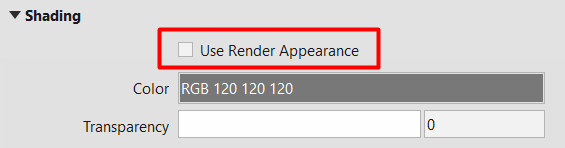
Use Render Appearance: In this section there is a 'Use Render Appearance' button that is not clicked by default. If this button is clicked, the colour and transparency settings of the material will be locked to the characteristics that have been checked in the 'Appearance' asset, which are explained in the next section.
Surface Pattern: is the pattern that Revit defines for the visible faces of an element and is divided into two subcategories:
- Foreground: is the pattern that is overlapped by the Background. It is composed of a type of pattern and a colour. If we place a Solid pattern in Foreground, it will always cover the pattern we have placed in Background. In case of using both patterns, the best option is to use a non-opaque pattern for the Foreground and a solid pattern for the Background, as in the example image.
- Background: this is the pattern that is placed in the background. It is also composed of a pattern and a colour.
Cut Pattern: this is the pattern applied to any face of an element sectioned by a section box. As in the surface pattern, it is made up of two subcategories: Foreground and Background, which in turn are made up of raster and Colour, and its operating scheme is the same as in the previous case.
Let's see an example of a visualisation of the same material with each of the visualisation styles to see what differences there are in their graphic representation.
The graphical configuration of the material is as follows:
The element that has been modelled is a wall:
- On the left with all its faces sectioned
- In the centre, only the upper sectioned face
- On the right, no sectioned face.
We see that on the vertical sectioned faces, the texture of the material is aligned perpendicular to the ground, while on the top face the texture is aligned perpendicular to the view.
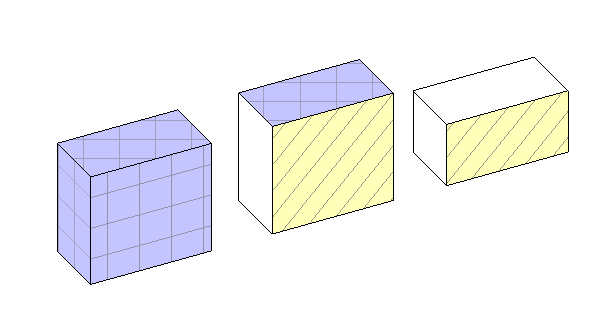
This is how it looks on the element according to each visual style:
- Wired: you can see the hidden edges of the material. The colour of the shading is not visible, otherwise it is white.
- Hidden line: as in the wired state, the colour of the shading is not visible, and it is represented in white. The rest of the patterns can be seen as mentioned above.
- Shading: in this case, the lateral and upper faces of the wall are already shown with the colour of the shading (red). In this type of visualisation, each face has a different tone affected by the relative shadows of the view.
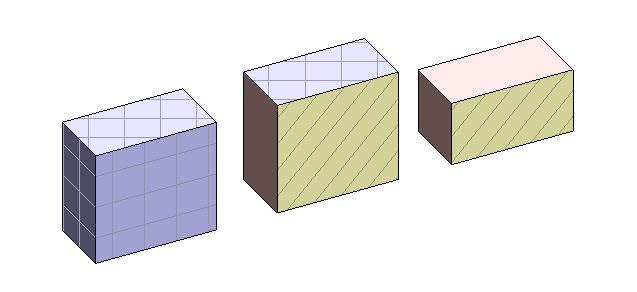
- Coherent Colours: this style is the same as the previous one, but the influence of shadows on the view is eliminated, so that all faces appear with the same colour tones.
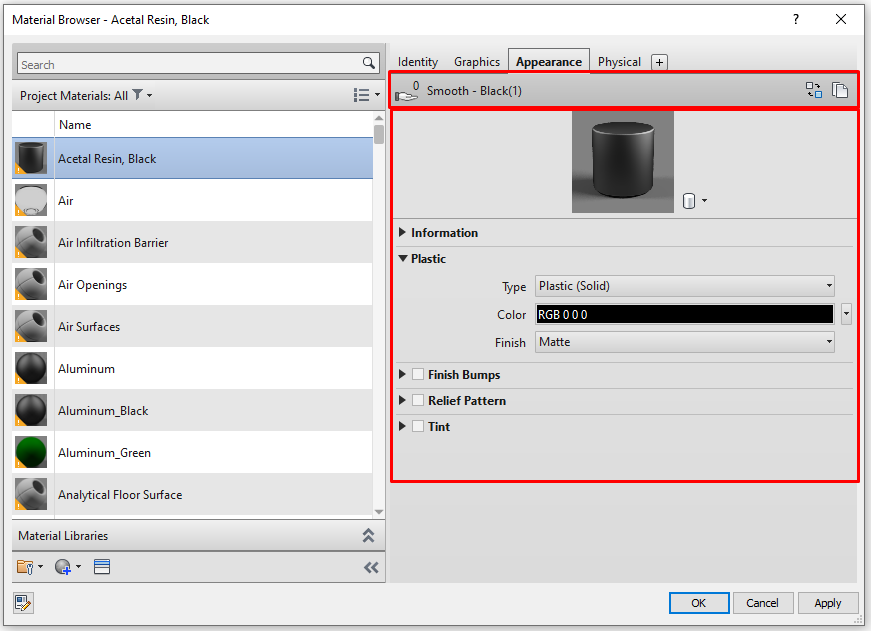
Appearance Tab
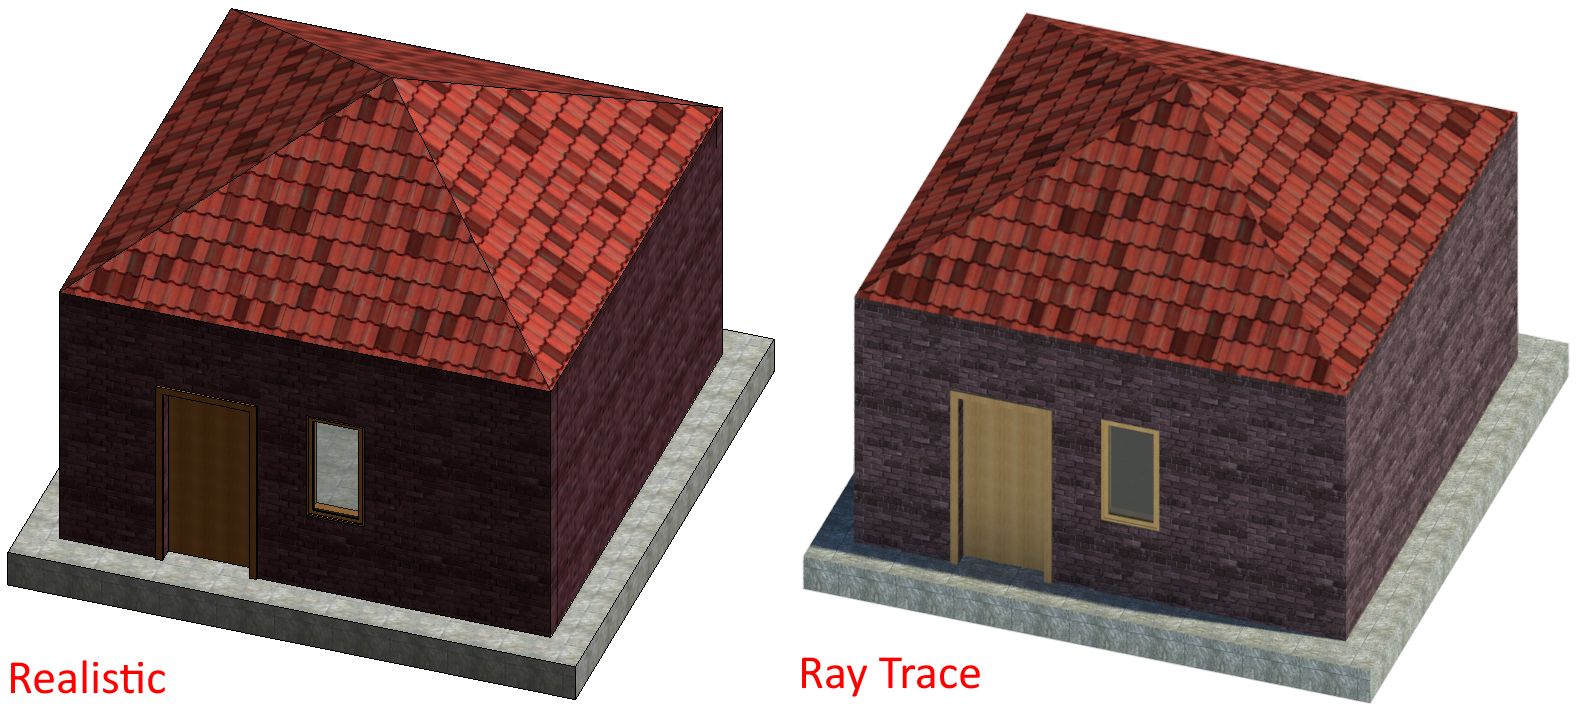
The properties of this tab control the display of a material both in renderings and in views with "Realistic" or "Ray-traced" display styles.
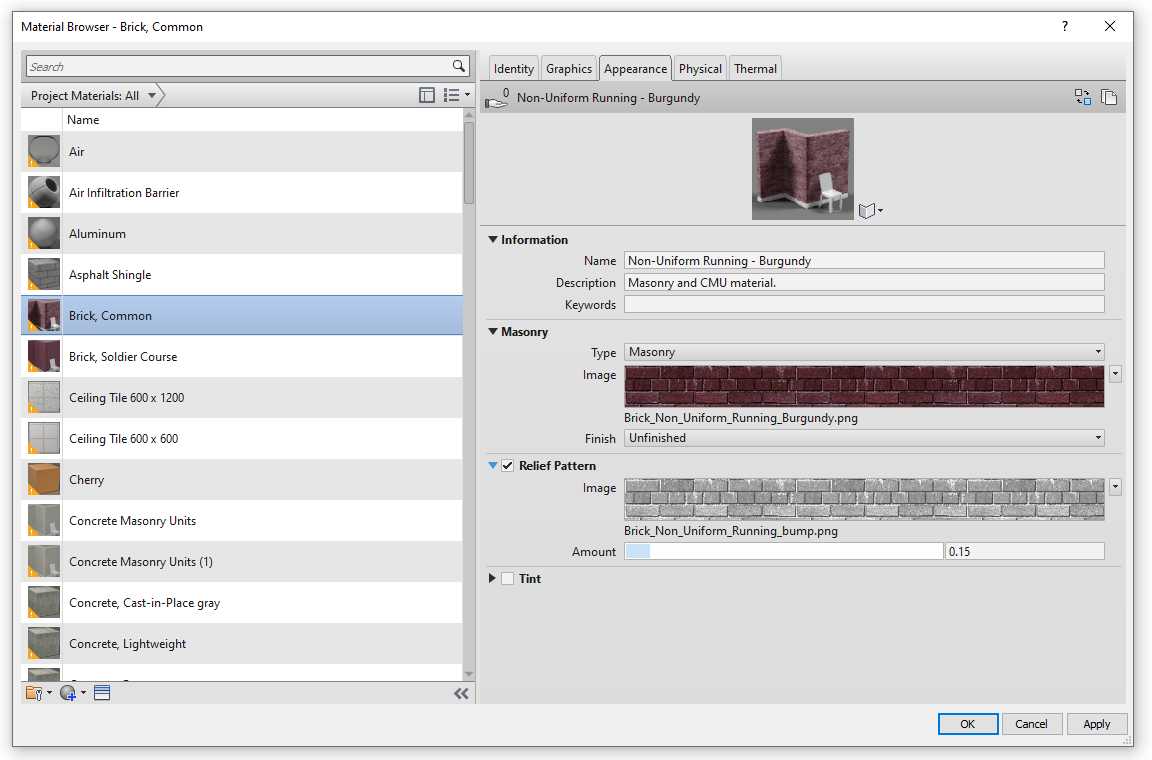
As mentioned in the previous point, if the 'Use Render Appearance' option is clicked in the Graphics tab, the settings in this tab will govern the appearance of the shading in the Graphics tab.
Material Assets
In general, the Aspect tab introduces a new idea, that of "material assets". Assets are groups of properties that control various characteristics or behaviours of an object. We can find appearance assets, physical assets and thermal assets.
In this case, we talk about "appearance assets", which determine how materials are represented in renderings or the aforementioned display styles.
Appearance assets are independent of materials, so that several different materials can share the same appearance asset. All materials will have an appearance asset, but may or may not have the other types of assets.
It is possible to load libraries of material assets created by us or by third parties. How to work with these libraries is explained below.
The Appearance tab is divided into two parts:
- Asset information
- Asset content
Asset information
In this section we can see the name of the Appearance asset.
Next to the name of the object is the symbol of a hand with a number above it, this indicates the number of materials that share the same appearance object. This means that if you modify the properties of an appearance object in the active material, they will be modified in the same way in all the materials that share the same asset.

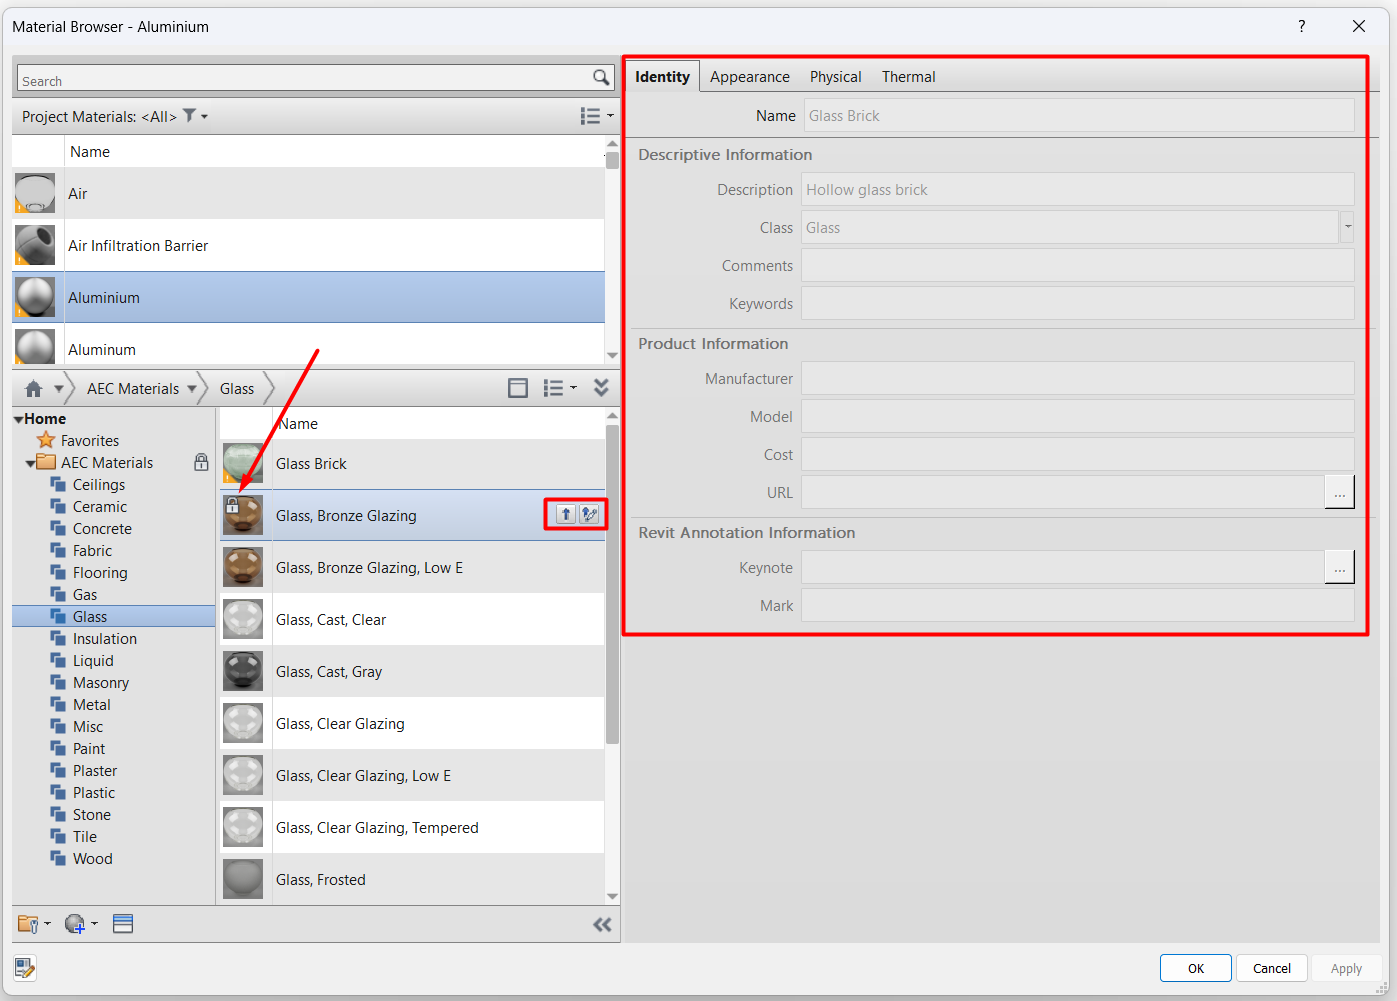
On the right hand side we find two buttons that allow us to:
- Replace the element.
- Duplicate the element.

- Replace the element.
Clicking on the first of these brings up the Asset Explorer, which allows you to replace the asset with any other asset from the available aspect libraries:
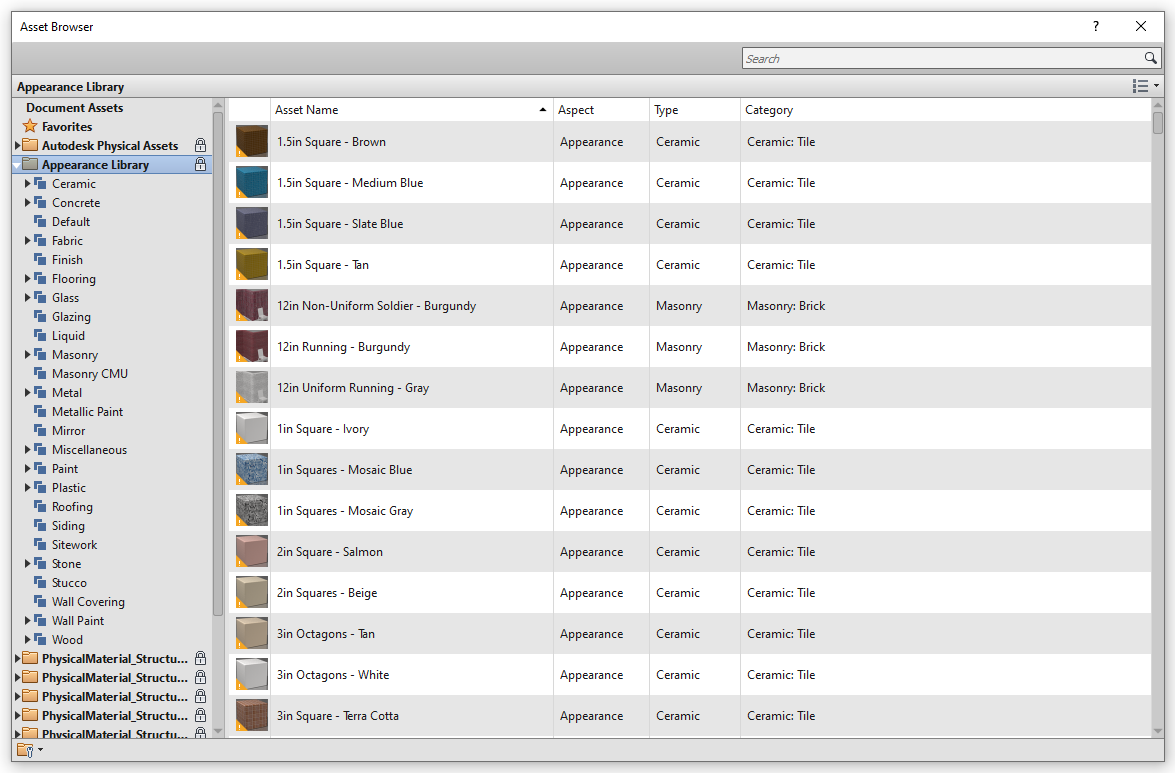
We can browse through the different categories displayed in the left panel, or use the search bar to filter assets by keywords.
- Duplicate item
Clicking this button will create a new asset, duplicating the existing one, adding [1], [2], etc in the original name and will make the new material no longer shared with other materials.
Content of the asset
As we have seen, this section contains all the properties that define an asset.
When we create a new "Generic" type material, it is created with the basic properties of the sections:
- Information: contains the name, description and keywords of the asset.
- The rest of the characteristics depend on the type of material aspect object (Class), in total there are 17 types, which are:
- Water
- Masonry
- Ceramic
- Solid Glass
- Glazing
- Layered
- Mirror
- Generic
- Concrete
- Wood
- Metal
- Opaque
- Stone
- Wall Paint
- Metallic Paint
- Plastic
- Transparent
Each of them has a distinctive set of properties, which can be adjusted. As an example, the following image shows the properties available for three different types of appearance objects:
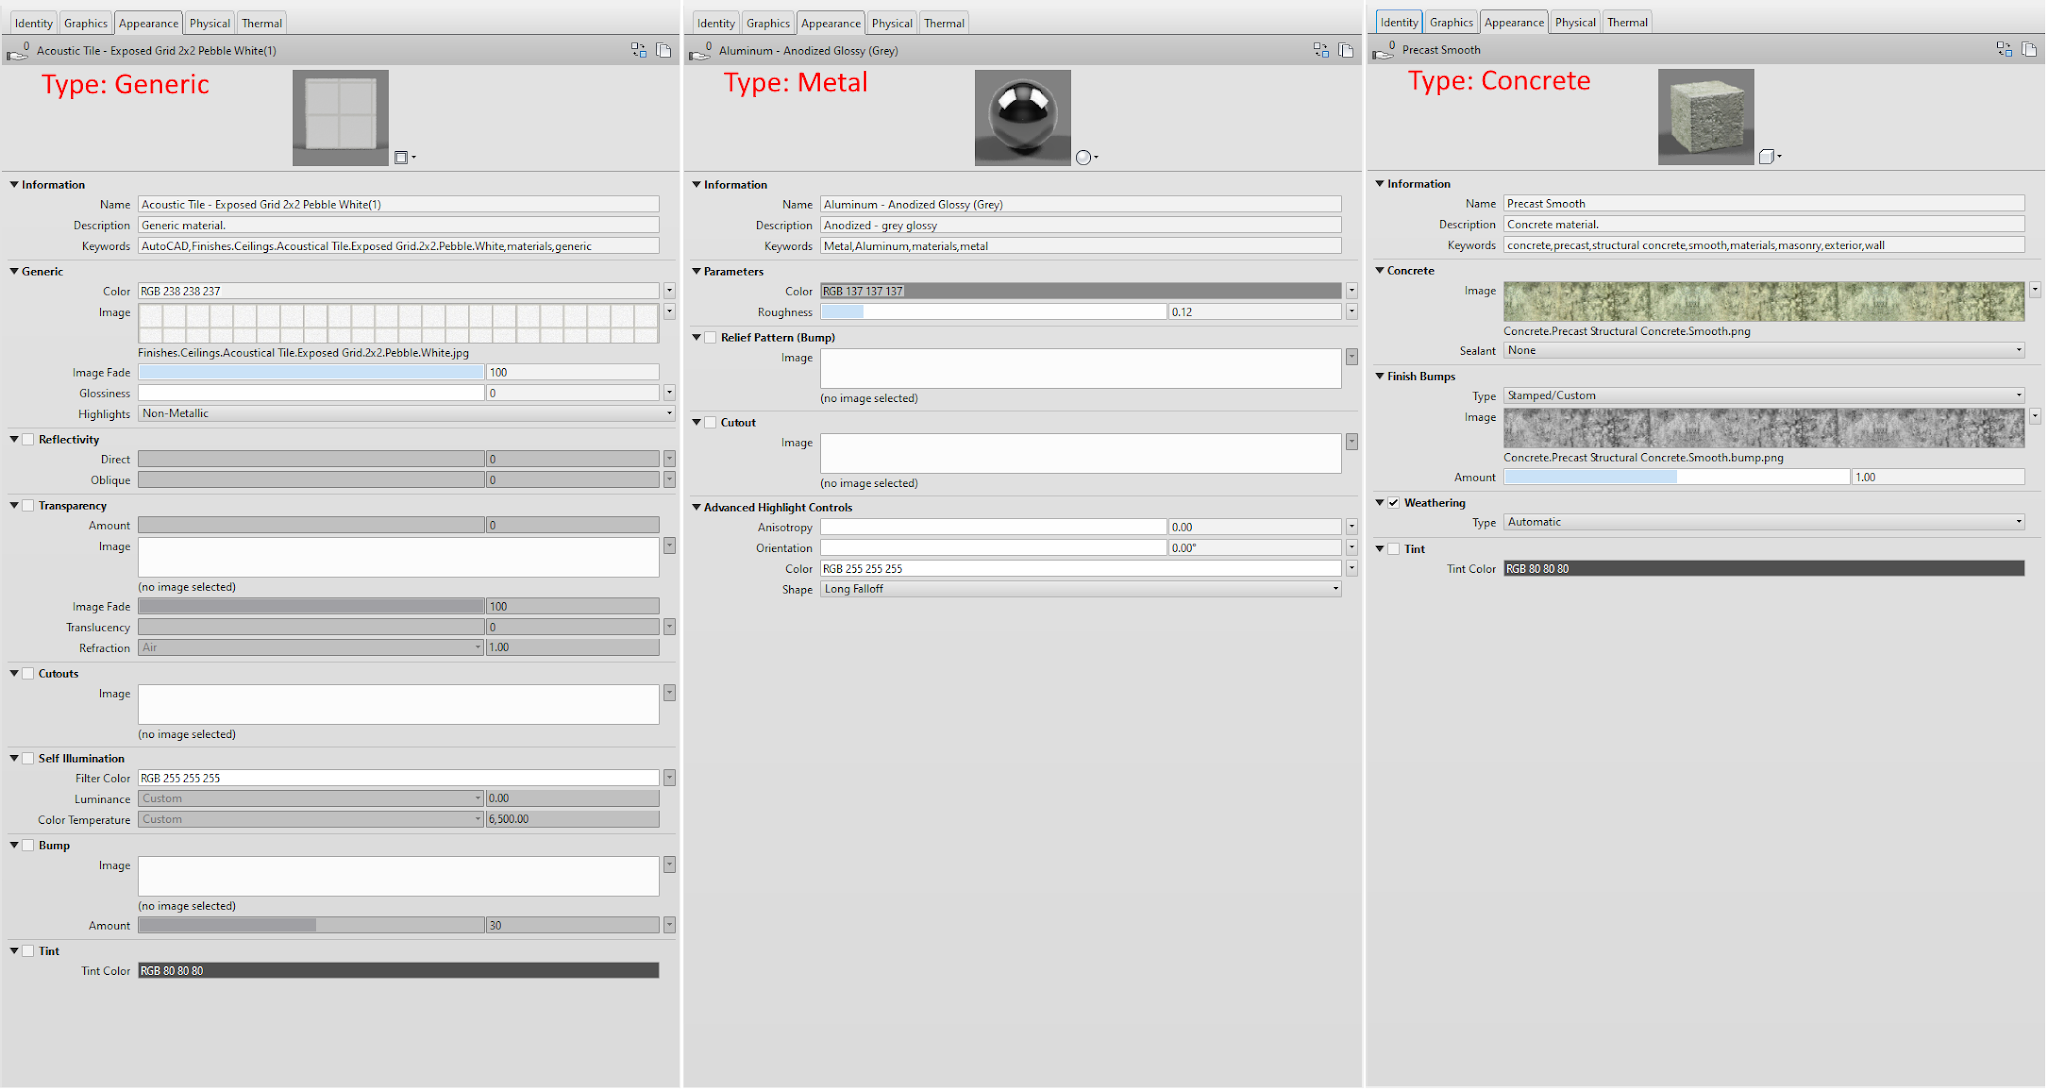
As can be seen, some object types (such as "Concrete") are based on texture images, while others (such as "Metal") rely mainly on numerical values of properties such as highlights, relief pattern, reflectivity, transparency, etc.
Physical and Thermal tabs
There are two other types of objects or material assets that can be assigned to materials. These are optional, so some materials may not have them.
In everyday use of Revit it is very likely that we will never get to use these tabs.
They are:
- Physical assets: contain properties used in structural analysis.
- Thermal assets: contain properties used in energy analysis.
The following image shows an example of each of them:
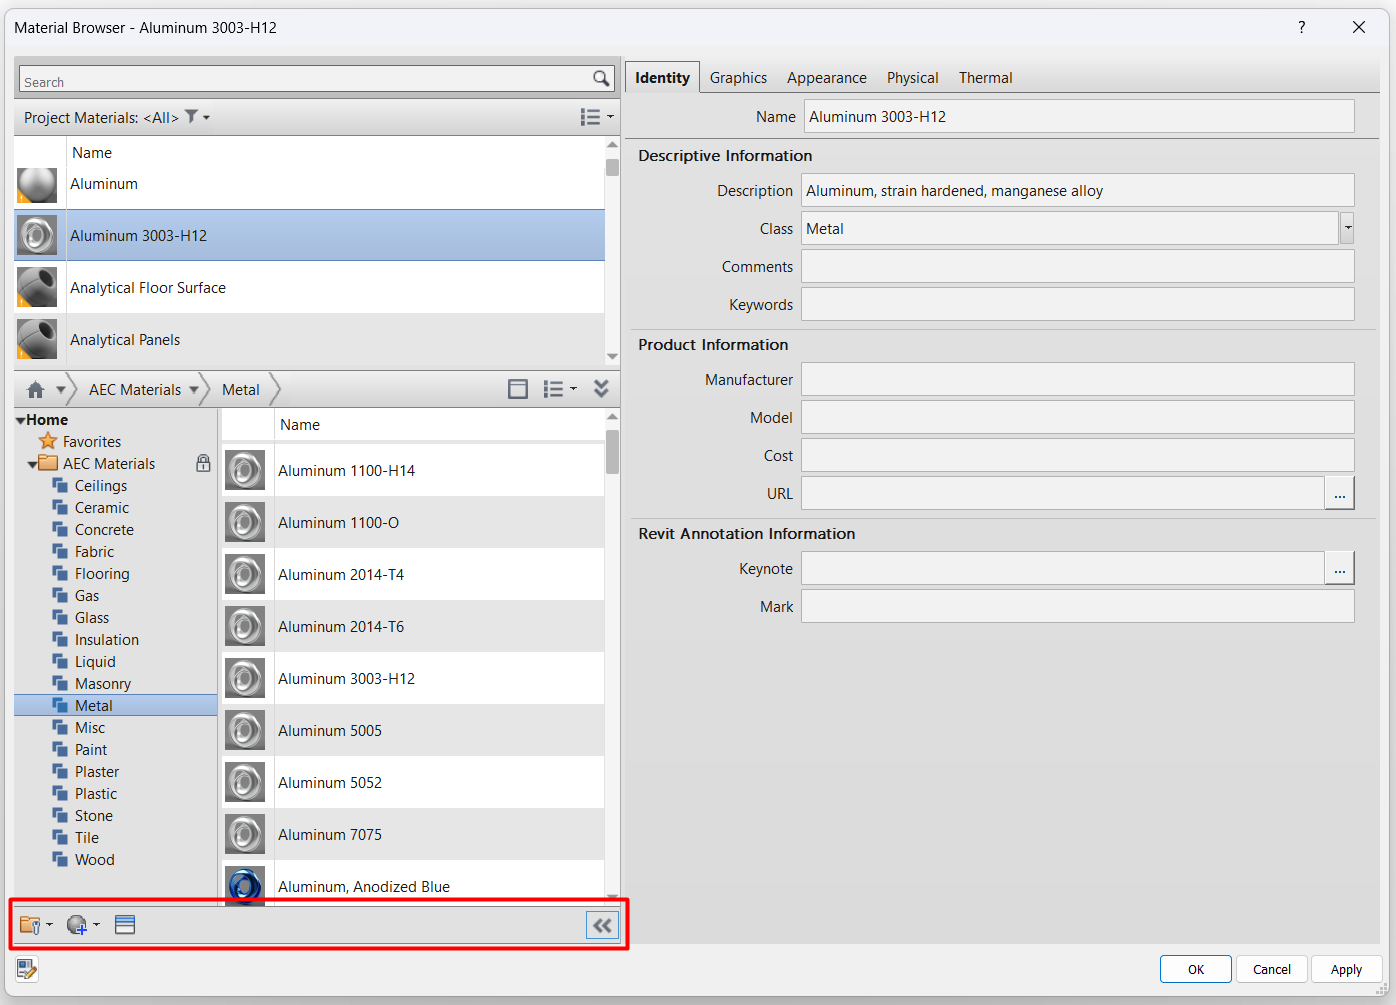
Existing Material Browser
At the top left we have the materials browser with all the materials we have created in our Revit file:
- Search bar: allows you to search for any specific material that you have created in the project. It is always advisable to control the coding of our materials so that the search is as agile as possible, using recognisable names that represent the basic characteristics of the material.
- Toolbar: This button allows us to filter the materials that appear in the search engine according to the class assigned to them. By default, all possible classes are selected, but by selecting any of them, only those materials defined with that specific class will appear in the search engine.
Further on, in the section Material Editor > Identity tab, it is explained how to define the class of a material.
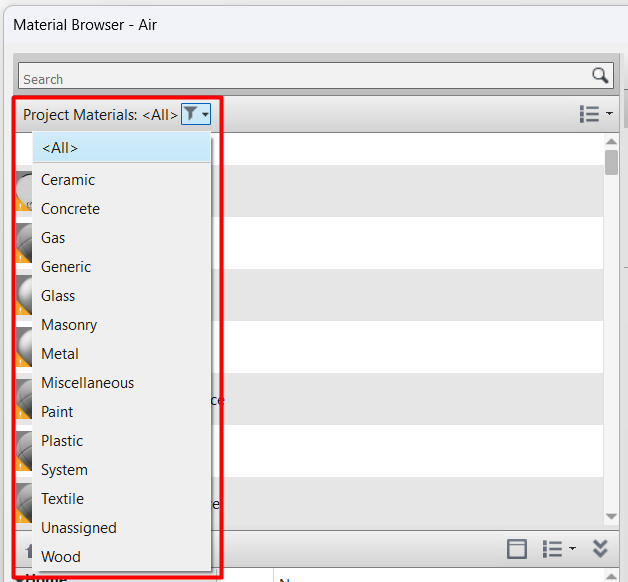
We can also modify the appearance of the list of materials using the button on the right.
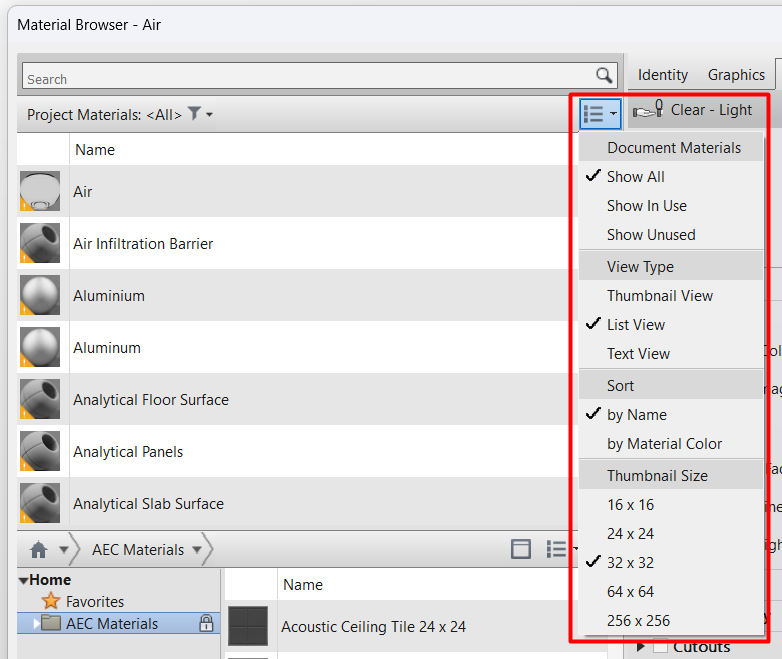
- List of project materials: all the materials loaded in the project. When you click on one of them, all its characteristics will appear on the right side of the window.
Material and material asset libraries
What are libraries
There are two types of libraries that we can work with to manage our materials: the material libraries themselves, which contain fully defined materials with all their preset characteristics that we can load into our project; and the material asset libraries, which contain sets of properties or assets that we can load into our existing materials in the project, these assets can be of type Appearance, Physical or Thermal.
Having our own libraries defined at the beginning of the project can help us to facilitate the management and creation of materials in a consistent way in our projects.
When downloading Revit, the standard Revit materials library (AEC Materials) is also downloaded by default.
We can also create personalised libraries and share them with other users. In each library we have multiple materials divided by categories, and we can also create our own categories to organise our materials as we wish.
Each library of materials is an ASDKLIB file that is normally located in: C:\Program Files (x86)\Common Files\Autodesk Shared\Materials
The materials that we have loaded in the project are not the same as the existing materials in a library that we have available. As long as we don't add the different materials in our project, we won't be able to work with them.
Material libraries
Creation of libraries
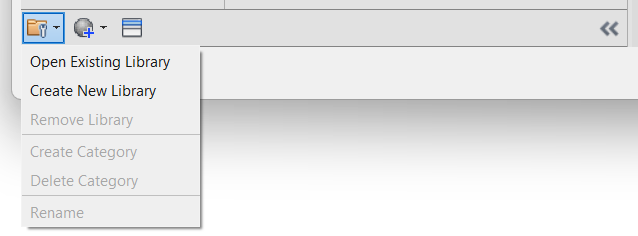
From the material browser toolbar, we can create new material libraries.
Libraries management: allows us to manage libraries of materials, creating our own, opening existing ones and creating or deleting categories in them.
Material Library Browser
- Toolbar: works in a similar way to the previous one, it allows us to filter the materials that appear in the list and also to modify the appearance of the list.
- Material libraries: all the available material libraries. In each library we have multiple materials divided by categories.
- Browser of library materials: set of materials contained in each category of each library in the previous section.
When you click on a material in this list, all the material properties in the right-hand menu are greyed out, as the material is not loaded in the project, and therefore the properties cannot be modified. In addition, a padlock is overprinted on the material icon indicating that the material is locked for editing.
When you place the mouse over the material, two buttons appear on the right-hand side. The first one allows you to load the material into the project. By clicking on it, the material appears directly in the material finder and becomes editable. The second button does practically the same thing and in practice there is no distinction between the first and the second, so we can use them interchangeably to load the material into the project.
If we try to load an existing material into the project, we will get a message like the following one:
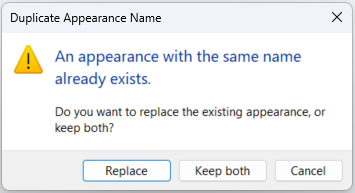
This allows us to replace the existing material with the new one, keep both, add a suffix to the newly created material or cancel the loading of the new material. We must be very careful if we click on replace as we may be modifying the appearance of a material we are using in an uncontrolled way with unexpected consequences in our project.
Asset browser
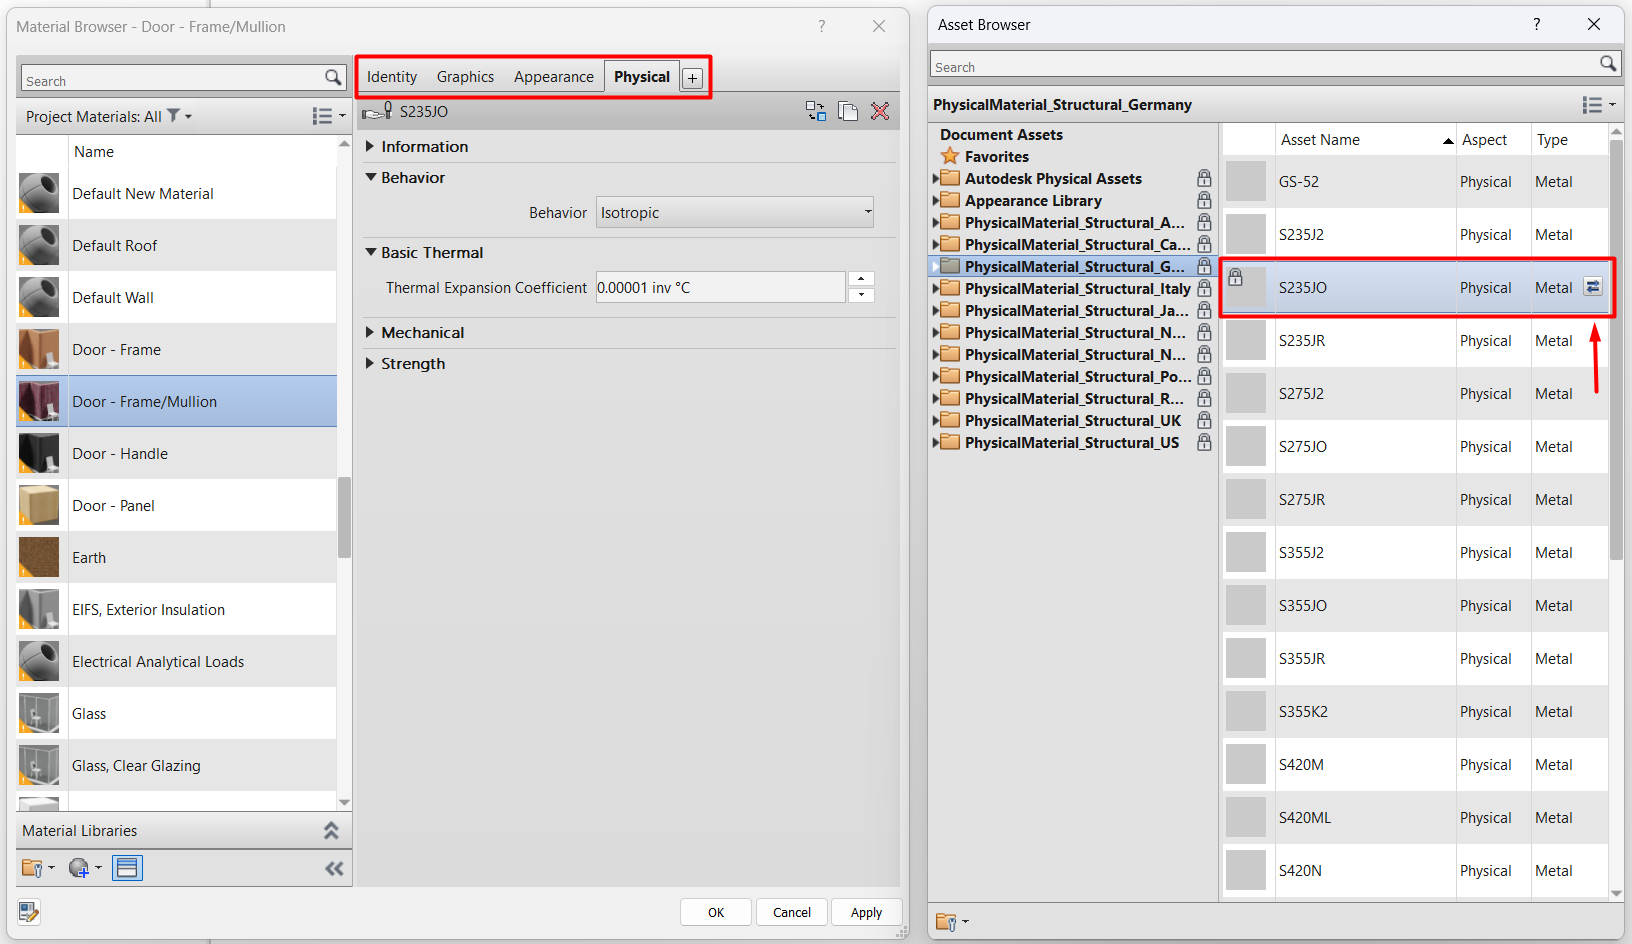
Open / Close the Asset Browser: when clicked, the Material Asset Explorer appears in a new window. This explorer works in a similar way to the Materials Library. It shows us all the accessible libraries and libraries of loadable material assets, we can browse through them and if any of the assets is of interest to us, we can load it in the selected material.
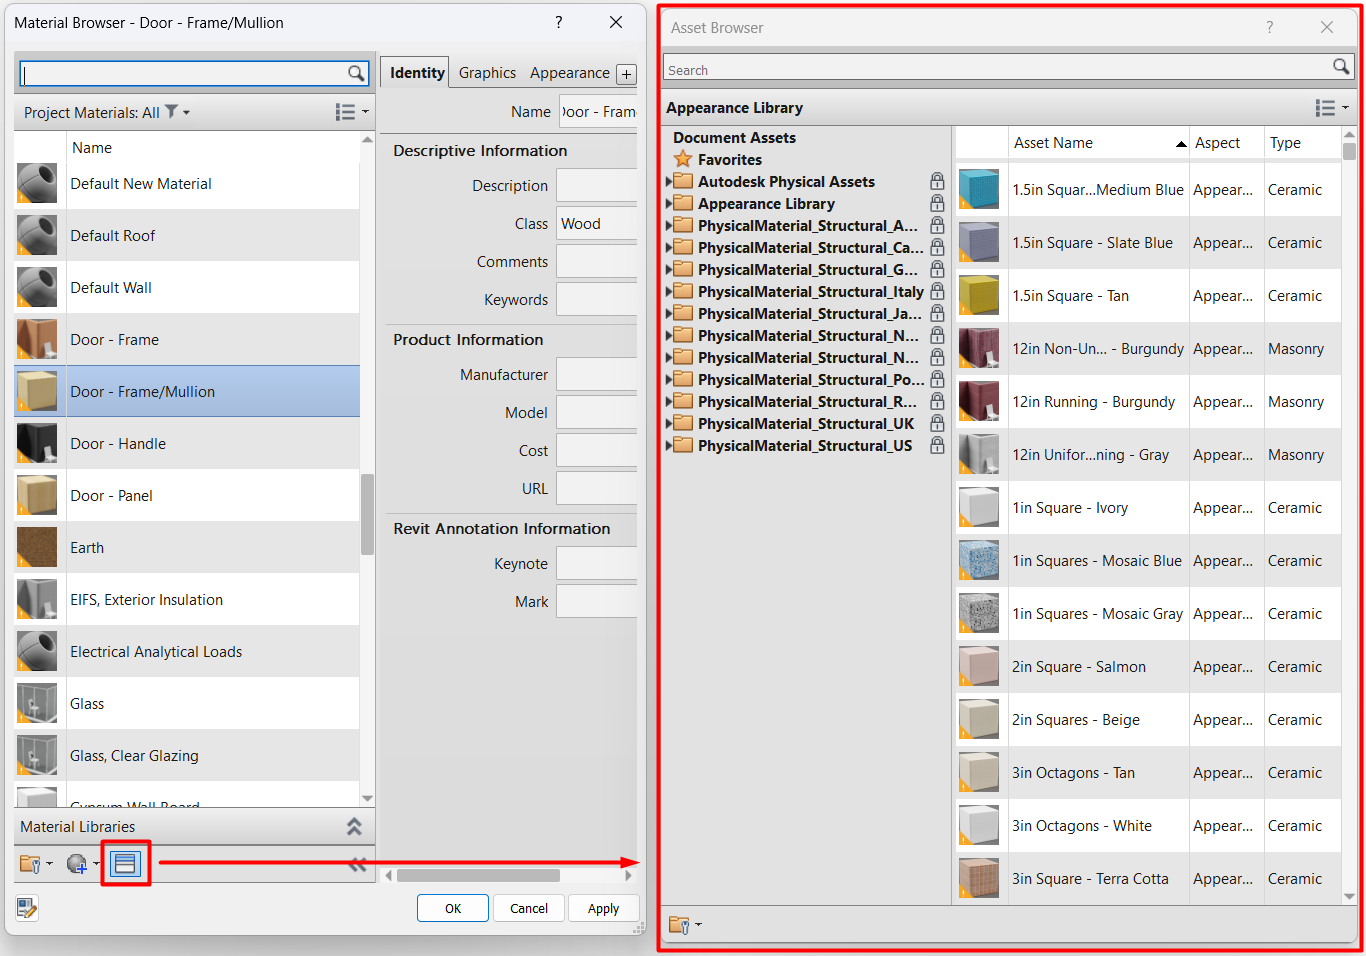
When you place the mouse over one of the assets, in case it does not exist in the selected material, an up arrow button will appear, and when you click on it, the asset will be loaded into the material.
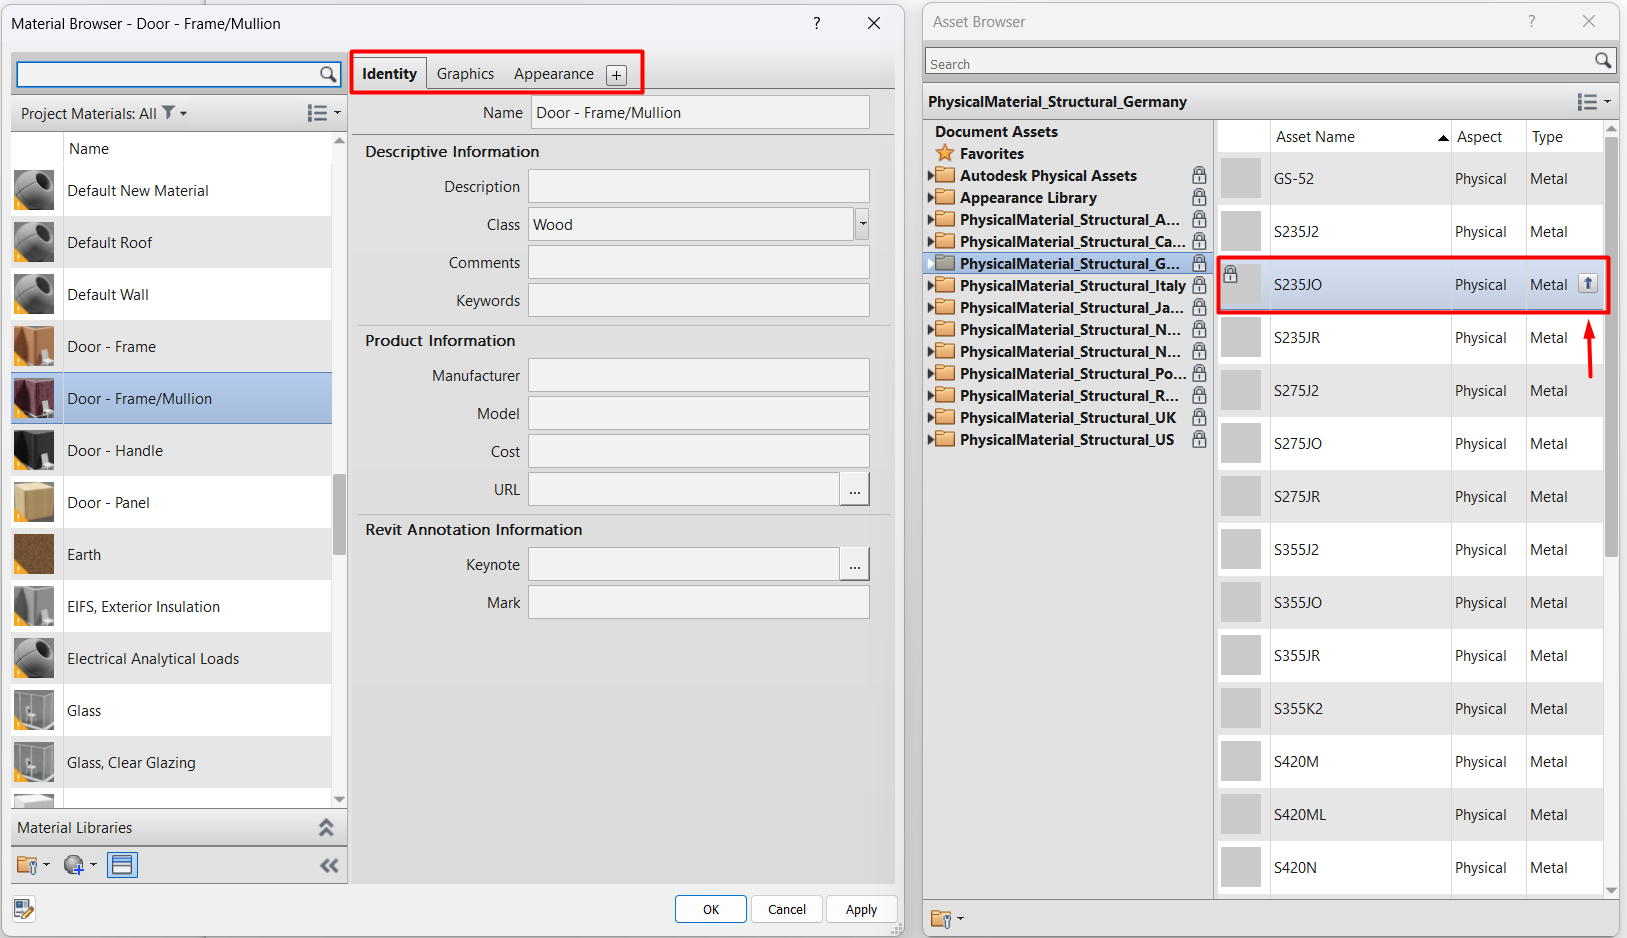

In case an asset of that type already exists in the material (Appearance, Physical, Thermal), a button with two arrows to the right and left will pop up, when clicked, the asset in the library will replace the existing asset in the project material.

Conclusions
Materials in Revit have their own properties (information and graphic representation) and others "inherited" from the assets (appearance, physical or thermal) assigned to them. This distinction is important, because while the former are unique to each material, the same asset can be assigned to several materials.
The properties and level of information required of the materials should be determined in relation to the expected uses. This aspect should be clear from the outset, as "too much information" is a waste of time and effort, and "too little information" may compromise the use of the model or, at the very least, lead to additional effort later on.
In the second part of this guide we will look at more technical aspects of materials in relation to their application in Revit elements and in documentation views of a project.
Tips & tricks
- It may be interesting to assign working colours to materials representing floor finishes, suspended ceilings or ductwork. This will make it easier to manage the modelling and documentation of these elements. It is always easier to apply a single filter that will turn them all back to white in the desired views, rather than multiple filters that will colour them according to the desired colours.
- When defining the graphics of a material, it is important to be clear about the distinction between Foreground and Background. It is advisable to always place solid colours in Background and wefts in Foreground, this way we can choose between overwriting only the colour of our elements, or overwriting the colour and the weft.
- In general it is always good advice to be careful when loading external families to the project. But in this case even more so as it can overload the model manager with incorrectly configured materials.