
Split a Revit Model
Workflow
Split a Revit model - Workflow
Objectives
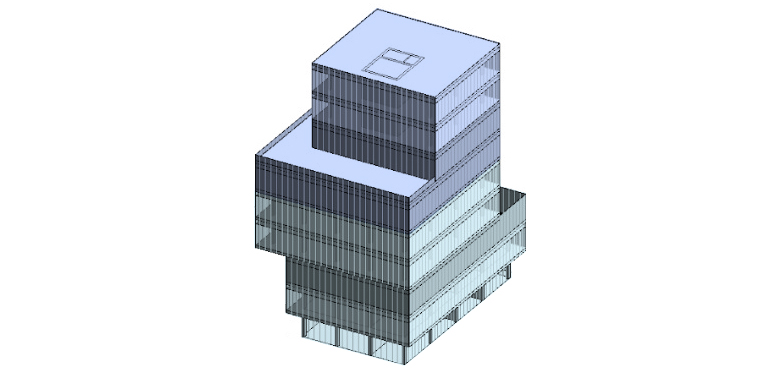
- Based on a heavy Revit model (model A), split it into several lighter models in order to optimize its performance.
Prerequisites
- The user has basic skills in Revit modeling.
- The user will be using Revit 2019 or newer.
Workflow description
The process of developing a Revit model sometimes leads to heavy files, which the regular computers aren't capable of processing. When a file reaches this state, it is recommended to split such a heavy file into lighter ones, that allow us to work with minor parts of the project at a smaller computational cost.
In order to split a heavy file, the first step is to establish the cutting limit, which should be determined according to the peculiarities of the project. For example, a criteria for splitting a 4 story building can be: one file containing stories 1 and 2, and another file containing stories 3 and 4.
Once we have defined the cutting limit clear, the process consists of duplicating the existing file as many times as needed, and cleaning each of them so they only contain the corresponding part of the model. Following with the previous example, The model would be duplicated twice, on the 1st copy we would delete everything except stories 1 and 2, and on the 2nd copy we would delete everything except stories 3 and 4.
When duplicating, we have to pay special attention to:
- Phases
- Design options
- Hidden elements
- Model views
- Worksets
- Shafts
- Linked views
- Rooms
- Areas
A key tool to ensure the quality of this process is a 3D view, it can be called “3D Control View”, in which the visualization of every element on the model will be enabled. If there are several phases on the model, one 3D Control View per phase should be created.
The sequence of this process is:
- Open the model to split. If it’s a central model, detach and save it.
- Open all worksets and reload all links.
- Create a 3D Control View per phase, and set their Discipline to “Coordination”.
- In each 3D Control View:
- Enable the visualization of all worksets and model categories.
- Verify that the “Phase filter” is set to the proper for that view.
- Disable the visualization of all links, annotation and analytical categories.
- Define the number of parts the model will be subdivided into and the splitting limit between them.
- It’s highly recommended to check Design Options contained in model and delete in advance all the options that are no longer needed.
- If a design option needs to be maintained, it’s highly recommended to keep it in only one of the files.
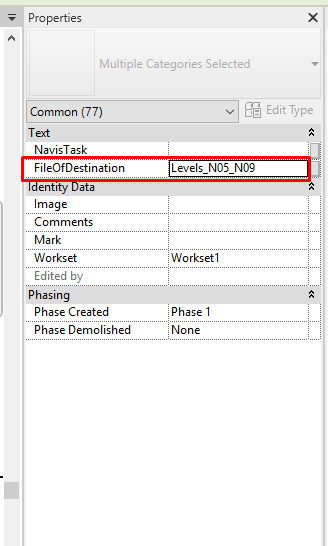
- Create an instance parameter such “FileOfDestination”, for instance, applicable to all model elements and links. The value of this parameter will indicate the file of destination for each element. This is especially important for those elements next to the defined border, be sure then that every element lands on one of the resulting models.
- Fill in the “FileOfDestination” parameter in every model element and link, indicating its destination file (“file_01”, “file_02”, etc.).
- Create a filter for each value of the parameter “FileOfDestination”, and apply it to the 3D views.
- Purge the model of all unnecessary elements, families and views.
- “Save As” this model as many times as parts we intend to have, and name them accordingly.
- If the documentation of the project has started (sheets, details, etc), consider which file the Documentation should be in. Probably there should be an independent model for that.
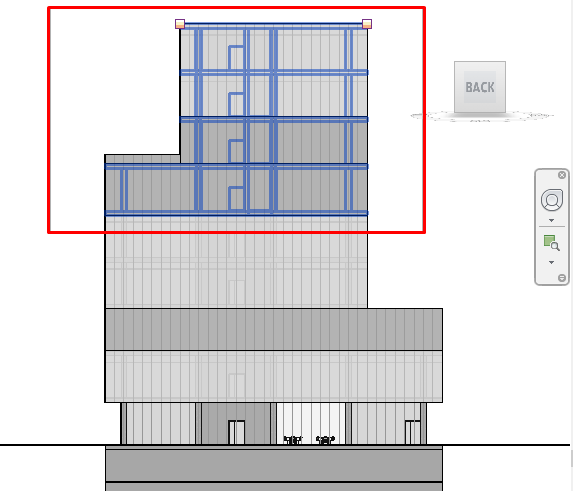
- Open each file, open the 3D Control Views, and hide the elements belonging to that file through a view filter such “File”, for instance. Delete everything that remains.
- If the model still has Design Options, remember to execute the previous step also in the elements assigned to every Design Option.
- Delete all worksets, views, filters, view templates and sheets that do not correspond to that part of the model.
- If a link inside the file is also being split, remember to delete the original complete link in all files, and replace it by the corresponding link of each part.
- If the views of this model are linked on another file, go to that file and re-link them.
Practical example
This process will be implemented in a practical case:
First, open the model. If it’s a central model, it will be detached and saved with a new name.
Once inside the model, open all worksets, enable their visibility and reload all links.
Control Views
Generation, Phase Filter and Discipline
These views will allow controlling the splitting process.
Generate as many Control Views as Phases there are. In this example, there are 2 phases: Existing + Phase 1:
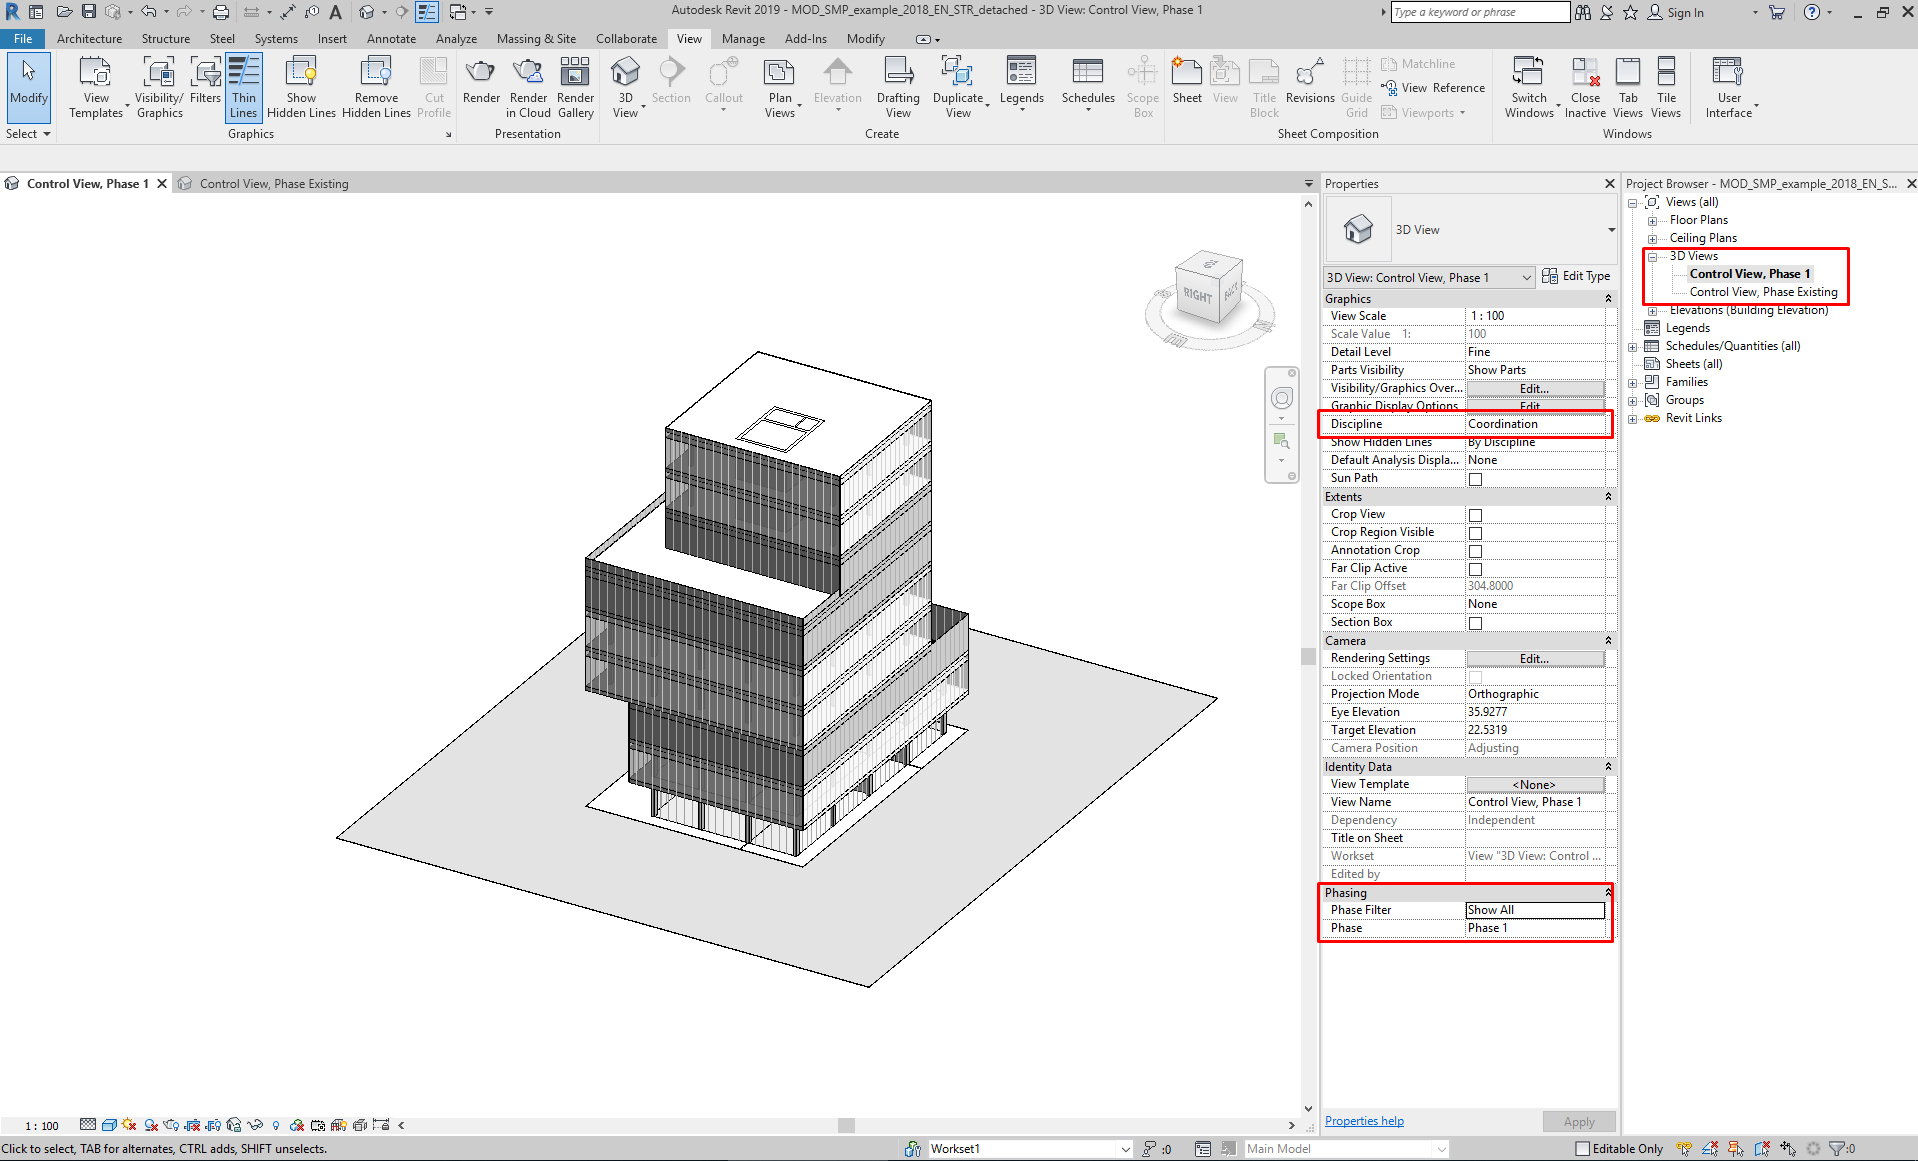
In each view:
- Set the Phase Filter to: “Show all”, or an equivalent filter that enables the visualization of all elements (Existing, Demolished, Temporary and New).
- Set the Discipline to “Coordination”.
Visualization
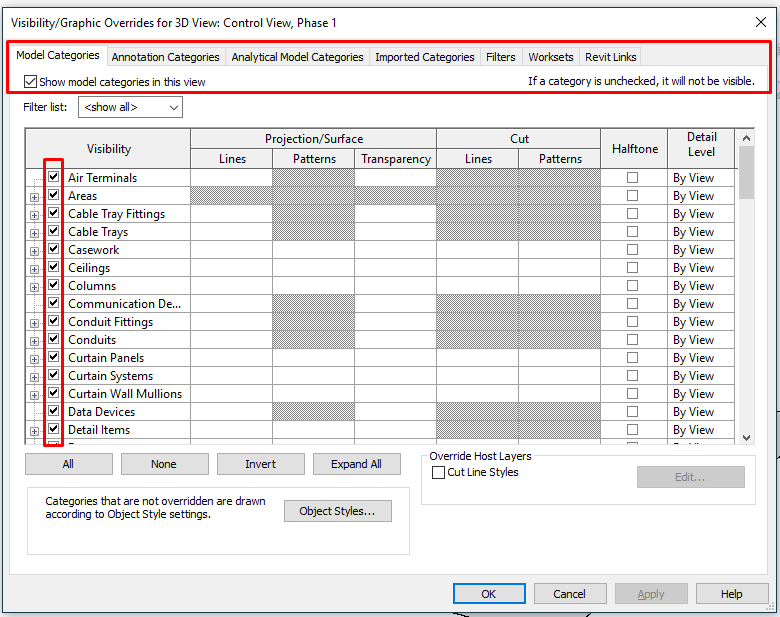
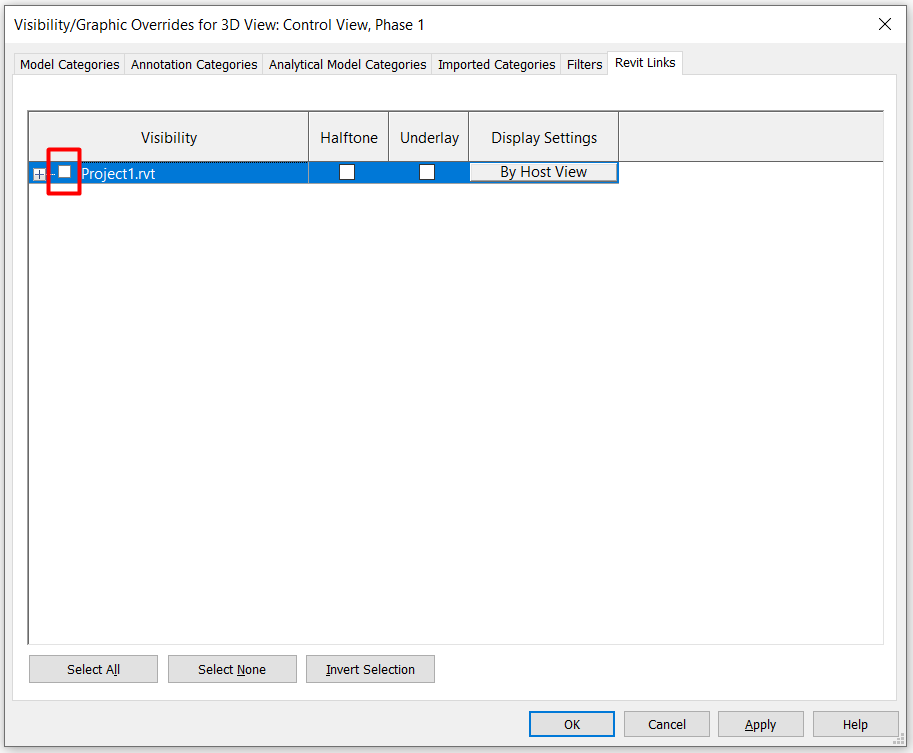
In each 3D Control View:
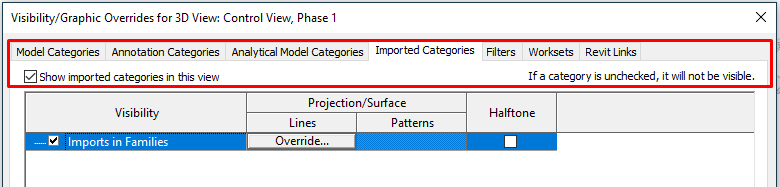
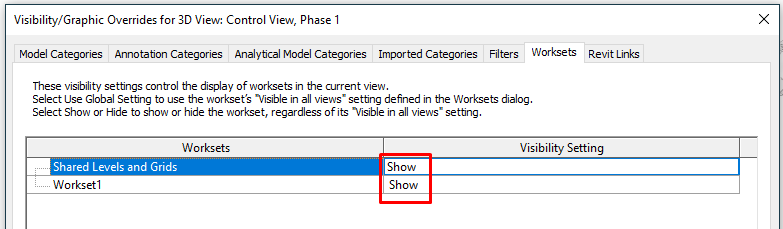
- Enable the visualization of all worksets, model categories and links.
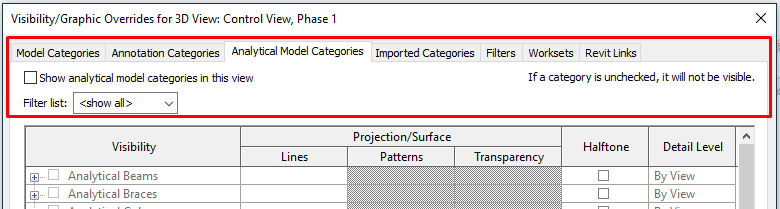
- Disable the visualization of all annotation and analytical categories.
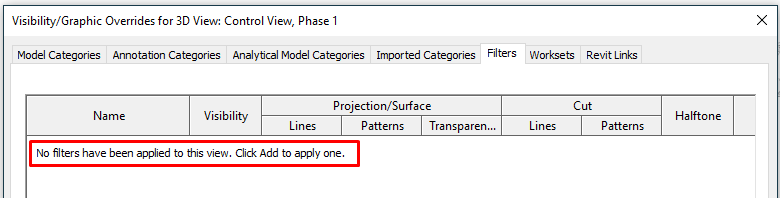
- There shouldn’t be any additional filters applied.
Model Categories: Show all
Annotation categories: Hide all
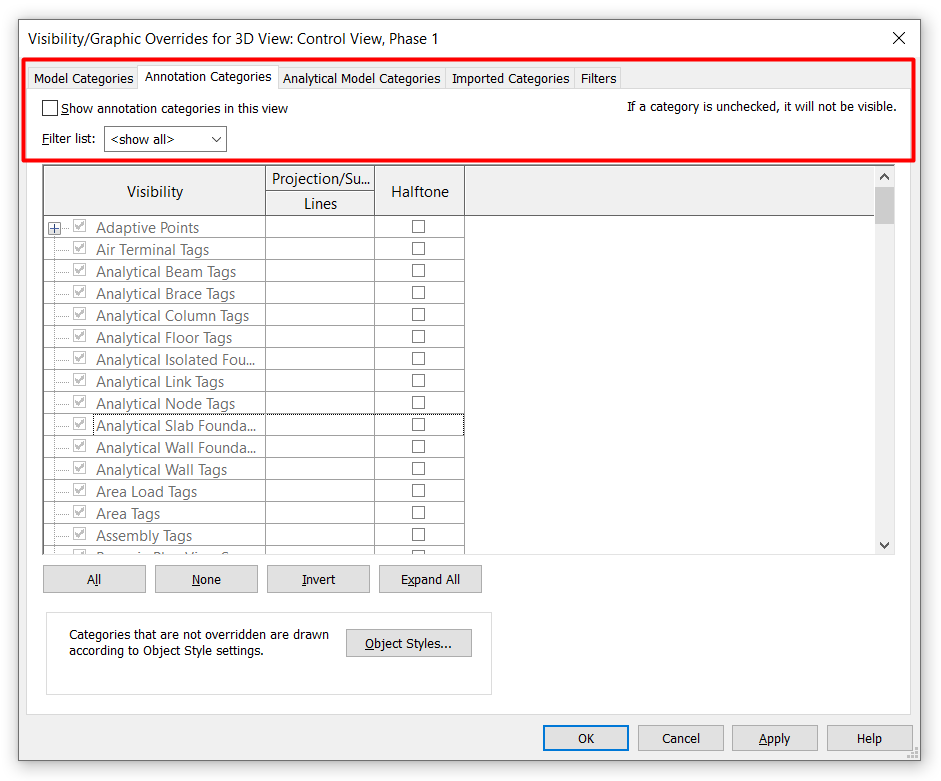
Analytical Model Categories: Hide all
Imported Categories: Show all
Filters: No filters applied yet
Worksets: Show all
Revit links: Hide all
FileOfDestination
Generation and fill-in of the parameter
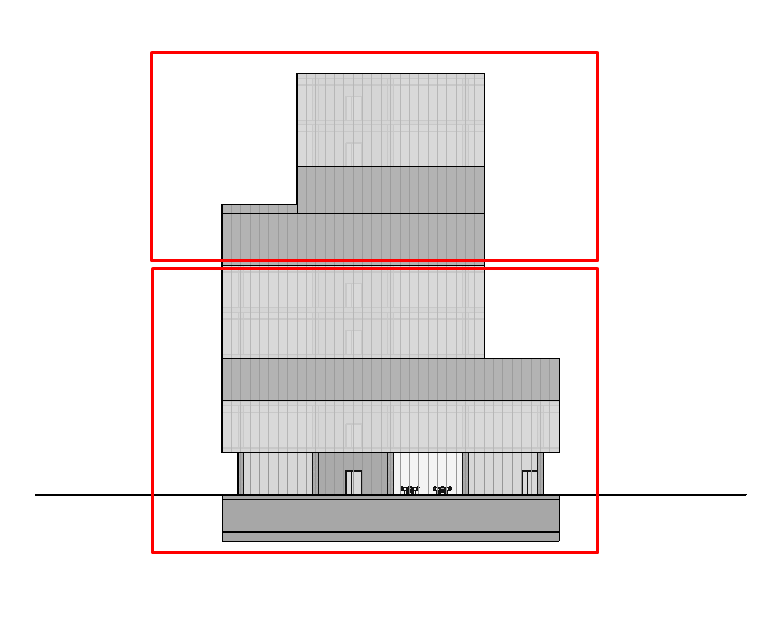
The next step is to establish the parts in which we will split the model, on this example, it will be split it into two different parts:
Create then the parameter “FileOfDestination”, it will be a “Text Type” parameter, and it will apply to all categories of the project:
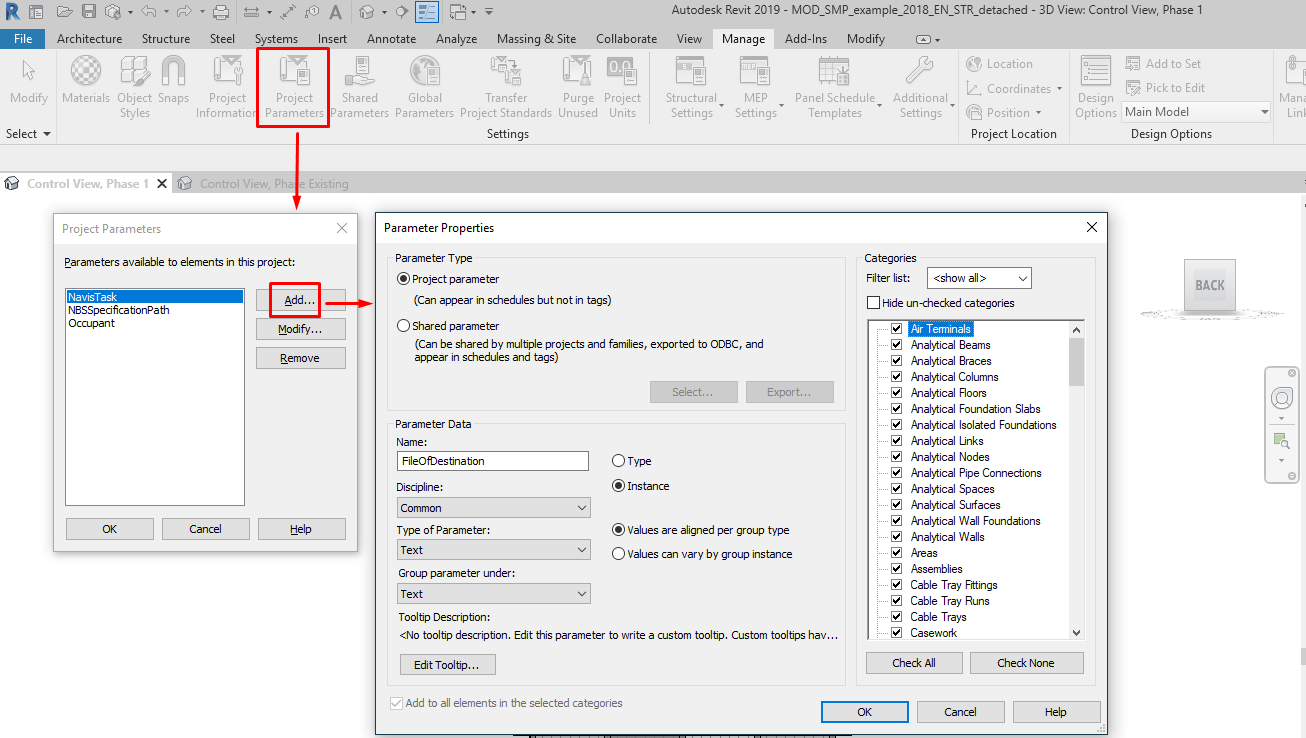
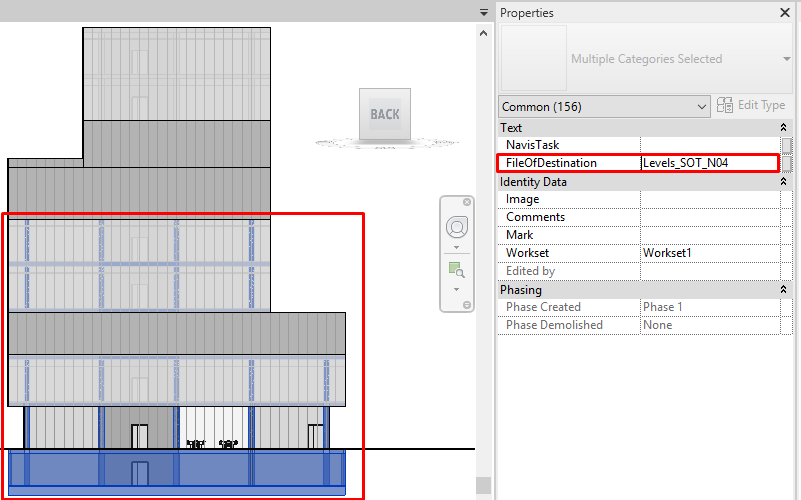
Once generated the parameter “FileOfDestination” is created, fill it in on every element of the project.
The first file of destination will be called: Levels_SOT_N04.
The second file of destination will be called: Levels_N05_N09.
Documentation
In some cases, the documentation of the project is organized in a way that separates modeling files and documentation files. If this is the case, and the model to be split is linked in a documentation file, it is important to pay attention to it , because depending on how the link is substituted, documentation objects (annotations) might lose their host.
So, do not remove the link containing the complete model (already obsolete) before relinking the subdivided models on the documentation file. This will imply that all annotation objects at some point in the process would lose their host and would be deleted.
Instead, open the documentation file, link all the already split models and finally, save it. Then yes, the complete linked model can be deleted. As the objects have the same ID in both the original and the duplicate and subdivided models, all documentation objects will recognize their host, therefore no annotation objects will be lost.
This is a nice breakdown and great idea for Architectural design but not practical for Electrical.
One can’t power linked electrical equipment or fixtures so your load calcs would be incomplete for the buildings main service.
Hi James. In MEP models you need to have the entire system that you want to analyze in one model, that’s true.
Regards