

Revit to Lumion
BIM Workflow
REVIT TO LUMION
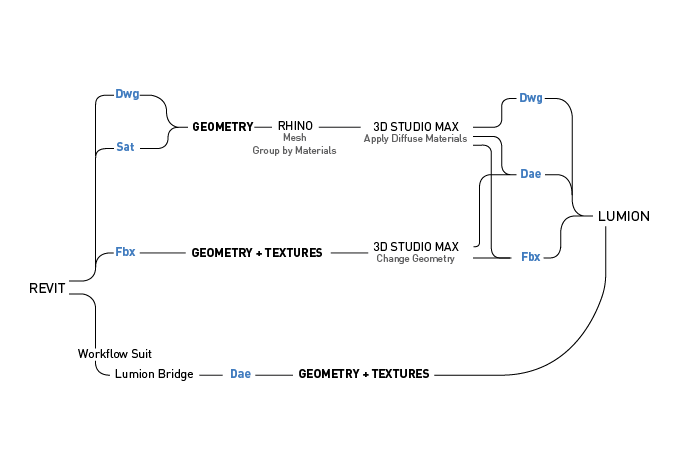
Lumion is a great software to get views and videos to showcase our projects with good quality in a really short time. So it is a good way to complement our Revit skills. The workflow between Revit and Lumion can be drawn as follows:
1 SOFTWARE TO INSTALL
- Lumion 6.0
- Lumion Bridge (depending on the Revit version)
2 MODEL IN REVIT
- Lumion will always combine surfaces that use the same material in Revit. If you want to assign a Lumion material to a specific surface, you must assign a unique material to that surface in Revit before exporting the model.
- The most important thing before exporting a model to Lumion is to apply materials to all elements in the model. When working with families, all the components of the family have to be assigned dedicated materials, avoid leaving materials as “By category”. There is not a rule about how naming materials, but the recommendation is to adopt a convention about names that refers to the material, so anyone can work with the exported file in Lumion.
- Another key recommendation before exporting the model to Lumion, is to Join Geometry when possible. Example: Walls and Ceilings with same materials. When doing this, views in Lumion have better results.
- Moreover, the model should not have any overlapping geometry to avoid having a flicker effect in Lumion.
- Last important thing to take into account when modelling in Revit before exporting to Lumion is the “Level of detail of the model”. The “Level of detail” should be set according to the scale that we will need for the images.
3 RECOMMENDATIONS TO EXPORT
- Split the model across several distinct views with the appropriate filters defined. The gain here is that you will reduce the overall complexity of the model (manage it into smaller chunks) and will be able to use different “Combine By” when exporting to DWG or FBX.
- Use “Visibility Graphics Override” to apply specific materials to singular entities.
- Use “Filter”s to export by materials.
4 WORKFLOWS
- Depending on the complexity of the project we will decide how to export the model from Revit. Most likely we will use Lumion Bridge, it is the fastest workflow. The only problems we may have are about materials and mesh definition.
Main workflows between Revit and Lumion:
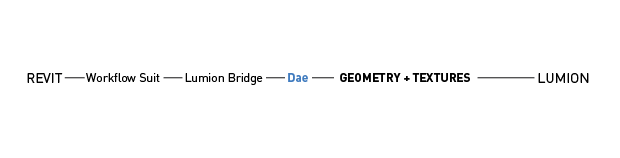
- Direct export from Revit to Lumion using the Lumion Bridge.
- Export from Revit to Fbx and use 3d Studio to change geometry and materials.
- Export from Revit to Dwg and use Rhinoceros to mesh the geometry and change objects to layers by material. Then, export that model into Dwg and open it to 3d Studio to apply standard/diffuse materials.
5 WORKFLOW A - Lumion Bridge
If you select North:
- If you choose "Base point" as insertion point, then project north is taken into account.
- If you choose "Survey point" as insertion point, then true north is taken into account.
The Geometry Accuracy slider is associated with the graphical detail of your model. Sliding this all the way to the right should result in a finer detailed model, but a larger file size.
If you select option Skip Interior Details then these Revit Categories are skiped:
- Casework
- CommunicationDevices
- DataDevices
- DuctTerminal
- ElectricalEquipmentq
- ElectricalFixtures
- FireAlarmDevices
- Furniture
- FurnitureSystems
- GenericModel
- LightingDevices
- LightingFixtures
6 WORKFLOW B - FBX - 3d Studio
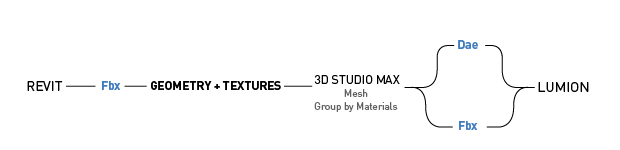
- The Fbx format is the best option if changing the accuracy of the mesh is needed or changing the textures of the materials.
- This workflow depends on the user, but usually we will use 3d Studio Max software as the intermediary between Revit and Lumion. Using 3d Studio enables us to change objects of layer, modify colors of materials or textures, and everything needed to manage small changes of the Revit exported model.
- After having modified the model there are several options for exporting it: Collada (Dae), Fbx, Dwg (when materials does not have textures) or even 3ds files. Collada Dae is the Lumion´s recommended file.
7 WORKFLOW C - DWG - Rhino - 3d Studio
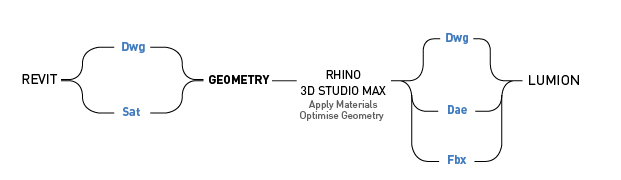
The Dwg format is the best option if we want to preserve the quality of the curved elements. By exporting to Dwg as ACIS solids, the parametric curvature information in the Dwg model is maintained. That is, we bypass the Revit tesselator.
The Workflow from Revit to Lumion thorough Dwg is the following:
- Open in Rhinoceros
- Group correctly by materials
- Create Meshes optimizing definition depending on the importance of the geometry
- Export to Dwg
- Import in 3ds
- Apply Standard Materials (MaxScript Editor)
8 LUMION - NAVIGATE SCENE
NAVIGATION
- (W) / (Up arrow): Move camera forward.
- (S) / (Down arrow): Move camera backward.
- (A) / (Left arrow): Move camera left.
- (D) / (Right arrow): Move camera right.
- (Q): Move camera up.
- (E): Move camera down.
MOVE CAMERA
- (Spacebar) + (W/S/A/D/Q/E): Move camera very slowly.
- (Shift) + (W/S/A/D/Q/E): Move camera fast.
MOVE MOUSE
- Right mouse button + Move mouse: Look around.
- Middle mouse button + Move mouse: Pan.
- Mousewheel up/down: Move camera forward.
TRICKS
- (CTRL) + (H): Reset camera pitch to horizontal viewpoint.
- (O) + Right mouse button: Orbit camera.
- Double-click with right mouse button on models: Instantly 'teleport' to the position that you clicked on.
9 LUMION - IMPORT MODELS
- Lumion supports most common CAD and BIM authoring tools. Supported file formats are: Collada (.DAE), Sketchup(.SKP), Autodesk® (.FBX), Autodesk® (.DWG), Autodesk® (.DXF), 3DS Max® (.MAX), 3DS Max® (.3DS), Wavefront (.OBJ).
- It is not possible to import vertex animations or bone animations in Lumion. It is however possible to import move/rotation/scale animations via DAE and FBX format.
- Lumion workflow: Objects > Imports > Import New Model
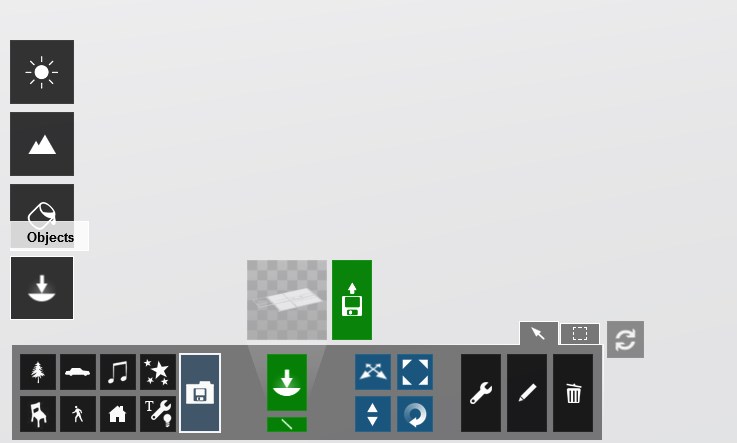
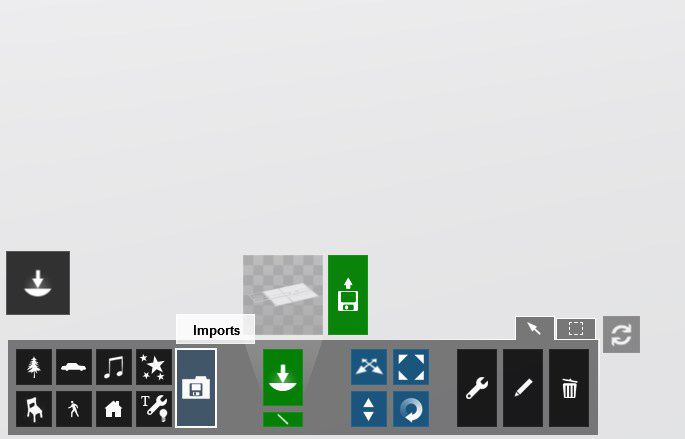
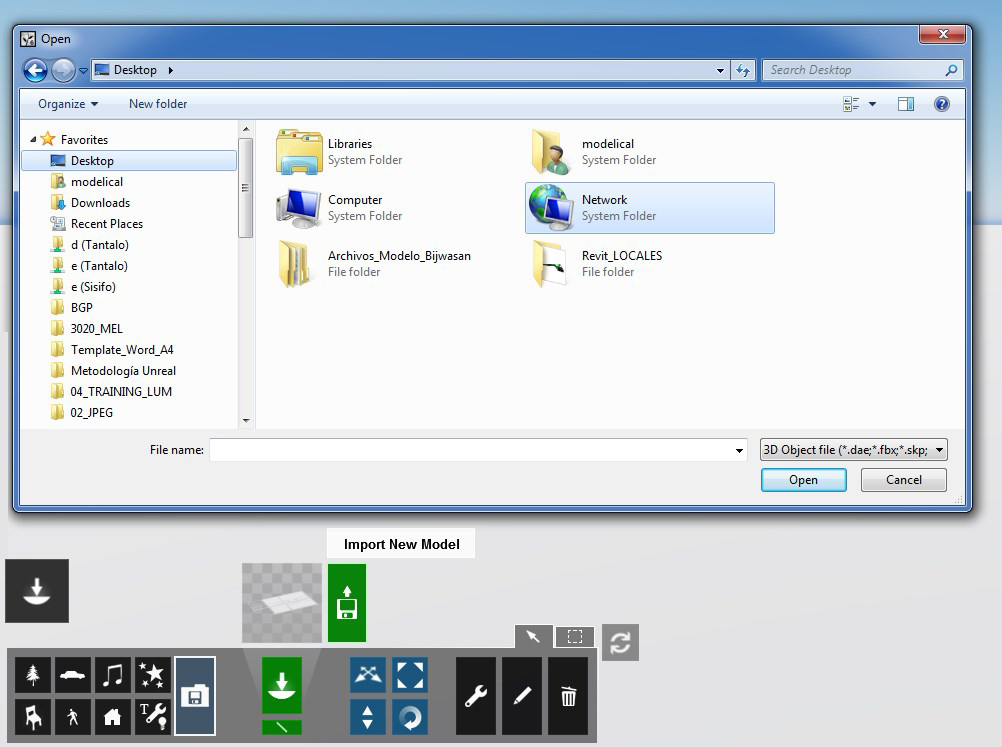
Recommendation: Lock models so that they do not move when modifying other file´s models.
- Select models > Context menu > Transformation > Lock Position > On
10 LUMION - APPLY MATERIALS
- Lumion workflow: Materials > Select surfaces to apply material > Material Pop-up
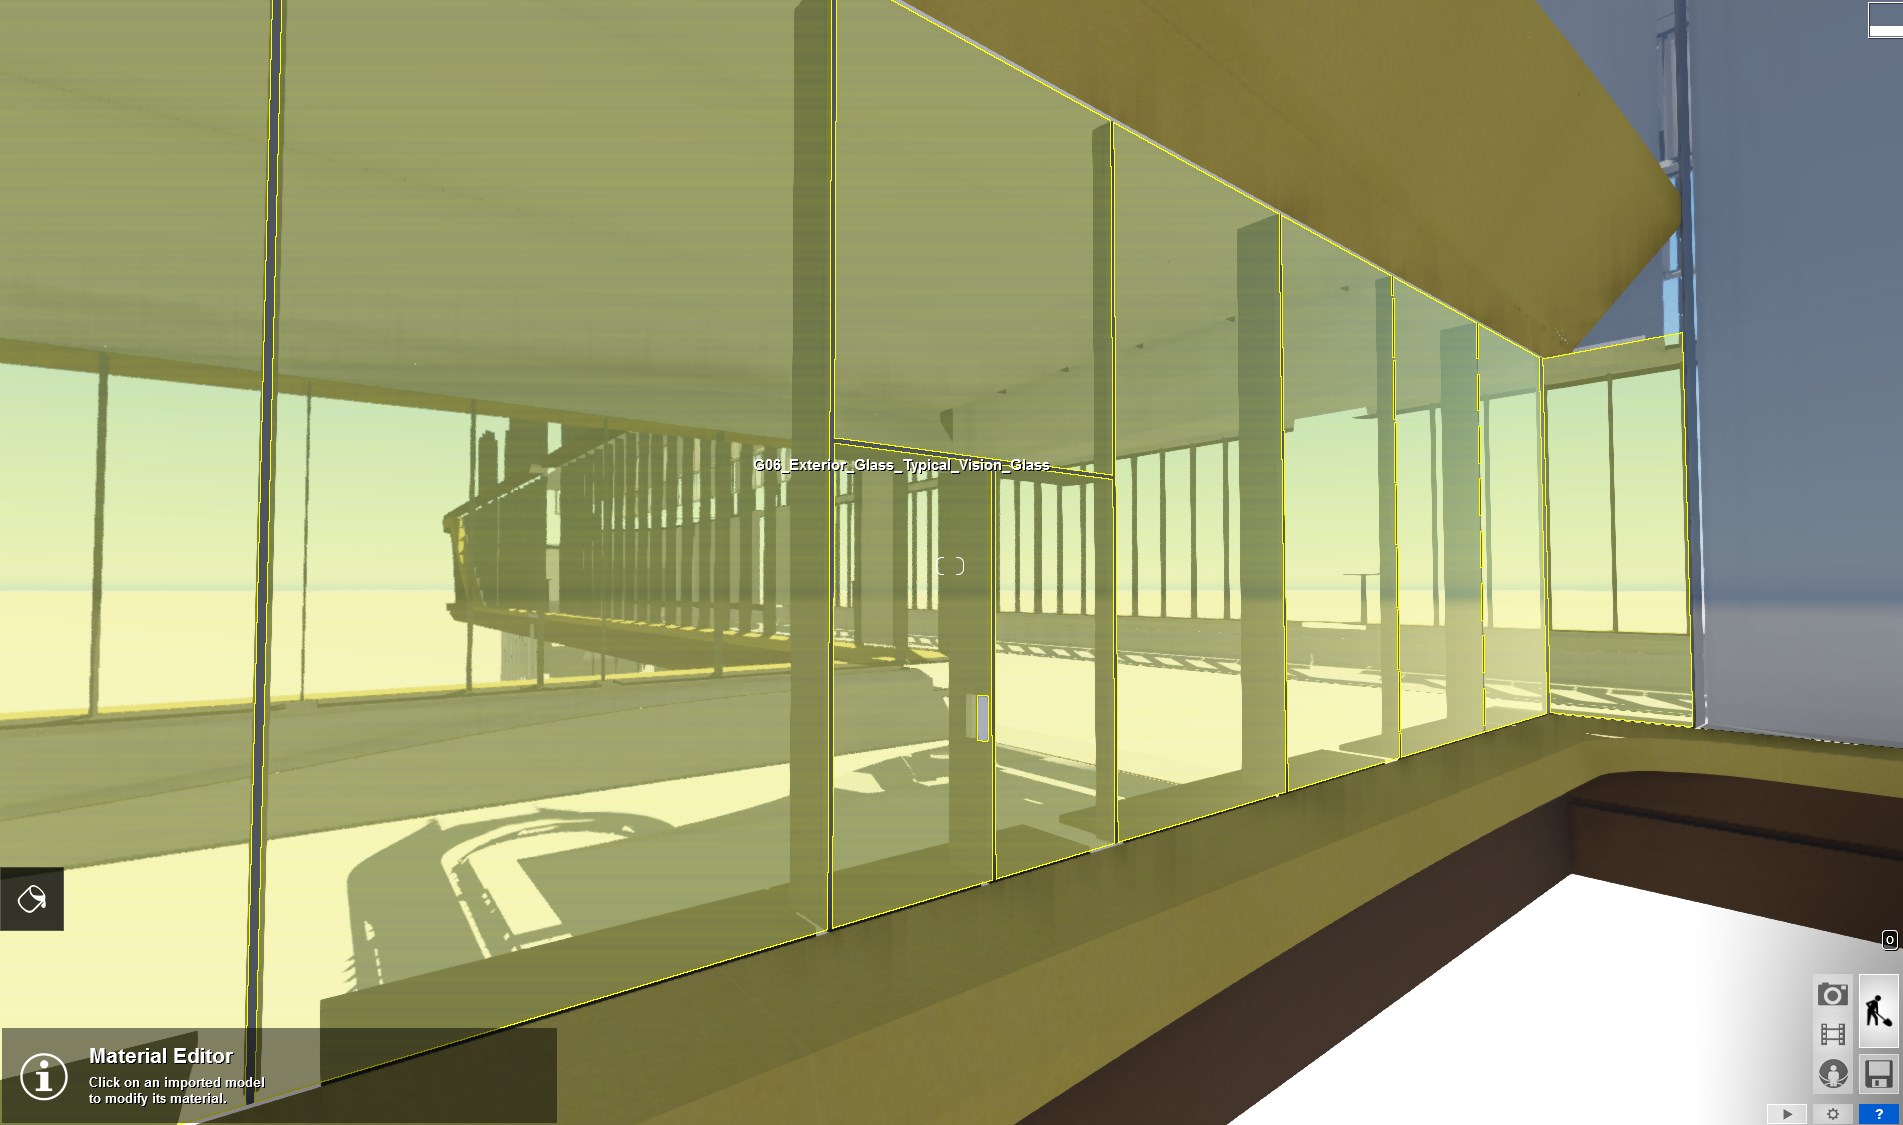
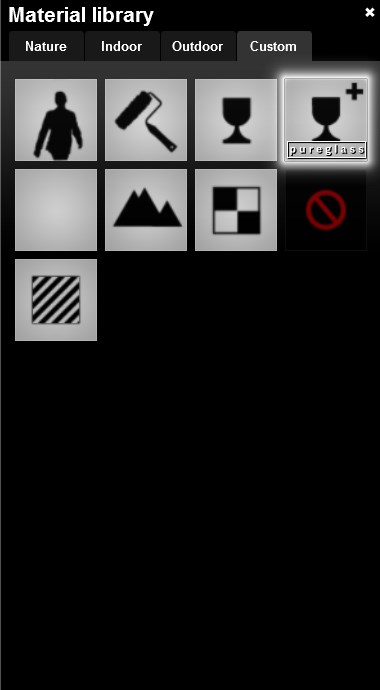
Recommendation: Save Standard Materials
Material > Options > Edit > Save
Recommendation: Save Material Sets
Material > Options > Material Set > Save
11 LUMION - ATTREZZO
- Lumion workflow: Objects > Nature / Transport / Sound / Effects / Indoor / People & Animals / Outdoor / Lights & Special Objects
Lumion has a wide library of static and dynamic objects which is really useful to add reality to our scenes.
12 LOAD LUMION SCENES IN A NEWER LUMION RELEASE
- If you need to load a Lumion 5 scene in Lumion 6, you need to copy the Scenes & Library folders in Documents/Lumion 5/ folder to Documents/Lumion 6/. Remember to restart Lumion after copying the folders.
- Alternatively, if you have Lumion Pro, you can also export a Lumion 5 scene as an LS4 file which includes imported models. The LS5 file can then be imported in Lumion 6.