

Structural columns
Modeling and configuration in Revit
Structural Columns
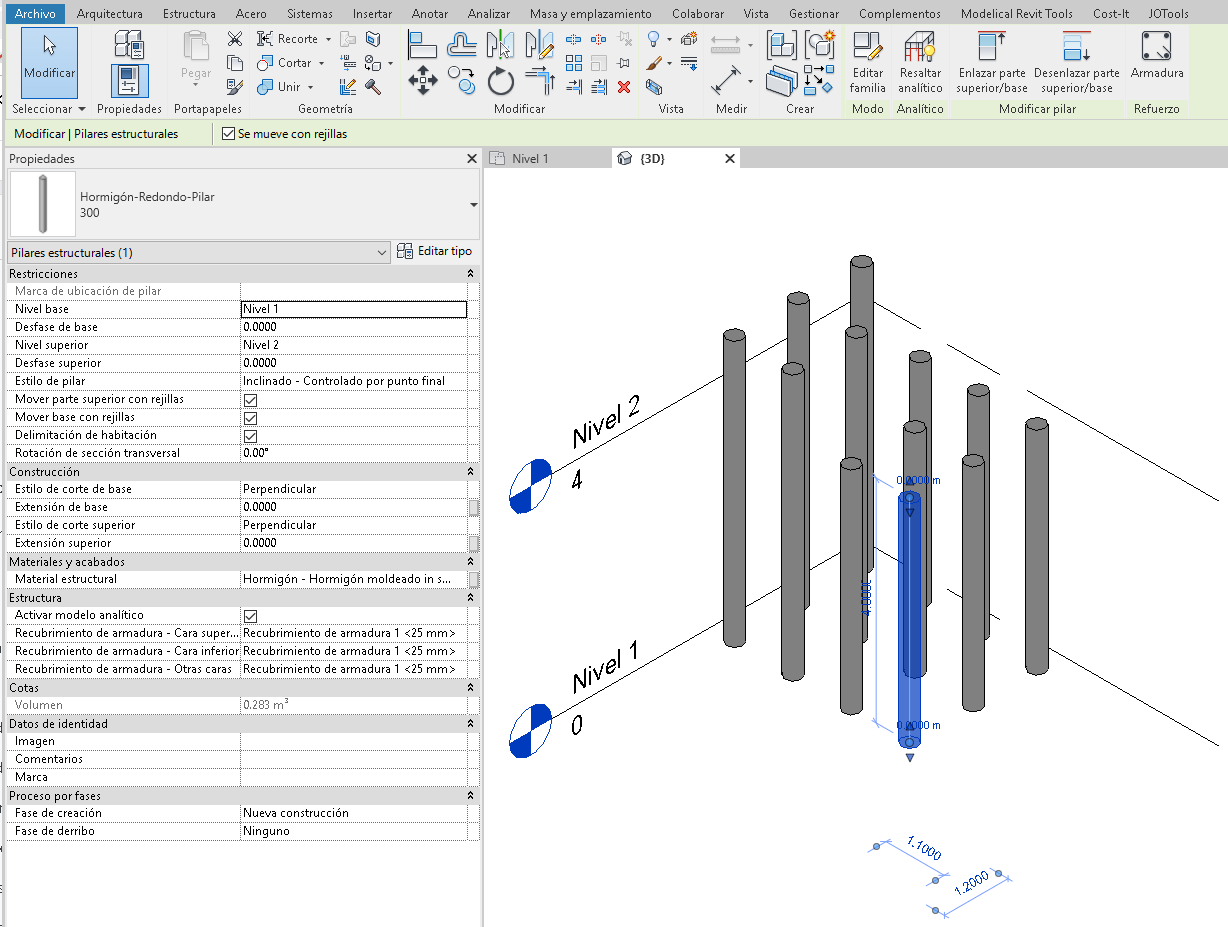
Objectives
Understand how to model Revit structural columns and how to edit them.
Prerequisites
- User will be using Revit 2017 or more recent.
- User is a nice person.
Description
This guide explains how to set the model environment, how to face the modelling process and how to edit Revit columns once they’ve been created.
Procedure
Before modelling
Datums must have been created (Grids, Levels and/or Reference Planes).
Not to be confused with Architectural Columns, these are used to: model non-structural columns or structural column coverings. Although the model starts from the discipline of architecture, it is desirable that the structural elements be modeled with the structural tools of Revit, that is to say the Architectural Columns are hardly used.
Structural columns
Structural Columns are a component family, which means that they are created in a separate family and are inserted into the model. There are several pre-defined families accessible on the web or through Autodesk. New families can also be generated according to project requirements.
Editing the family can assign or modify the OmniClass code.
Modelling
Creation
When you select the "Structural Column" tool in the Modify tab there are few options:
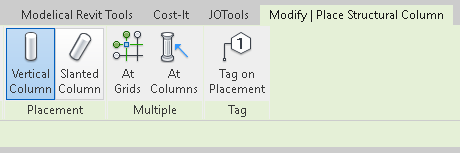
Placement:
- Vertical Column: Most common case, and the one this GUIDELINE is about.
- Slanted Column, for sloped columns.
Multiple:
- On Grids, it is recommended to always model the columns using this option.
- On Columns, creates a Structural Column within an Architectural Column.
Tag on placement: useful to tag the column as it is modelled. It is recommended to model first and tag later.
The tools shown above are available in floor plan view.
In the Options tab you can see:
Rotate after placement, allows you to automatically rotate the column.
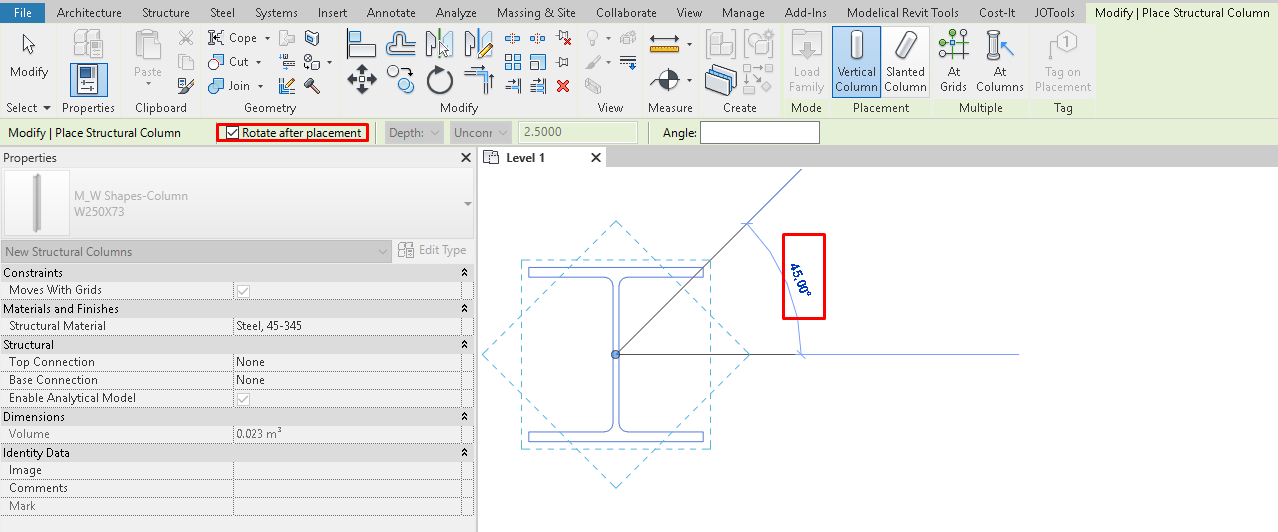
Keep in mind that this rotation is not "read" by any parameter. If we wanted the rotation to appear as a parameter and therefore to be able to control it by type, by instance, or in the tables,then we should generate a new family that would take it into account.
Depth/Height. Columns are defined by a Base Level and Top Level. Furthermore you have the parameters called Base Offset and Top Offset to introduce little variations on start and ending column levels. Columns are by default attached to the level assigned to its Base Level creation view. If we set Unconnected, to Depth or Height, this removes the reference to another level and in that case we can enter a quota.
Sometimes choosing these inputs can be a little confusing, another option is to create the columns first and check or modify the placing parameters as desired.
Room Bounding, indicates whether the column delimits rooms.
Considerations
Sometimes columns are created but cannot be seen: Verify that you are in the right view, with the appropriate Visibility and View Range Settings.
Concrete columns: Concrete columns have to be created from Level to Level, always corresponding the Base Level to the level in which we are modelling the column.
Steel columns: will be modeled according to their total height. Once they are validated by the calculator, contractor, manufacturer, etc. columns will be cut into segments.
Sometimes the pillars must reach a sloped roof, a staircase, etc. In these cases the column must be attached to the element to which it must reach. Once the item has been "attached" in the properties window several options are displayed to justify the "attachment".
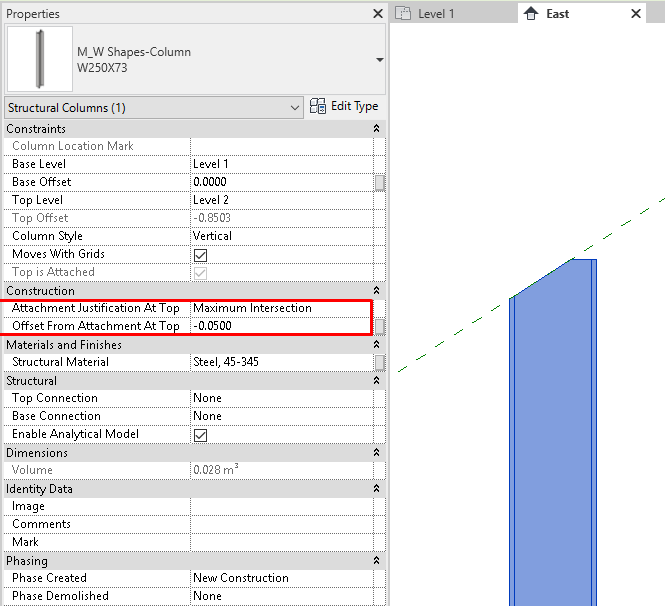
Properties
Type properties
In addition to the Identity Data common to all families in the same category, own parameters that could be added to that particular family will be displayed.
Under Identity Data, Keynote or Assembly Code can be assigned.
Instance properties
Constraints
Column Location: once a pillar has been placed on Grids, this parameter indicates the column’s coordinates on Grids. If it needs offset relative to the Grids, add the displacement dimension.
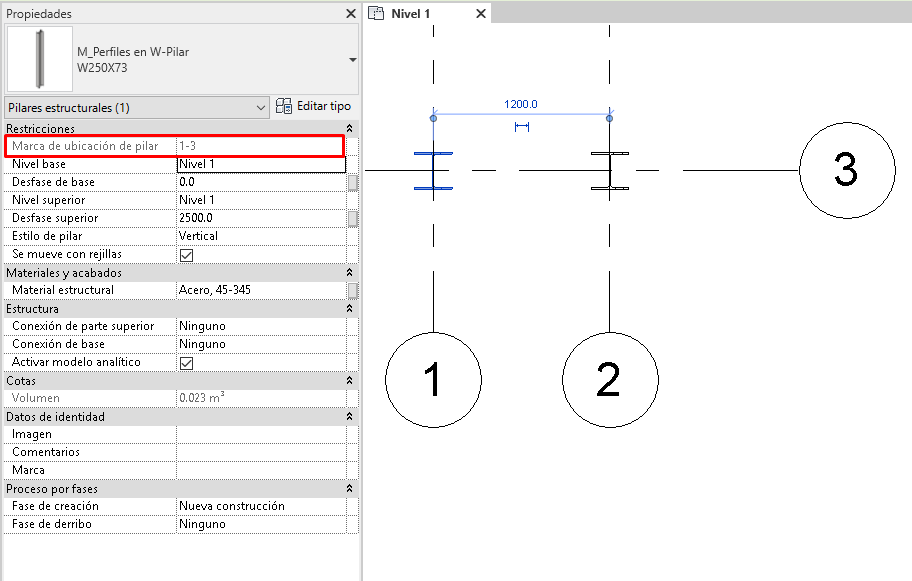
Base Level, column starting level.
Base Offset, starting correction dimension.
Top Level, column ending level.
Top Offset, ending correction dimension.
Column Style, indicates a vertical or sloped column.
Moves with Grids, Indicates that moving Grids implies moving their nested columns.
Room Bounding, Indicates whether the column delimits rooms.
Material and Finishes
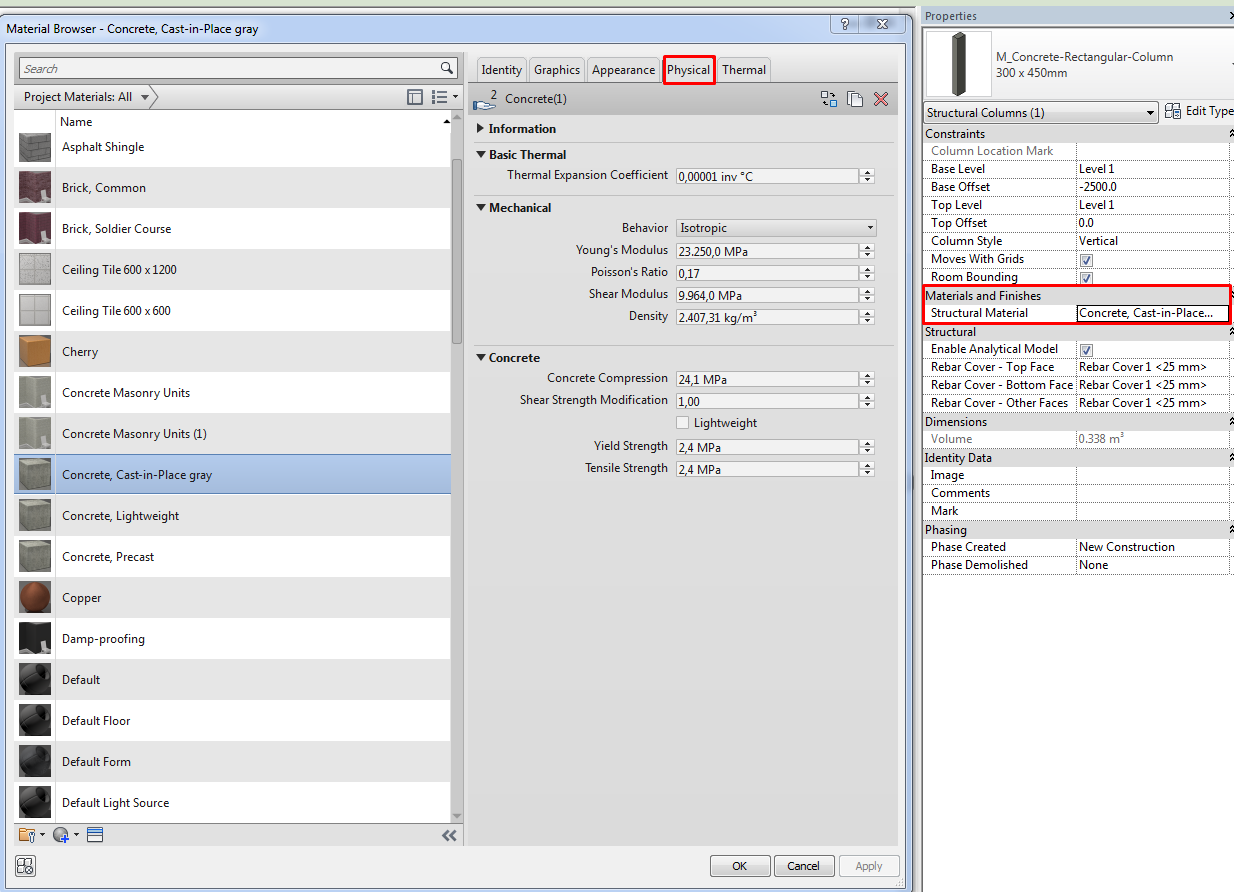
Structural Material: it is the material that will be used for quantity schedules, and to give certain graphic properties to those objects.
In addition, the Asset of physical properties of the material is the one that contains the physical parameters that take the analytical elements for the structural analysis.
Structural
Enable Analytical Model: If this option is selected the column is enabled in the analytical model. If the model is not to be used as an analytical model or is not going to be exported to a structural calculation software, NOT checking this option will considerably improve the handling of the file.
Rebar cover: Indicates rebar cover value for that column.
Identity Data
Image: An image can be linked.
Comments: Comments can be added.
Mark can be useful as alternative identifier to “Column Location”.
Comments and Marks become useful when sorting and controlling the columns of a model.
Phases
As in the rest of elements you can indicate Creation phase and Demolition phase.
Detail Level
It is recommended to think about the use of the lowest levels of detail: Coarse or Medium, especially when dealing with steel structure.
Column schedules
It is convenient to generate a column control schedule. With the alphanumeric data you can quickly control the correct placement of the pillars and their characteristics.
Tips & Tricks
- Remember that you can use the space bar to rotate the columns 90º by 90º.
- Columns of an entire Level can be copied using Copy and then Paste Aligned to Selected Levels. They can be copied to several Levels at a time.
Conclusion
This guideline explains how to model and edit Revit structural columns, taking into consideration the available options in terms of restrictions and attachments.