

Curtain walls
Operation in Revit
Curtain Walls Modelling
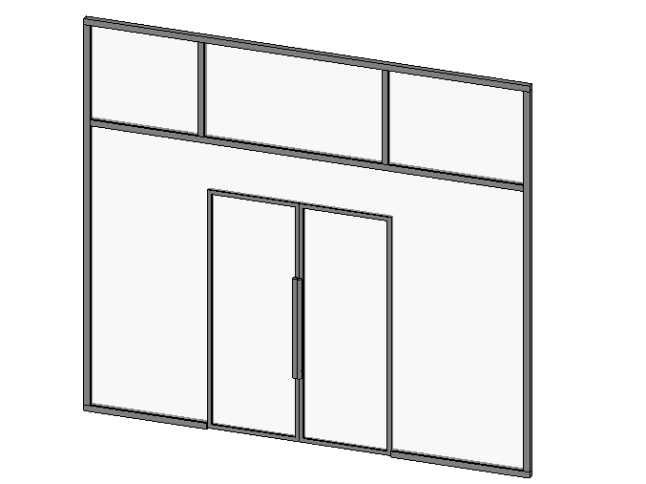
Objectives
- To create a new curtain wall, understanding all its properties.
Assumptions
- The user will use Revit, any version.
- The user has basic knowledge of modelling.
Description
- Walls are a system family, what means that they are created and modified only inside the project.
- You cannot create new wall families. Either way, you can make as many types as you need inside the existing system families: Curtain Walls.
- Curtain walls can be created in a custom and individualized way or according to types.
Procedure
Types
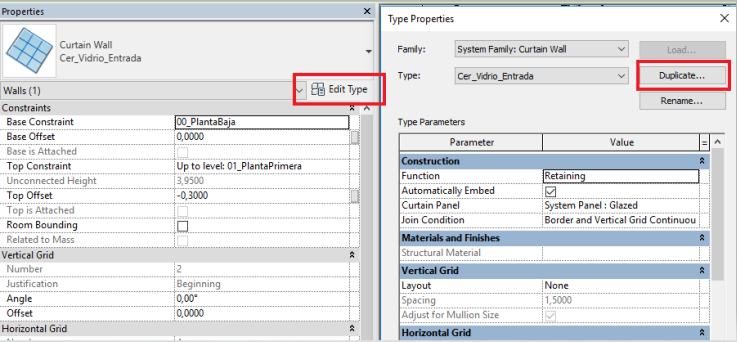
In the same way that a basic wall is created, the way to create a new curtain wall is selecting an existing one and duplicate it:
Curtain wall parameters
Each of the parameters for the geometric definition of a curtain wall is described below.
To summarize, what we have to indicate is what the curtain wall panel is made of, eg: Glass or metal sheet. Also the definition of the elements that make horizontal and vertical mullions and the distance between them, the grids.
Construction
- Function: Indicates the purpose of a wall: exterior, interior, retaining, foundation, soffit, or core-shaft. Function can be used in schedules and to create filters that simplify a model when exporting. When modelling a curtain wall, defining or not this parameter does not influence the model.
- Automatically embed: It is a Yes / No parameter that is activated by checking the box. It indicates whether the curtain wall is automatically embedded in the wall or not. It is advisable to have this option activated since it is not very logical to have a curtain wall inside another wall without embedding it
- Curtain panel: Sets the curtain wall panel family type for the curtain wall. In the drop-down of the possible panels to choose from, we find families of loadable panels and with the types of wall that are loaded in the project. To create a new curtain wall panel we will have to do it in the family editor or create a new type of wall with the desired layers and thickness in the project. There may be a curtain wall as a panel within another curtain wall, as in the list of possible panels we can select all types of walls, either basic, curtain walls or stacked walls.
- Join condition: Controls which mullions are divided at intersections in a curtain wall instance. In other words, at an intersection between horizontal and vertical mullions, it will be determined which of them will be continuous. In addition, a distinction can be made between Intermediate and border mullions. In this way, the entire frame of the curtain wall could be continuous and additionally, establish an intersection priority.
Vertical / Horizontal Grids
These are the lines that define the grid of the curtain wall. They are used to control the dimensions of the panels.
- Layout: Set an automatic vertical/horizontal layout for the curtain wall grid lines along a curtain wall. When set to a value other than None, Revit automatically adds vertical/horizontal grid lines to a curtain wall, following some rules.
- Fixed distance indicates that the curtain wall grids are placed with a spacing equal to the value specified for the vertical/horizontal spacing. If the spacing value is not a factor of the length of the wall, Revit makes the last panel of a smaller dimension. For example, if the wall is 5 meters long and the vertical spacing is 2 meters and the justification has been defined at the beginning of the wall, Revit starts the grids at the beginning, placing the first grid at 2 meters, the next at 4 meters, and up to 5 meters there would be a panel with the remaining length, in this case 1 meter. However, if the justification were at the centre, we would find two panels of 0.50 meters length at the ends, and two panels of 2 metres each in the intermediate spans.
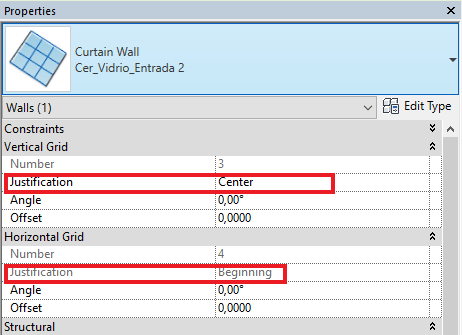
The justification is an instance parameter, therefore it is in the properties menu of each curtain wall, not within the type edition.
- Fixed number: In this case, the number of mullions that you want to have is fixed, and it is Revit itself who makes the calculation of the distance between grids in order to have the amount of grids required. In this way, with the same type of curtain wall, with a fixed number of 3 vertical mullions, we can have: grids every 3 meters if it is a 12 meters wall, or grids every 1 meter, if it is a wall of 4 meters.
- Maximum / minimum spacing:The maximum or minimum distance at which the mullions are desired is indicated here. Revit makes an automatic calculation of the distance between mullions based on this value. If we choose a maximum spacing, the grids will separate equidistantly from each other without exceeding the chosen value. In the case of choosing a minimum spacing, we will be sure that there is no panel with dimensions smaller than the specified.
- Spacing: In this parameter we will specify the distance of the spacing. It is activated when "Fixed distance" or "Maximum/minimum spacing" is set in "Design".
- Adjust for mullion size: Adjust the location of the grid lines according to the mullion dimensions to ensure that the curtain wall panels are of equal size whenever possible. Sometimes when mullions are placed, especially at the borders of curtain wall, uneven sized panels can result, even if the Design is set to Fixed Distance.
Vertical / horizontal Mullions
In this section it is specified if you want to use a default mullion in the quartering of the wall, so that they can be modeled automatically.
- Interior type: Specifies the family of mullion for vertical / horizontal interior mullions. You will be able to select those mullions that are loaded in the project. By default, Revit has the following families of mullions, which can be found in the families browser.
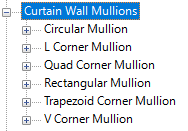
However, until types of these families are created, they can not be selected in the drop-down list.
To create a new type, you simply have to press the right button on top of the family, and select "New type".
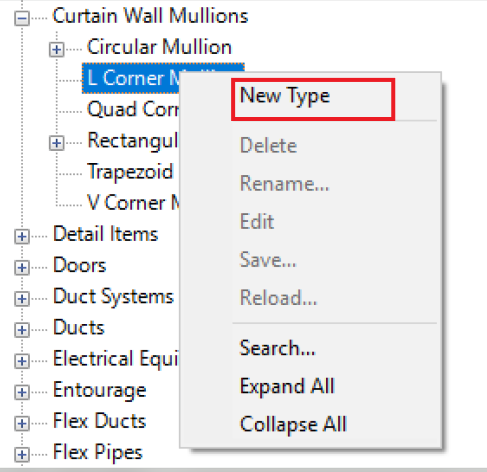
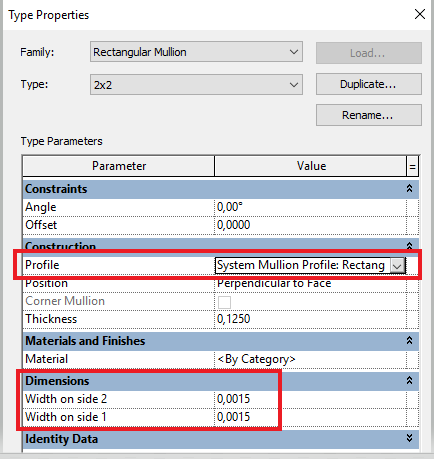
And you will have the option to load a specific profile, or put the dimensions of it. In the case of a rectangular profile family you will have: Width1 and Width2; for circular profile you will have: Radio; etc.
- Border 1 type: Specifies the mullion family for vertical / horizontal mullions at the bottom or left edge. The choice of one or the other would be in the same way as on the interior edge.
- Border 2 type: Specifies the mullion family for vertical / horizontal mullions at the top or right edge. The choice of one or the other would be in the same way as on the interior edge.
With these defined parameters, we will have created the curtain wall geometrically.
Other identity data parameters will be necessary in terms of project management, but not in terms of the geometrical definition of the curtain wall.
Custom walls
In the same way as in the procedure for the creation of types, to generate curtain walls in a custom way we also have to define the elements that make up the curtain wall: panels, grids and mullions.
- In the first place, a standard curtain wall must be modeled from the project families library.
- Once modeled, and from the options of the Architecture tab, you can edit its internal elements using the tools: "Curtain Grid" and "Mullion".
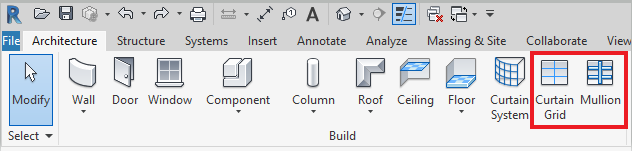
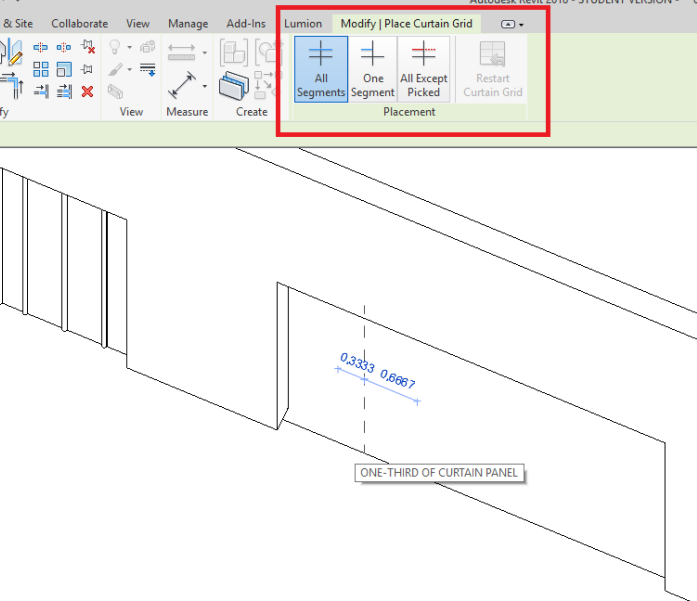
- With the tool "Curtain Grid" we will place grids defining custom distances between each of the grids, since they are placed manually. A second tab of options to place the grid will appear: In all segments, in a single segment, or in all segments except one, the one indicated. Once the grid is placed, it can be moved or modified manually whenever you want. When we generate curtain walls from types, the elements that make up the curtain wall appear pinned by default, however, when placed manually, they have free movement by default.
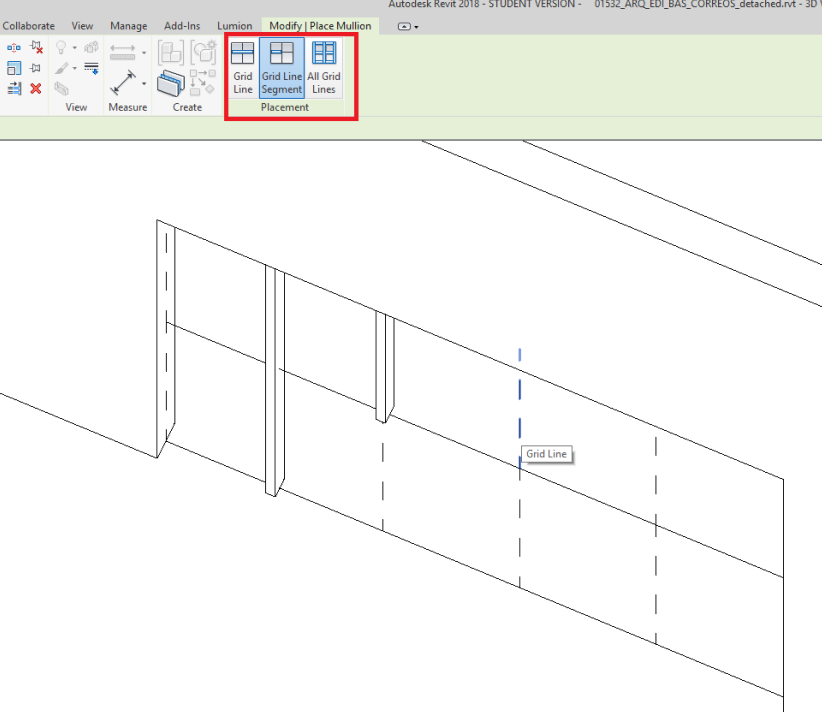
- With the tool "Mullion", once the grids are placed, we can place mullions on top of those grids. Important: without previously placing the grids, we will not be able to place mullions. A new menu of options for the Mullions will also appear: Place mullion in the whole line of the grid, only in one segment, or in all the grids that have been created. To select the type of mullion we want in the curtain wall, we will have to select one by one, or with multiple selection, and change the type of mullion in the properties palette. It doesn’t have to be all mullions of the same type, nor does the entire grid has to have a mullion. Once placed, we can modify or delete them. What we can not do is change its position, since this is defined by the position of the grid. Therefore, to change the position of a mullion, previously it will be necessary to select using the tabulator, the corresponding grid, and move it.
Tips&tricks
- It is important to know that each of the elements that define the curtain wall, can be selected separately: Panel, mullions and grids, as well as the curtain wall system itself. Therefore you have to be careful at the time of selecting, using the tab key to select precisely.
- By default, the elements that make up the curtain wall (panel, mullions and grids) appear pinned, but this block can be deactivated and the curtain wall can be individually modified without changing its type. Adding mullions, removing or editing panels, etc.
- Be careful. After a manual editing, the curtain wall geometric type parameters will not work efficiently and constant errors will occur and even certain panels or mullions will be automatically deleted. The best thing in this case, is to create a new wall, not to continue editing the previous one, thus avoiding errors.
Bottom-line
Curtain walls are a Revit system family. To generate the types, it is necessary to pay attention to the previously defined parameters. They consist of 3 elements that are, the panel, the grids of the mullions and the mullions themselves. Curtain walls can be created according to types and/or in a custom and individualized way.
Excelente alcance, gracias.