

Facades Modelling
Operation in Revit
Modelling of façade elements
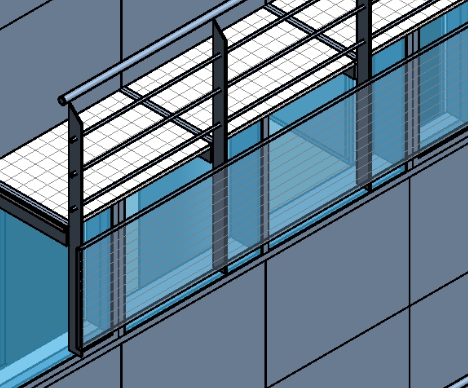
Objectives
- Fully understand the difference between windows and curtain walls in Revit.
- Get a global view about how a façade could be modelled.
Prerequisites
- User has basic skills in Revit Modelling.
- User has basic notions about façade systems.
Description
This guideline was created with the intention of describing the most commonly used elements in the modeling of façades, and in order to define methods and good practices that will help us in the development of this section of the project.
Firstly, we will establish some points to keep in mind before beginning to model.
- When working in collaborative mode, is important to keep a good use of worksets. Having a specific workset for façade elements will help the coordination between disciplines, and can also be useful when adjusting visibility settings.
- We should think previously which parameters we will need the modelled elements to have. When tags in sheets are needed, is a good practice think it in advance in order to add the parameters while modeling the elements.
- It is also important to think about the purpose of an element inside the model before creating it, because it will help us to decide what we model and how we do it. For example, if we have five windows with the same characteristics and in a high state of definition, is better to create a family of category window and then load it to the project and place it where need it. That will give us the advantage of making changes in the family for all the instances placed in the model at the same time. On the other hand, if those five windows have big differences in their characteristics, and their design is not very clear yet, will be more interesting for us modeling them as curtain walls, since they offer much greater flexibility when making changes, and work better with complex shapes that will be modified.
We will define some of the most important elements in façade modeling: curtain walls and windows.
Procedure
Curtain walls
Curtain walls are a special type of wall, so they are a system family, what means that they are created in the model and there are not loadable families. We can create and modify families of the elements that form the curtain walls: mullions and curtain panels, and then load them to the project.
Creating curtain walls
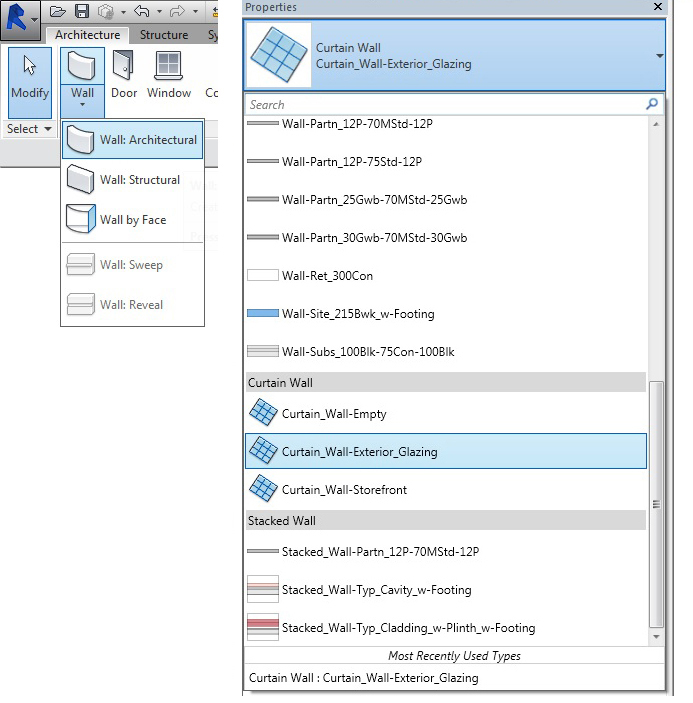
To create a curtain wall we should go Architecture > Wall, and we will find them with all the types of walls. We can choose in the type selector which type of curtain wall we want to create and then Revit will show us the same options as when creating a normal wall.

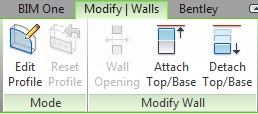
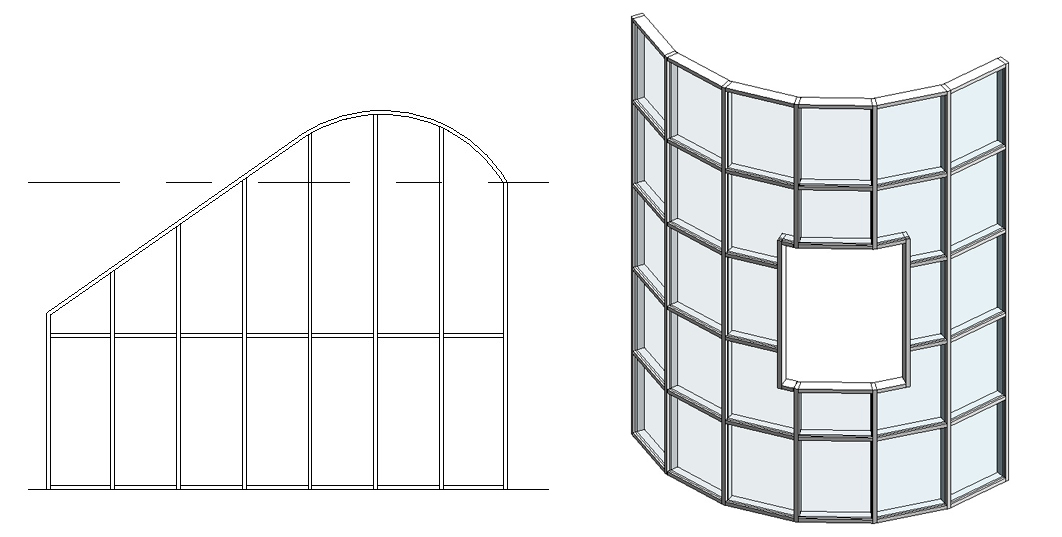
As with all walls, we can edit its profile, attach and detach its base or its top, or create a "wall opening".
Properties
Curtain walls type properties allow us to change its function, join condition, its mullions or its panels. To adjust these parameters, we have to click on "Edit Type" in the properties palette.
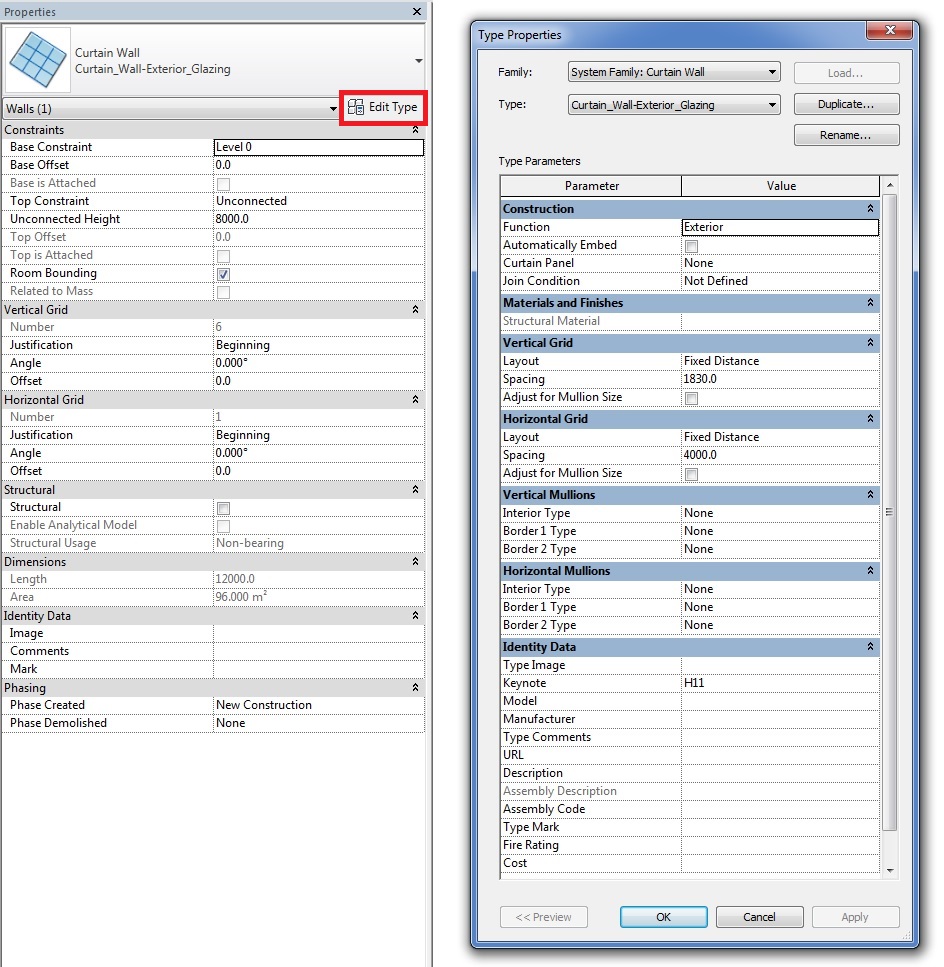
Type properties
Function
Exterior/interior
Automatically Embed
Indicates whether the curtain wall automatically embeds into the wall.
Curtain Panel
Sets the curtain panel family type by default for the wall.
Join Condition
Controls which mullions break at intersections and which remain continuous.
Grid Pattern Layout
Sets an automatic vertical/horizontal layout for curtain grid lines along the length of a curtain wall. When set to a value other than None, Revit automatically adds vertical/horizontal grid lines to a curtain wall.
Fixed Distance
The curtain grids will place at an exact distance that we will specify. If the spacing is not a factor of the wall's length, Revit will leave the extra space at one end of the wall, or the other, or both, as we indicate in its instance properties.
Fixed Number
We will indicate the number of interior grids we want (if we set 4, it will place 4 interior grids, so there will be 5 curtain panels), and Revit will automatically place them equally spaced.
Maximum Spacing
Indicates that the curtain grids are placed at intervals along the length of the curtain wall at a distance equal or smaller than the specified. Minimum spacing would act in the opposite way.
Grid Pattern Spacing
In modes "Fixed Distance" and "Maximum/Minimum Spacing" establishes the distance that will meet the restriction.
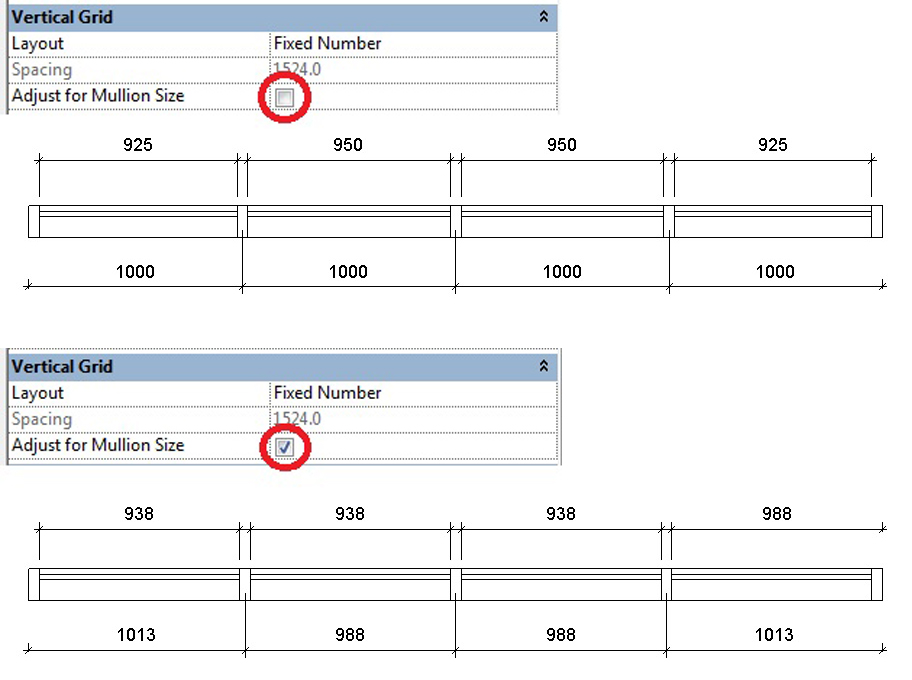
Adjust for mullion size
Adjusts the position of grid lines to ensure that curtain panels are of equal size. It is useful when curtain walls meet with borders of curtain hosts, because it can result in panels of unequal size.
Vertical / Horizontal Mullion
Sets the type of mullion that will be used by default in each position.
Instance properties
Through instance properties we can adjust certain parameters related with the position of each curtain wall individually. We will find some parameters equal to those who have the rest of the walls such as "constraints", concerning the position and the height associated with the project levels, "Structural", "Dimensions", "Identity Data" and "Phasing".
There are also some parameters specific for curtain walls concerning the position and layout of the grids, that we can adjust for each wall:
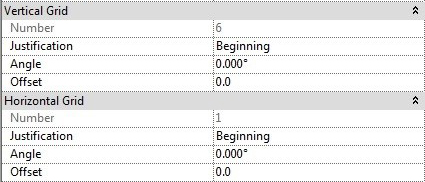
Number
It will appear enabled when the wall has the "Fixed Number" option.
Justification
Indicates from where will Revit start placing grids following the "Layout" option chosen in the type properties. We can choose "beginning", "end" or "center", always taking in consideration the sense in which the wall was modeled, and Revit will adjust the spacing between grids and its position along the length of the curtain wall.
This is an important setting when the spacing between grids leaves some extra space. If we have chosen "beginning", Revit will leave the extra space at the end of the curtain wall; it will happen the opposite if we have chosen "end"; and if we have chosen "center" it will split this extra space between both ends of the wall.
Angle
This option allows us to rotate the gridline to the specified angle. Valid values are between 89 and -89.
Offset
Starts grid placement at the specified distance from the justification point of the grids. For example, if Justification is specified as "End" and we enter an offset of 5, it will place the first grid following this instruction, and from this grid, then it will place the rest of the grids following the Layout criteria set in the type properties.
Editing grids
Despite the settings explained previously, we can edit the position of each grid individually.
When selecting a grid in a curtain wall it will appear pinned, what means that the position of the grid is set by the Layout options in the type properties. If we unpin it, we will be able to change its position by moving or aligning to other elements.
Adding grids
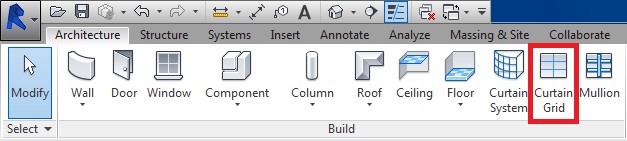
We can go to Architecture > Curtain Grid to add grids to a curtain wall in the position we want, that will always be parallel to one of the two grids sets in the wall. This tool allows adding grids to all segments, that will go from end to end of the wall, or grids in one segment, from grid to grid.
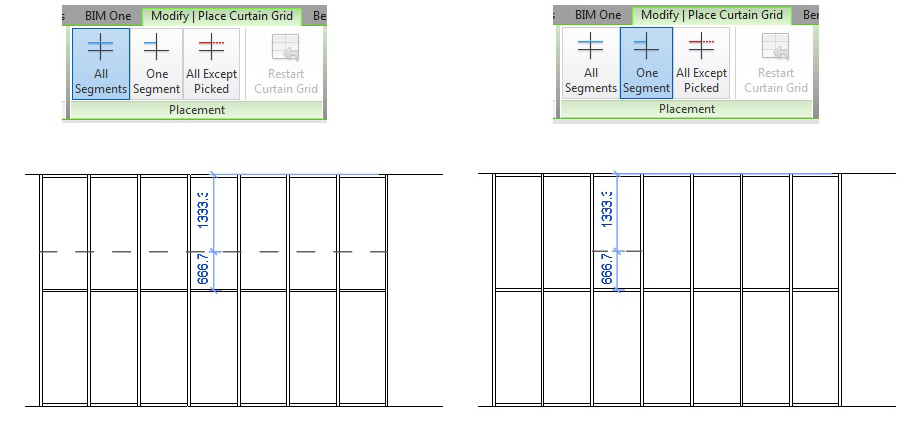
Removing grids
When selecting a grid, appears an option that allows adding and removing segments. This tool allows adding or removing segments of the selected grid.
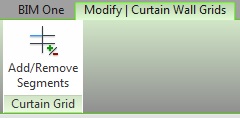
Mullions
Placing mullions
Mullions are elements that are always placed on curtain grids. To add a mullion on a grid, we will go to Architecture > Mullion. The tool allows us to place the mullion on a full grid line, on a single segment, or on all grids of the selected curtain wall.
If a mullion is added to an interior grid, it will place at the center of the grid. If the mullion is added to a border grid, it will be placed with its outer face aligned with the outer face of the wall.
When we select a mullion that has been placed automatically with the grid, it will appear pinned. If we want to edit the mullion, we have to unpin it. We can change its type, delete it, or edit its continuity in an intersection with the symbols that appear at both sides of the segment.
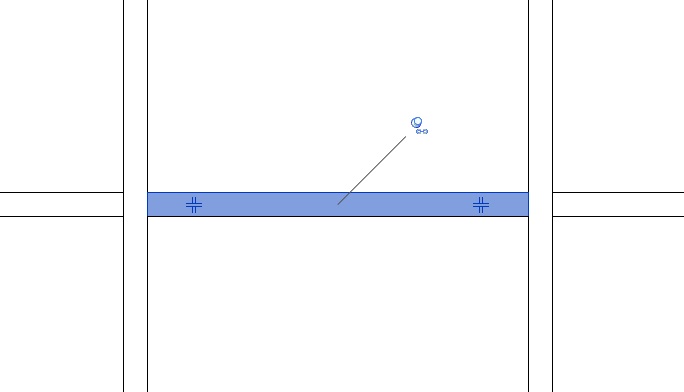
Corner mullions
There is a special type of mullions that solve the meetings of two curtain walls, these are the corner mullions. We can select the corner mullion type in the border mullions on the type properties of the curtain wall, or we can select the border mullion in the model and change its type. Revit will show us a warning telling us that the corner mullion overlaps the mullion placed on the other curtain wall, and we will select delete element in order to have a single mullion solving the corner.
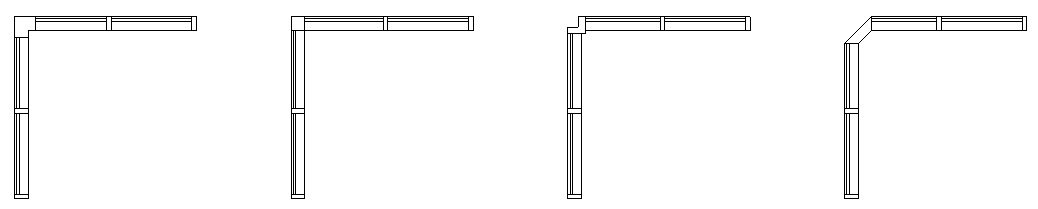
Mullion properties
Mullion type properties present a series of parameters common to all types of mullions, and other parameters that depend on the type of profile:
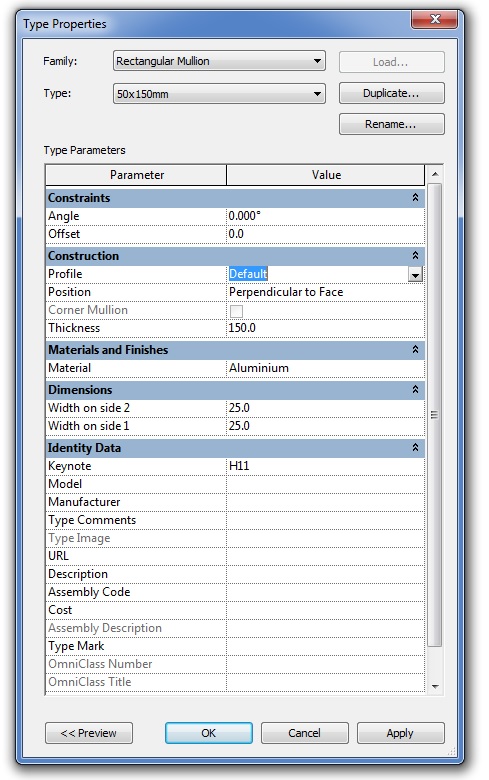
Material
Mullion´s material.
Angle
Rotates the mullion profile. Unable for corner mullions and circle mullions.
Offset
Sets the offset from the panels.
Profile
Sets a profile for the mullion.
Position
Rotates the mullion profile. Normal to Face is the usual condition. Parallel to Ground is appropriate for sloped curtain panels, such as in sloped glazing.
Creating mullions
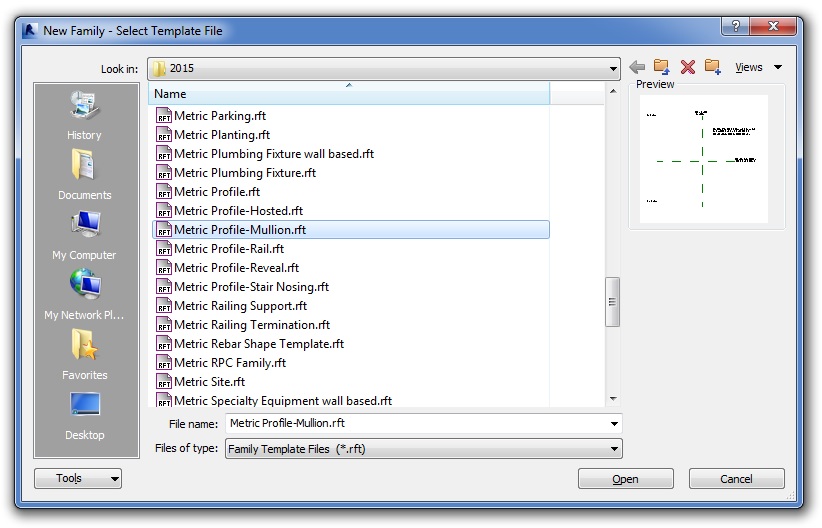
We can create new mullion types by creating mullion profiles. Mullions are based in profiles, in some cases they are parametric. To create those profiles we use the family "Metric Profile-Mullion".
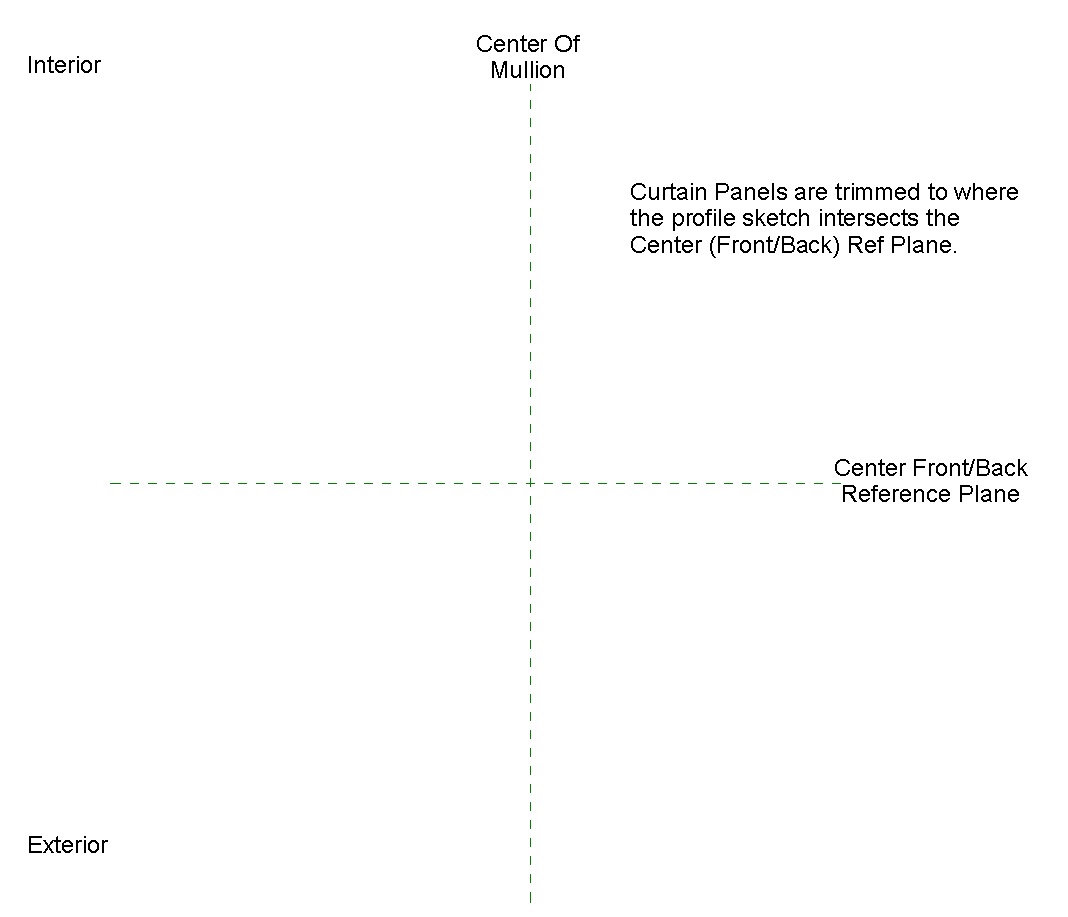
Once in the family, we will see two axes that indicate one the center of the mullion, and the other the line of placement of the curtain wall, the line where the panel will be placed. The curtain panel will go until the profile intersects with this axis.
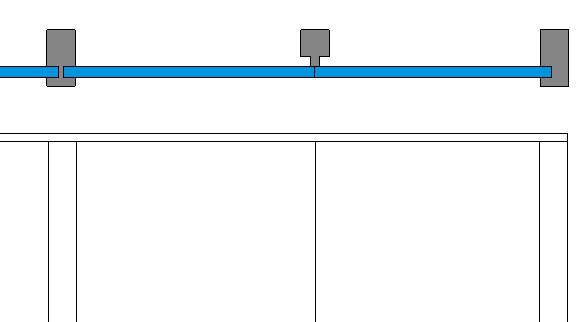
In order to avoid too complicated profiles trying to increase accuracy, we can load detail items and configure their visibility so they appear only when the detail level is set in fine, for example. These detail items will only appear when the cut plane of the view cuts the mullion.
After creating the profile, we will load it in the project. Within the project we can select any of the existing mullions or select a mullion type in the project browser. By duplicating a mullion type we can create a new mullion and then assign to it the profile we have created.
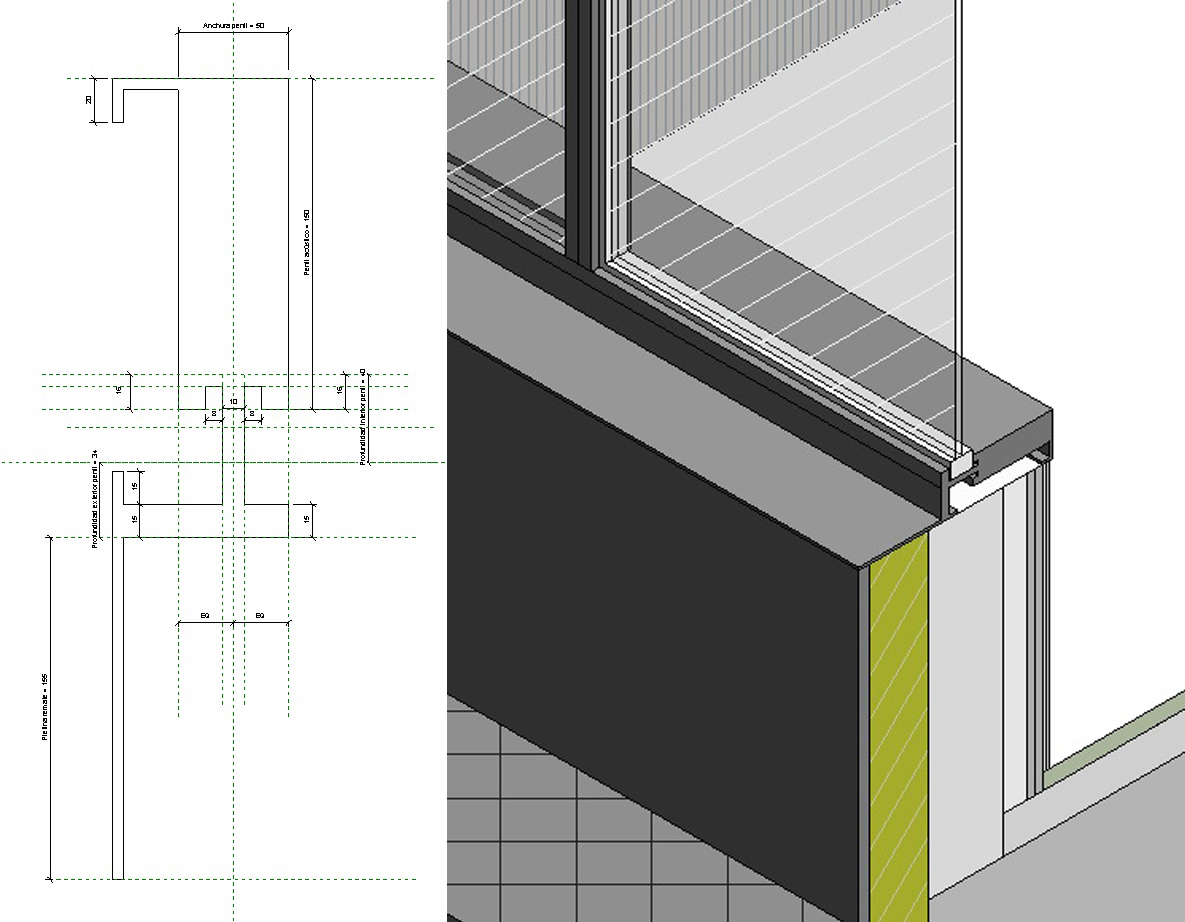
Curtain panels
Editing curtain panels
Curtain panels can be changed by any type of wall. To do so, we select the curtain panel, and choose the type of wall or curtain panel in the type selector.
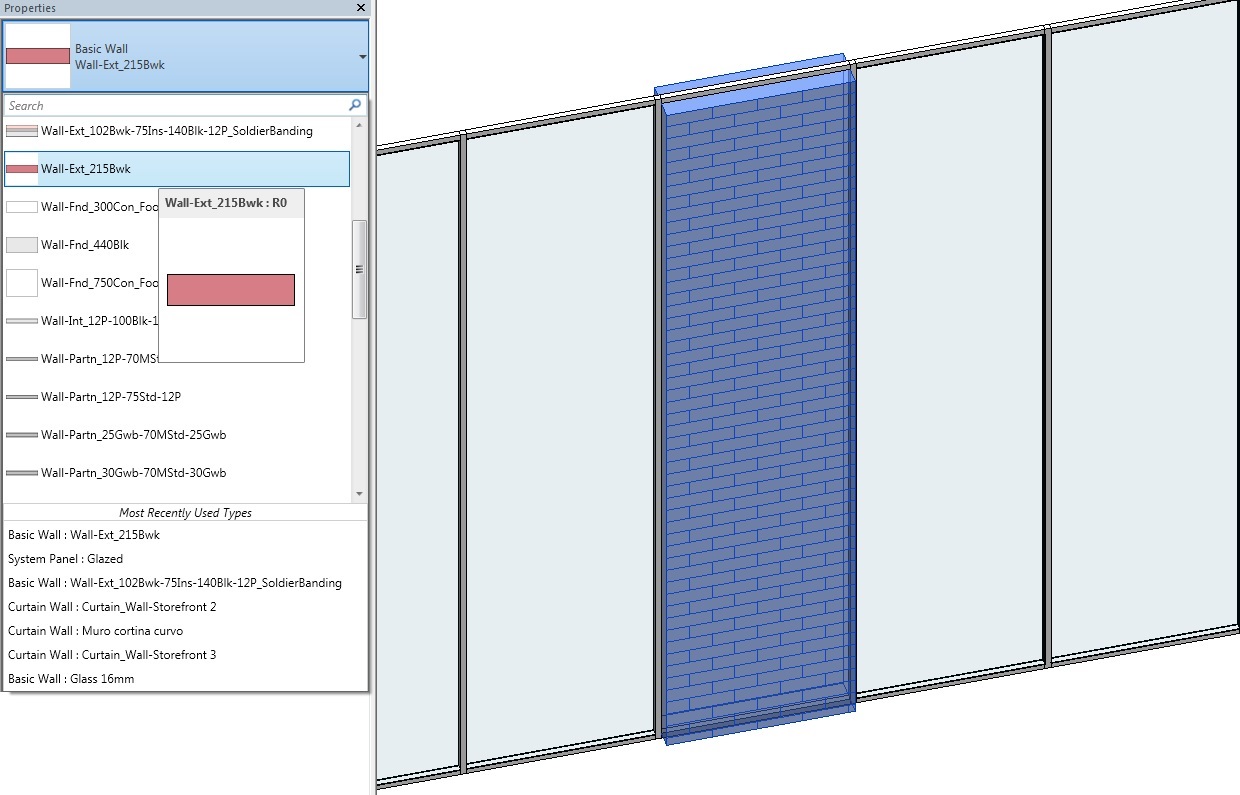
When we place a wall as curtain panel, maintains some of its properties. For example, it is still "host" for doors, windows or openings. But, when curtain grids change its position, the panel (in this case the wall) will follow the movement of the grids, but the hosted element will not change its position and will not follow it host. Having a wall as a curtain panel offers the advantage that walls can have a curve as location line, and they will adapt it shape, but curtain panels will not adapt and will maintain its shape from grid to grid in a straight line.
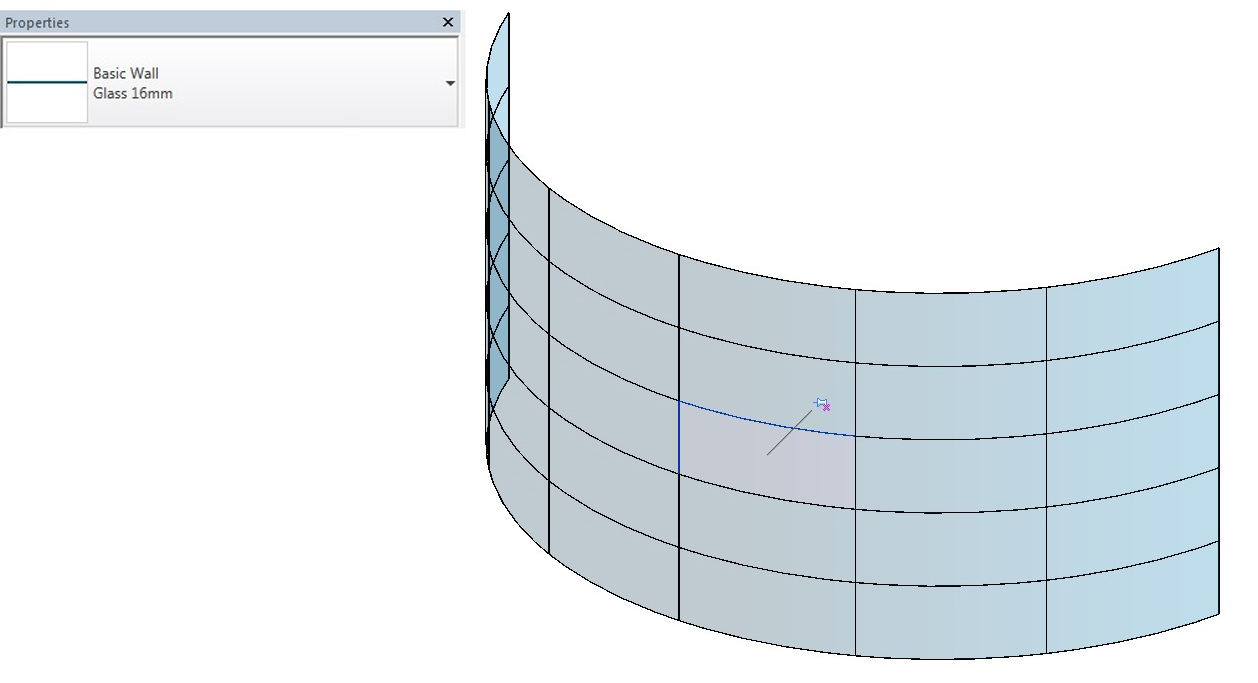
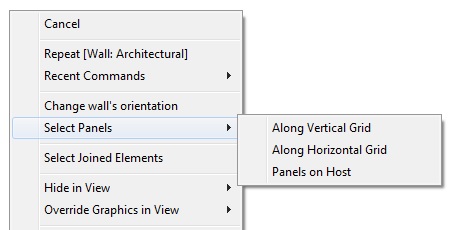
To select several curtain panels quickly, we can rightclick in the panel when it is selected, and will appear the option "Select Panels". With this tool we can select all the curtain panels along the horizontal grid, along the vertical grid, or all the panels of the wall.
Creating curtain panels
Curtain panels are a loadable family. To create new curtain panels we will use the family "Metric Curtain Wall Panel".
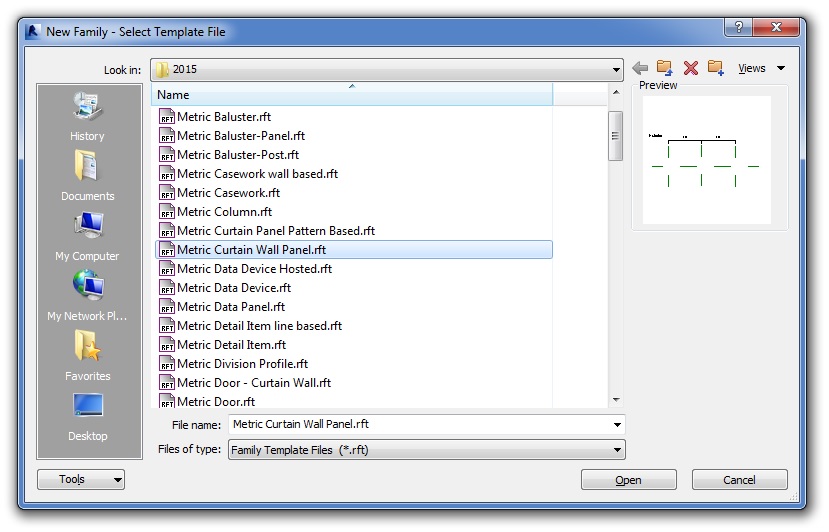
Once in the family, being in the exterior elevation, we will see the reference planes that mark the limits of the curtain panel. These plans will be adapted to the position of the panel in the curtain wall.
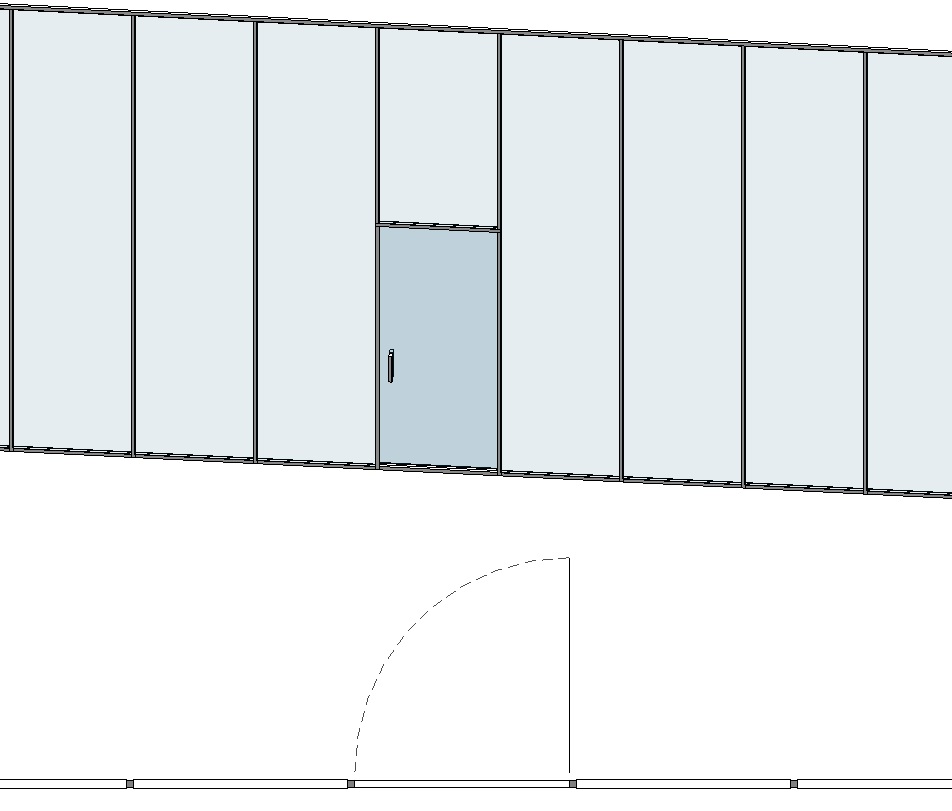
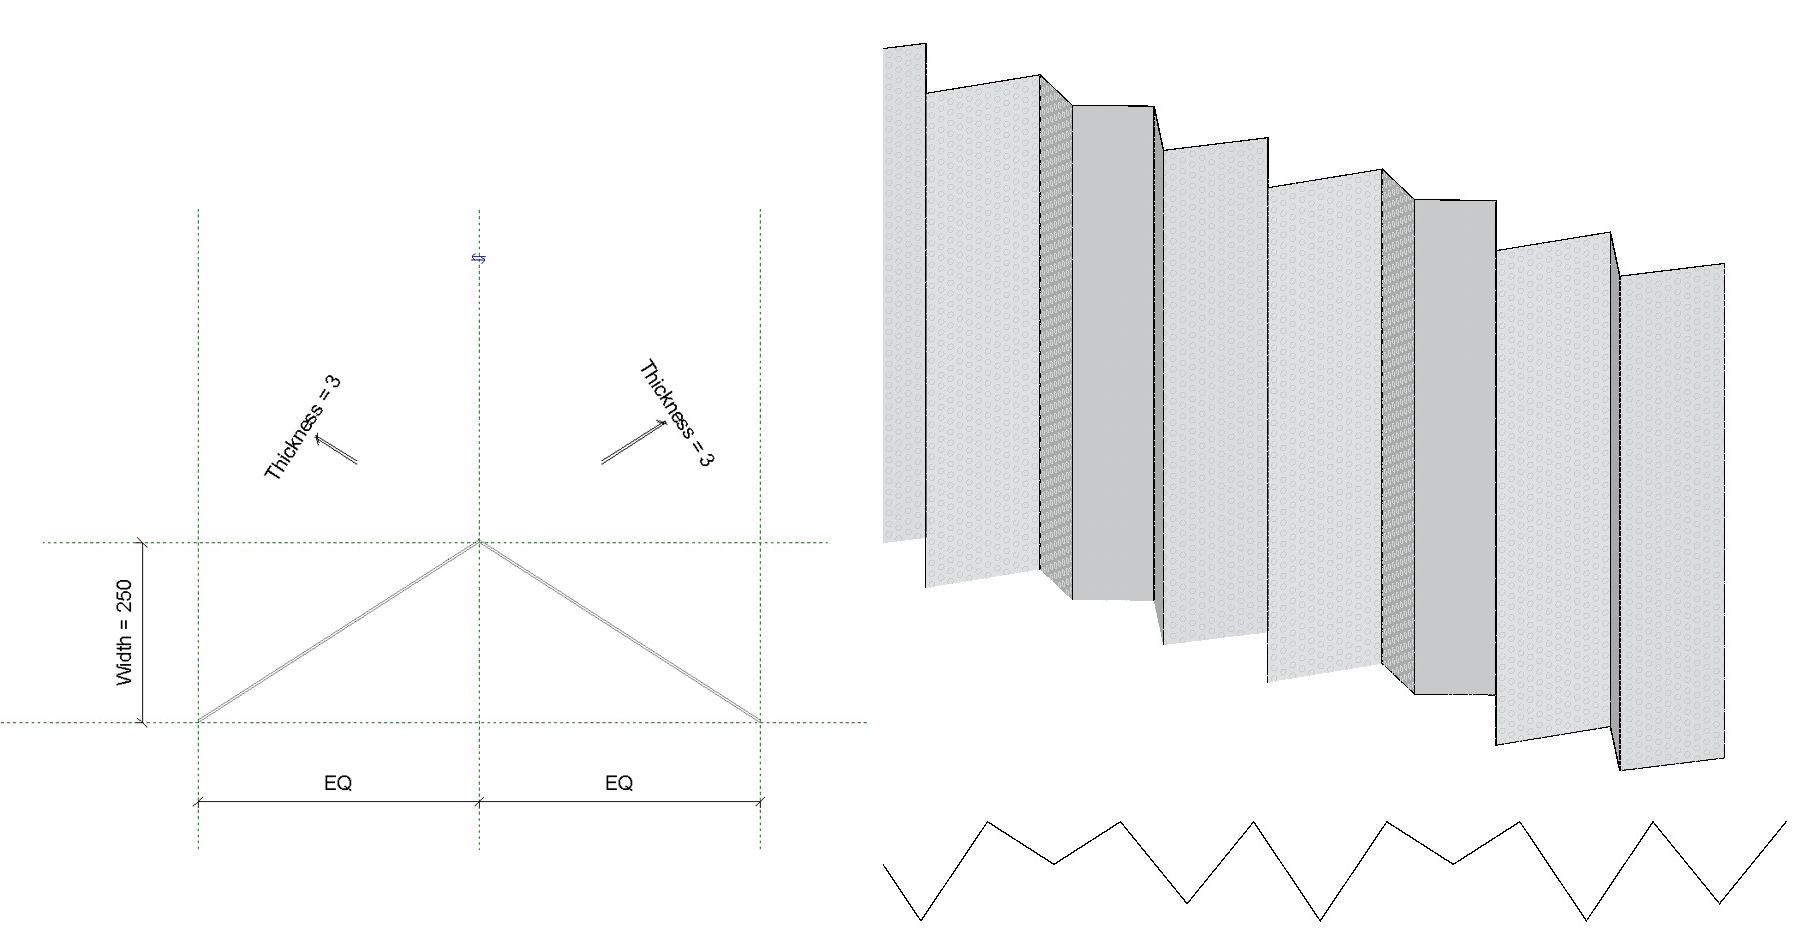
Curtain panel families offer great flexibility to create different shapes. We can create panels that change it shape depending on its dimensions in the curtain wall. One of the most common curtain panels are curtain wall doors.
Special cases
Sloped Glazing
Sloped Glazing is a type of roof that can have some of the properties of curtain walls. It can be created in the same way as any other roof, "by footprint", "by extrusion" or "by face".
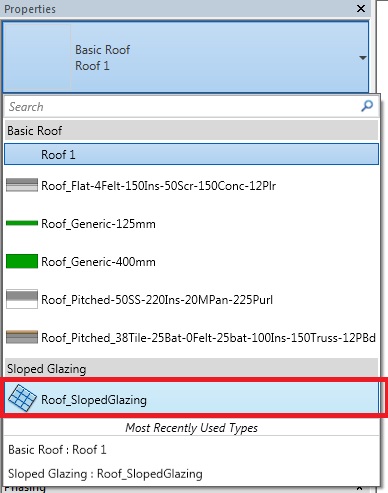
These roofs have the same type properties as curtain walls, therefore we can add a grid layout, and the type of mullions and panels it will have. Once created we can add or remove grids, editing its mullions or curtain panels, as we will do with any other curtain wall.
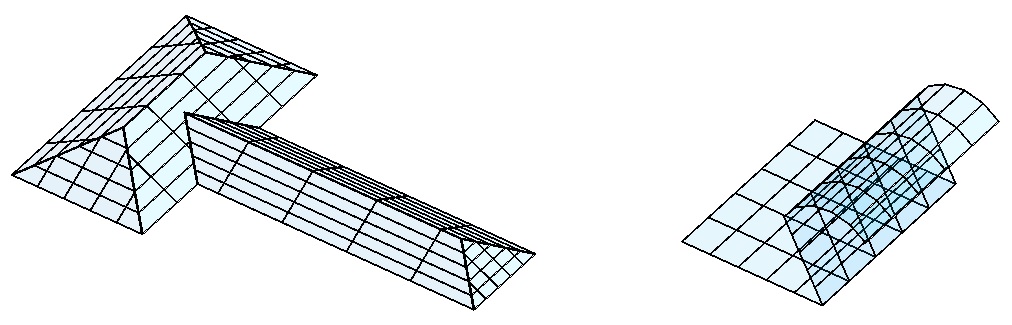
They do not automatically embedded in a roof as curtain walls do. It is necessary to create the opening first in case you are designing a skylight.
Curtain System
A curtain system is a component that comprises panels, curtain grids, and mullions. It usually does not have a rectangular shape.
Curtain systems can be created by selecting element faces. After creating it, we can add curtain grids and mullions using the same technique as curtain walls. Curtain systems cannot edit its profile because they adapt it shape to the face they are related with. Curtain systems do not admit normal walls as curtain panels.

Curtain system type properties are very similar to curtain wall properties. We find some differences in the instance properties, because curtain systems cannot set its position related with the project levels as curtain walls do, their position is defined by the face they are created from.
Metric curtain panel pattern based
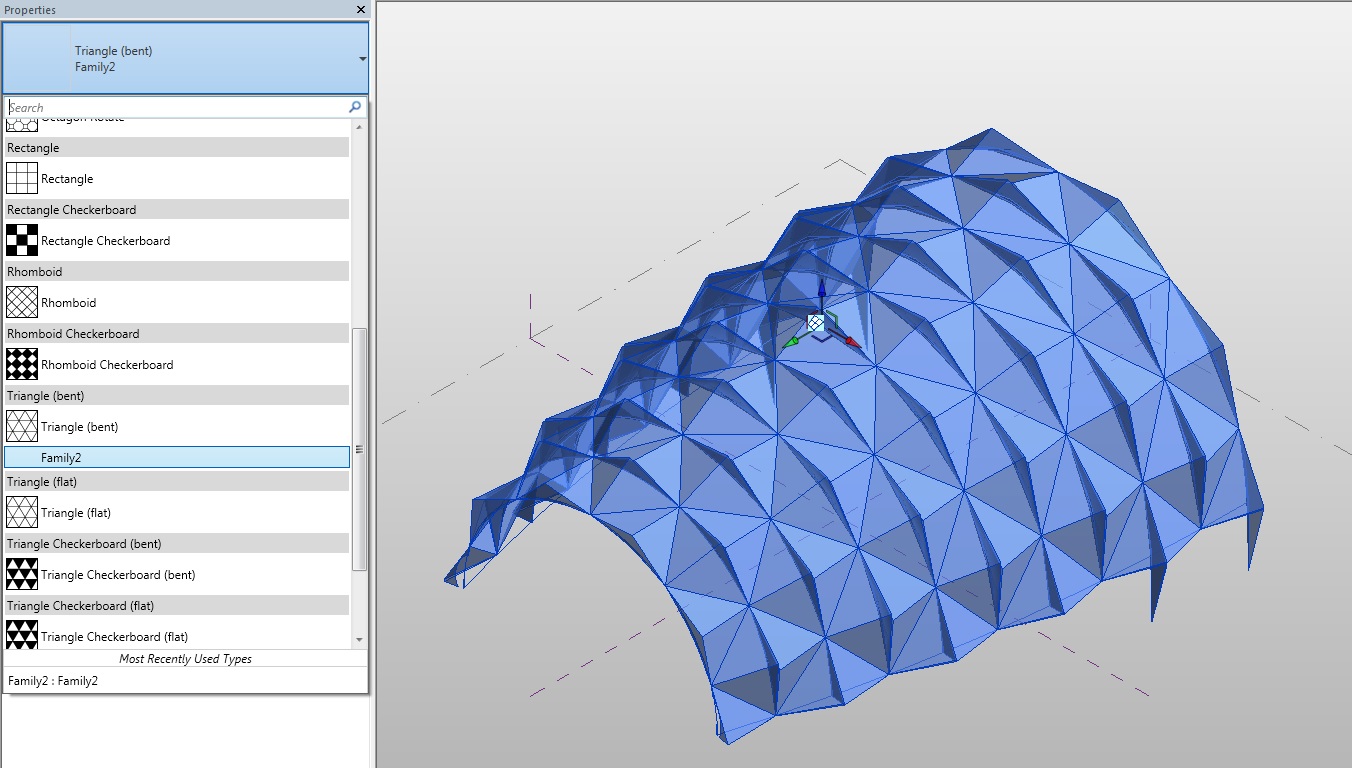
Metric curtain panel pattern based is a special family of curtain wall panel. This type of panels are used for divisions of masses that have a pattern. With the family "Conceptual mass" we can create masses and then assign the shape a pattern.
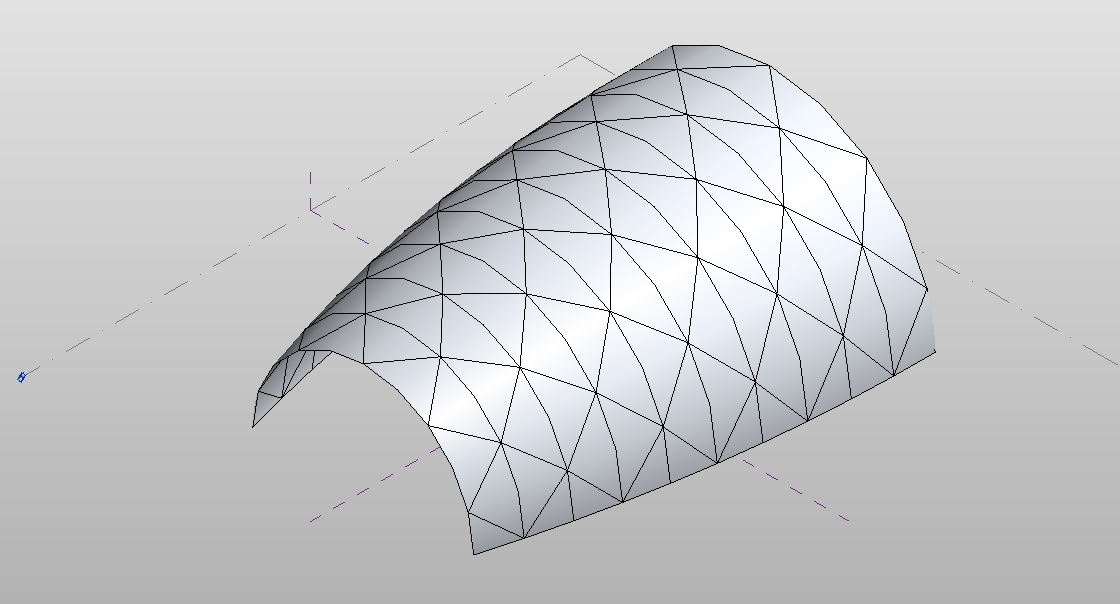
With the family "Metric Curtain Panel Pattern Based" we will be able to place panels in the mass as it were a curtain wall.
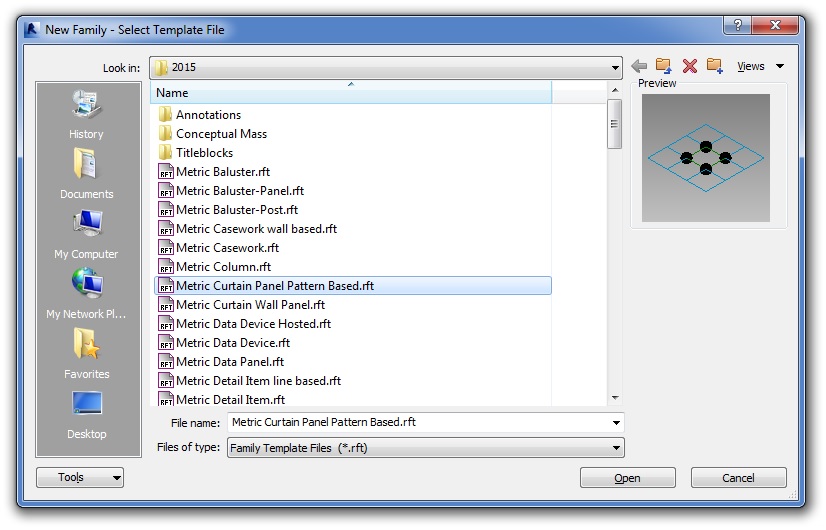
Once in the family we can change the pattern of the panel by selecting the blue grid and changing its type in the type selector.
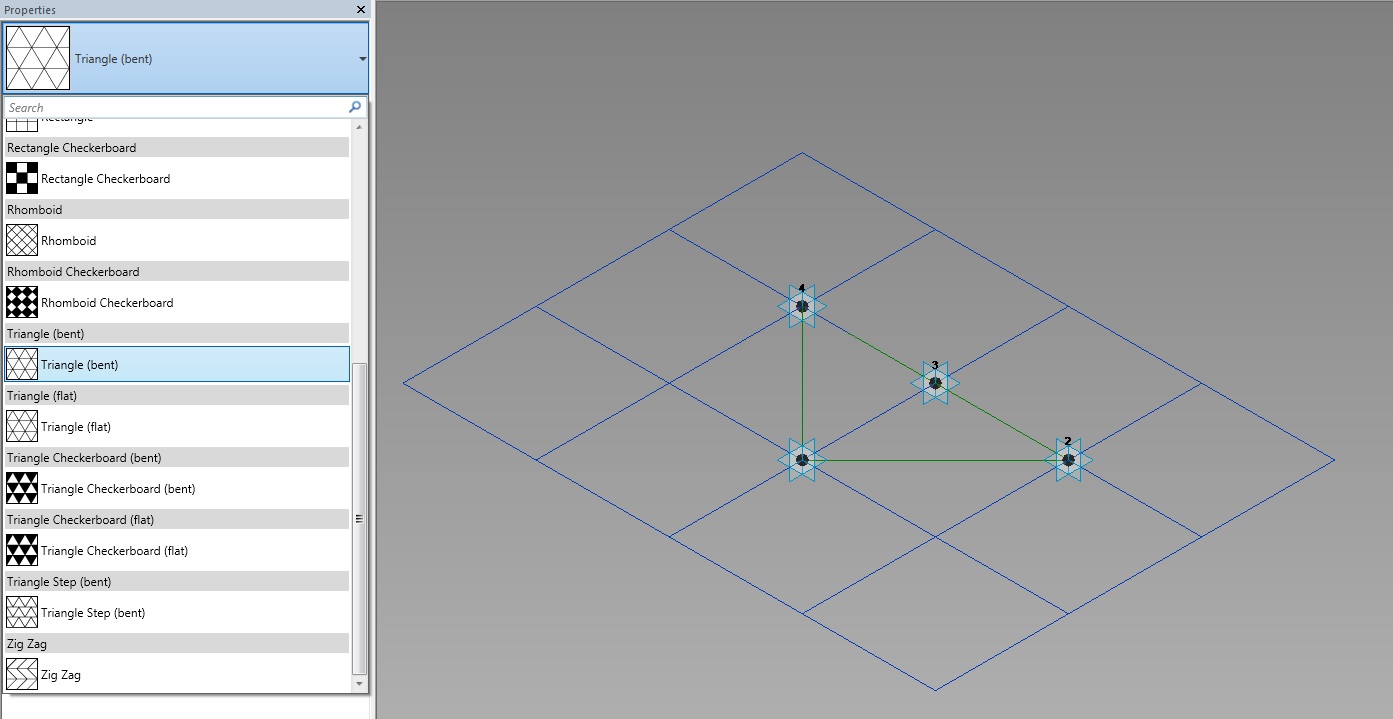
Using adaptative points and adaptative lines we can create solid forms that will create the shape of the curtain panel.
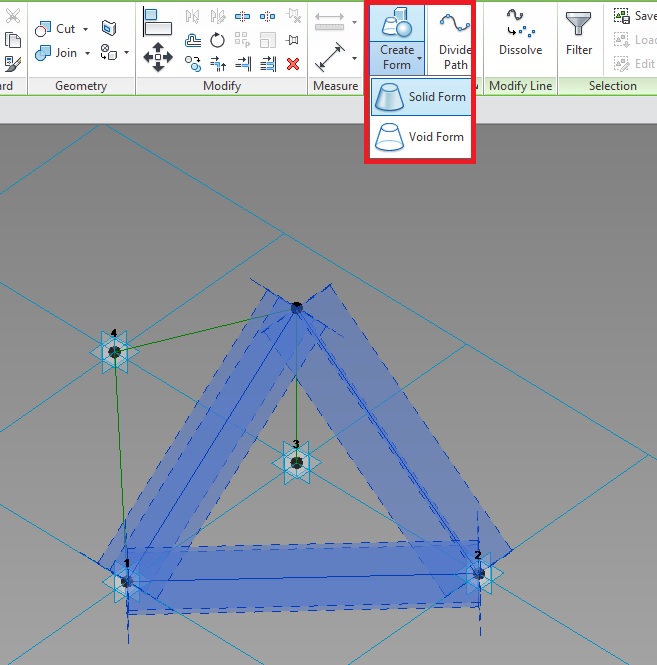
Once we have the panel, we will load it into the mass family. We will then change the pattern of the mass to the family of panel we have just created that will appear with the other pattern types.
Curtain walls in schedules
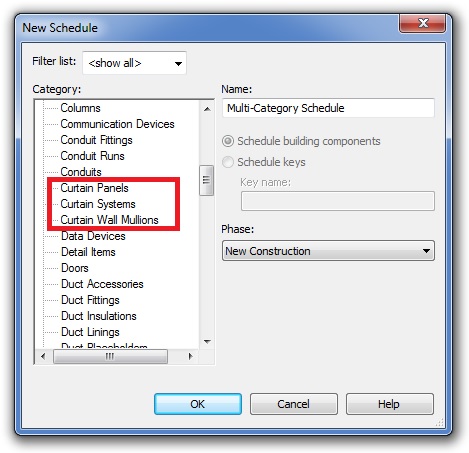
When we want to create a schedule of curtain walls we find out that there is not an specific category of curtain walls for schedules. We can do schedules for curtain panels, as well as for mullions or curtain systems, but if we want to see curtain walls in a schedule we have to do a schedule of walls.
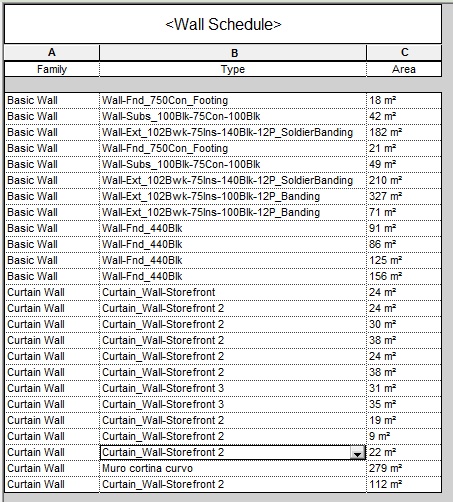
If we want a schedule only for curtain walls, we will find some problems because it is not possible to filter by family or type. A good way of filtering elements could be by the typemark, comments, or other identity parameters. Anyway if we include the field of family and we sort the elements using it, all the curtain walls will appear together in the schedule, so it will be easier to read.
Other option could be doing two different schedules, one with mullions and the other with curtain panels.
Windows
Windows are a loadable family that behaves as hosted elements, it means that they need a host, usually walls, but also roofs for skylights.
Placing windows
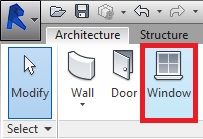
For placing windows we will use Architecture > Window, then we can select the type of window, and specify its location on the host element.
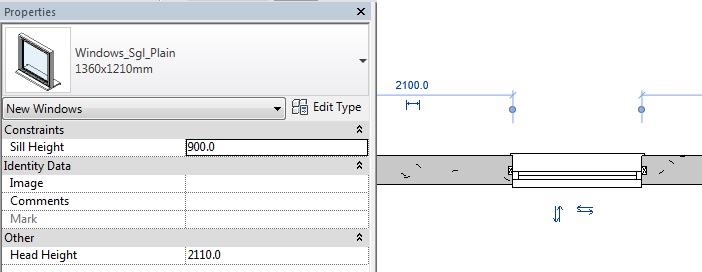
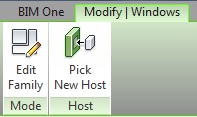
Once the window is located in the wall, its area will be automatically subtracted from the area of the wall. Windows cannot be out of a host. We can change its position in the host, or we can select a new host by clicking "Pick New Host" with the window selected.
Window type properties
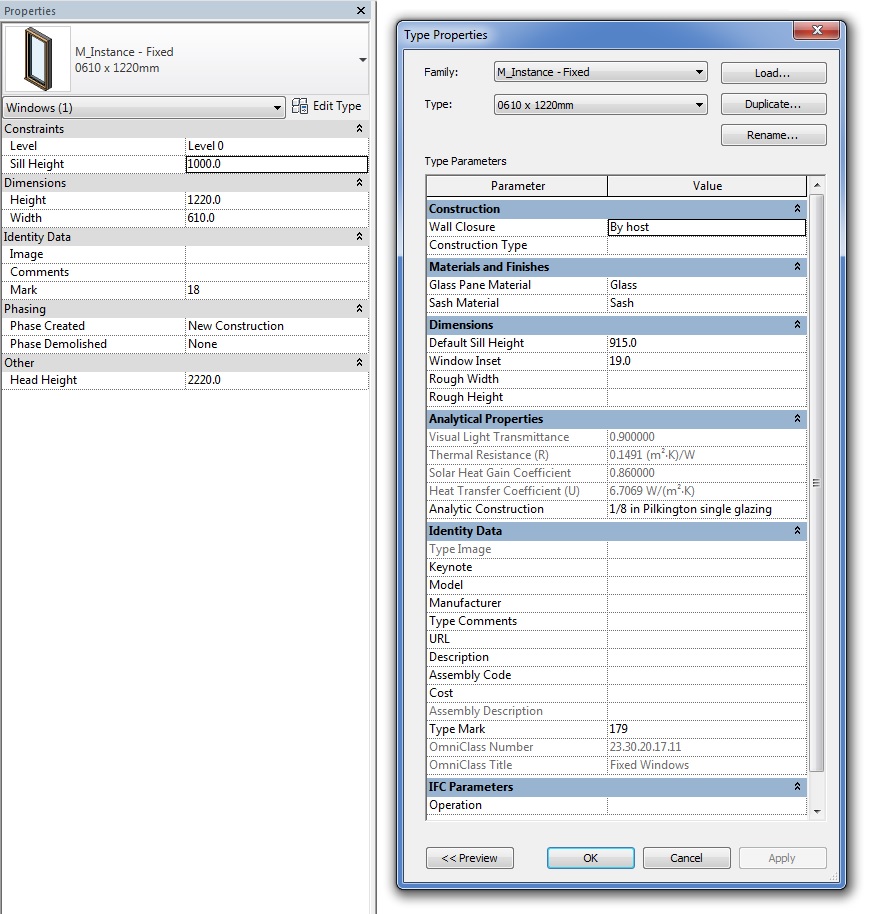
Window properties allow us to change its materials, dimensions or its position.
Construction
- Wall Closure: This parameter sets the layer wrapping around the window. It overrides any settings in the host.
- Construction Type: The type of construction for the window.
Materials and Finishes
- Glass Panel Material: The material for the glass panes in the window.
- Sash Material: The material for the window sash.
Dimensions
- Depending on the family of the window there will be different parameters. The most common are:
- Height: The height of the opening of the window (in the case of the picture is an instance parameter).
- Default Sill Height: The height of the bottom of the window above the level. This parameter can be changed in the instance properties
- Width: The width of the window (in the case of the picture is an instance parameter).
- Window Inset: The inset of the window into the wall.
- Rough Height: The height of the rough opening for the window. Can be scheduled or exported.
- Rough Width: The width of the rough opening for the window. Can be scheduled or exported.
Identity Data
Parameters that give information about the type of window, the cost, the manufacturer, a description, the type mark, or some comments.
IFC Parameters
Classification of the window for exporting to IFC.
Window instance properties
Constraints
- Level: Indicates the level on which the window is placed.
- Sill Height: Specifies the height of the sill in relation to the level on which this instance is placed.
Identity Data
- Comments: Comments done to the instance. Once entered, the comment can be selected for other instances of elements in the same category, regardless of type or family.
- Mark: Enumerates instances within a category while we are creating them.
- Phasing: Parameters related with the phase of the instances.
Other
- Head Height: Specifies the height of the top of the instance in relation to the level on which the instance is placed.
Creating Window Families
As we mentioned above, windows are a category of external families, that can be created and loaded into the project. When creating a new window we can use several family templates:
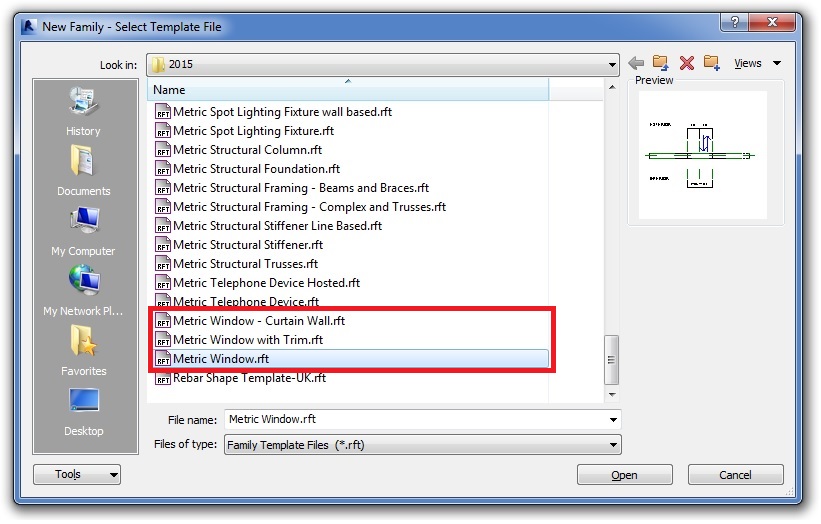
The family template "Metric Window - Curtain Wall", offers a template to create a curtain panel that behaves as a window. It is very similar to other families of curtain panels. It has some axis that mark the dimensions of the panel that then will change in the curtain wall.
Templates "Metric Window" and "Metric Window with Trim" differ in that the second one has a sweep in the exterior side of the wall, as a casing. Anyway, we can create this sweep with the other template too.
For this example we will use the family "Metric Window". The template of the family already has an opening cut in the wall. We can modify or delete this opening if we want.
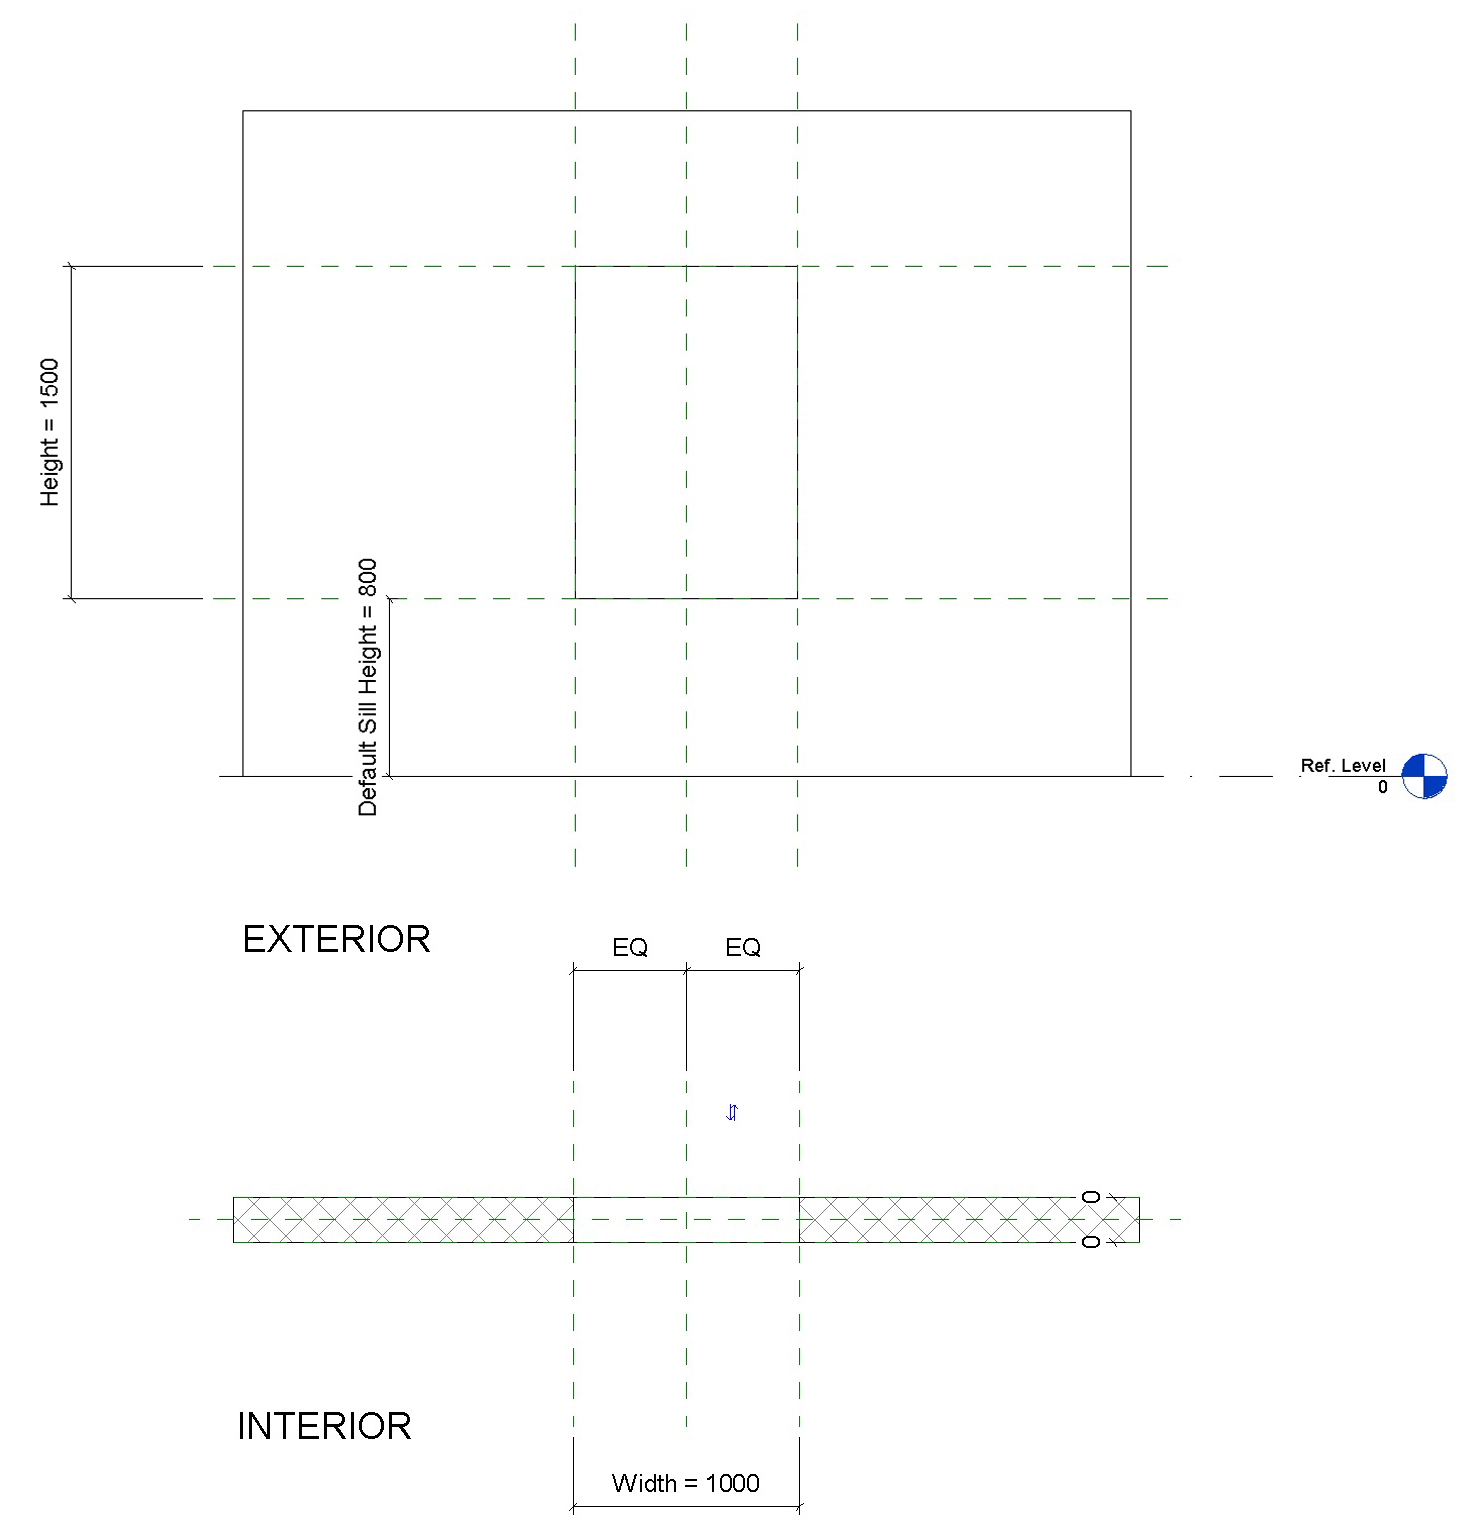
The family template has some type parameters already created and related to dimensions that cannot be edited or deleted. We can use these parameters together with new ones that we can create, to establish different types within the same family that will adapt to different dimensions. With this method we avoid having too much families for different dimensions.
When creating a window is important a good use of reference planes within the family. If the elements that we model are not accurately constrained to the reference planes, the window will suffer deformations when changing its size.
We can add flip controls to make easier the adjustment of the position of the window. To do that, located in a plan view, we go to Create > Control. It will show us different control options.

When creating complicated profiles with a high degree of definition, it is a good practice editing their visibility according to the views and the level of detail, either adding detail items.
Windows in schedules
As a category, we can make schedules of windows, where only windows will appear. Within the schedule, we can add dimension or identity parameters, as needed.
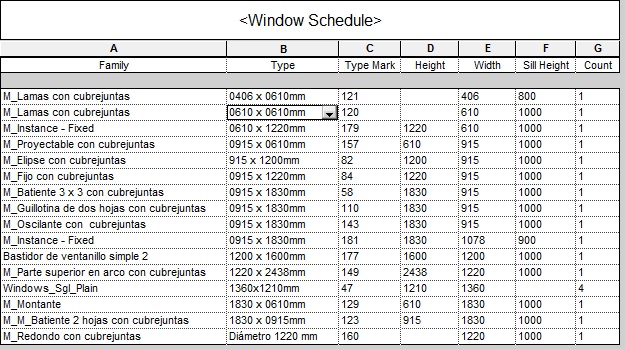
Window graphical schedule
A quick way of developing a graphical schedule in a project is by using legend views. We can create these views from View > Legends > Legend. Then we will name it and choose a scale for the view. After that, from the project browser, in the drop-down of families, we can drag the window type to the view.
We can later modify the family by choosing other family type, the view (plan, elevation or section), and the host length in plan views.
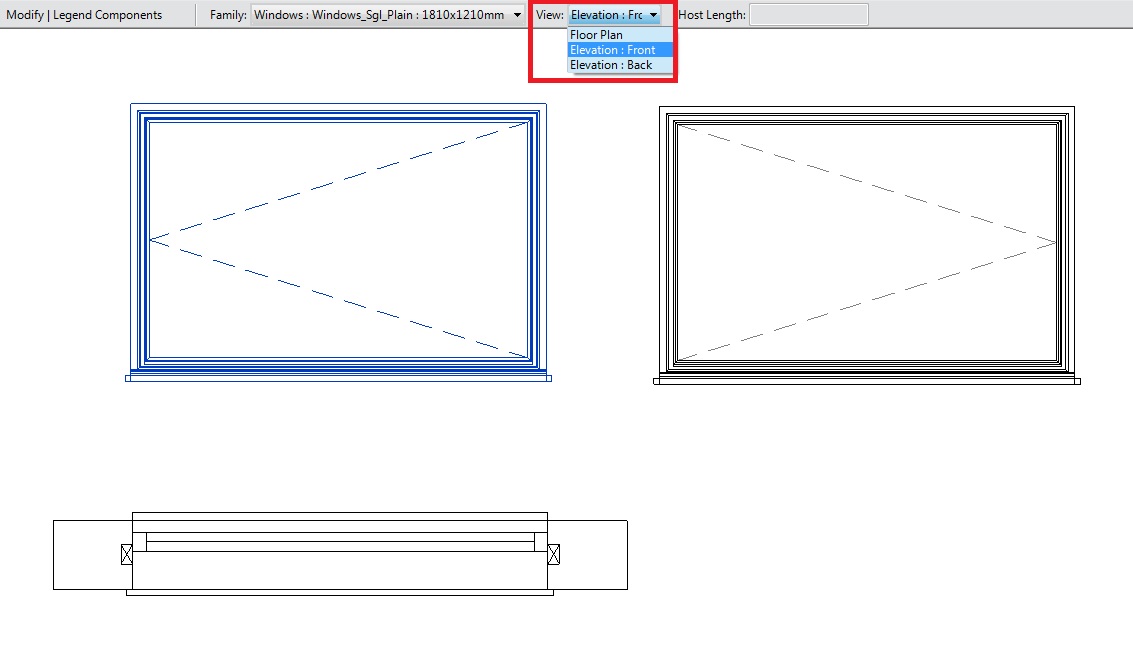
Within these views we can place dimensions and make annotations, with the exception of tags.
This type of views, also have the advantage that can appear in several sheets at the same time, so we do not have to duplicate them. We can add several types of windows to the same legend view, or we can make different legends, one for each type of window.
Choosing Curtain Walls vs Windows
When it comes to modeling façade elements, we can doubt about choosing curtain walls or windows. It will depend on the element and what we want to get from it. Below we expose some of the advantages of each element:
Curtain walls
- Curtain walls are much easier to edit than windows. It is much more comfortable adding or removing mullions and modifying curtain panels than changing the family of a window or creating a new one. They are very useful for fast design exploration.
- They adapt their shape much better to curved surfaces than windows. If we want to adapt a window to a curve shape, we will have to modify the family by changing the shape of all the elements modeled inside it. Then we have to reload it to the project and try if it fits correctly to the shape we want, if we want to change it we will have to repeat the process again. Curtain walls adapt much easier since they are modified inside the project and they can be created from faces of curved elements.
- Curtain walls do not depend on any element, however windows depend on its host element. Therefore, curtain walls are easier to adapt to a position.
- Curtain walls are easier to work with. Creating and editing windows requires implies more difficulty. Furthermore, we can achieve greater variety of results with a curtain wall by creating mullion and panels families.
Windows
- Windows offer a more accurate and closer to reality representation.
- Windows can appear in legend views while curtain walls cannot. This can be an advantage when creating a memory of carpentries because is easier and faster dragging the types of windows than duplicating views to show curtain walls. Being unable to place tags in this view can be a disadvantage.
- Windows can appear in schedules, while curtain walls appear with the rest of the walls. On the other hand, curtain walls have the advantage that we can create schedules for mullions and panels separately, and windows do not offer the possibility of separating components.
- They offer greater control over the wrapping of the layers of the host element. In the type properties of the window we can set how the layers of the wall adapt to the window, while this is not possible with curtain walls.
Tips & Tricks
- Having a wall as a curtain panel offers the advantage that walls can have a curve as location line, and they will adapt it shape, but curtain panels will not adapt and will maintain its shape from grid to grid in a straight line.
- When creating complicated profiles with a high degree of definition, it is a good practice editing their visibility according to the views and the level of detail, either adding detail items.
- The phase “Legends” could be created with the aim of placing on it all the elements you want to appear in legends or sheets but that you do not want to appear in measurements. It offers some advantages over legend views: it is possible to tag the elements and modify the way they are shown. In order to avoid the elements modeled in this phase to appear on schedules it is important to check that the View Phase and the View Filter of each schedule do not show that phase..
- We could establish that windows would be better for elements understood as "units" and that can be repeated in the project, while curtain walls would be better for elements understood as "systems", and for fast drafts in early stages of the project.
Conclusion
To model complex facades well detailed in Revit is hard work and takes time. It is important to decide what is worthy to model and what could be avoided in order to reach the established LOD.
To sum up we can say that the use of windows or curtain walls will depend on several factors: what we want from the project, from the element, and our preferences or skills, etc…
Associated Files
- GEN_Graphics Management
- OPE_Sheet Layout