

Sheet Layout and Management
Operation in Revit
Sheet Layout and Management
File: OPE_SheetLayout
Objectives
- Be able to prepare graphic documentation out of the BIM Model in form of sheets.
- Be able to create a Sheet List showing project information.
- Manage sheet creation and organization in project
Prerequisites
- User have basic skills in BIM modelling with Revit Software, and can navigate the model and project browser.
- User have notions about view creation and graphic configuration.
- User can complete model views with annotation elements.
- User can create and edit schedules.
- User understand the use of parameters (project, family, shared and system parameters).
Description
At some point in the evolution of BIM Processes we will be able to delivery just the BIM Model since it is a digital version in advance of the building to be and should contain all the information needed. This moment has not come yet and in the meanwhile we have to get ready a set of construction documents to explain the project.
In this case the construction document set is a group of sheets that describes the project as needed in each phase.
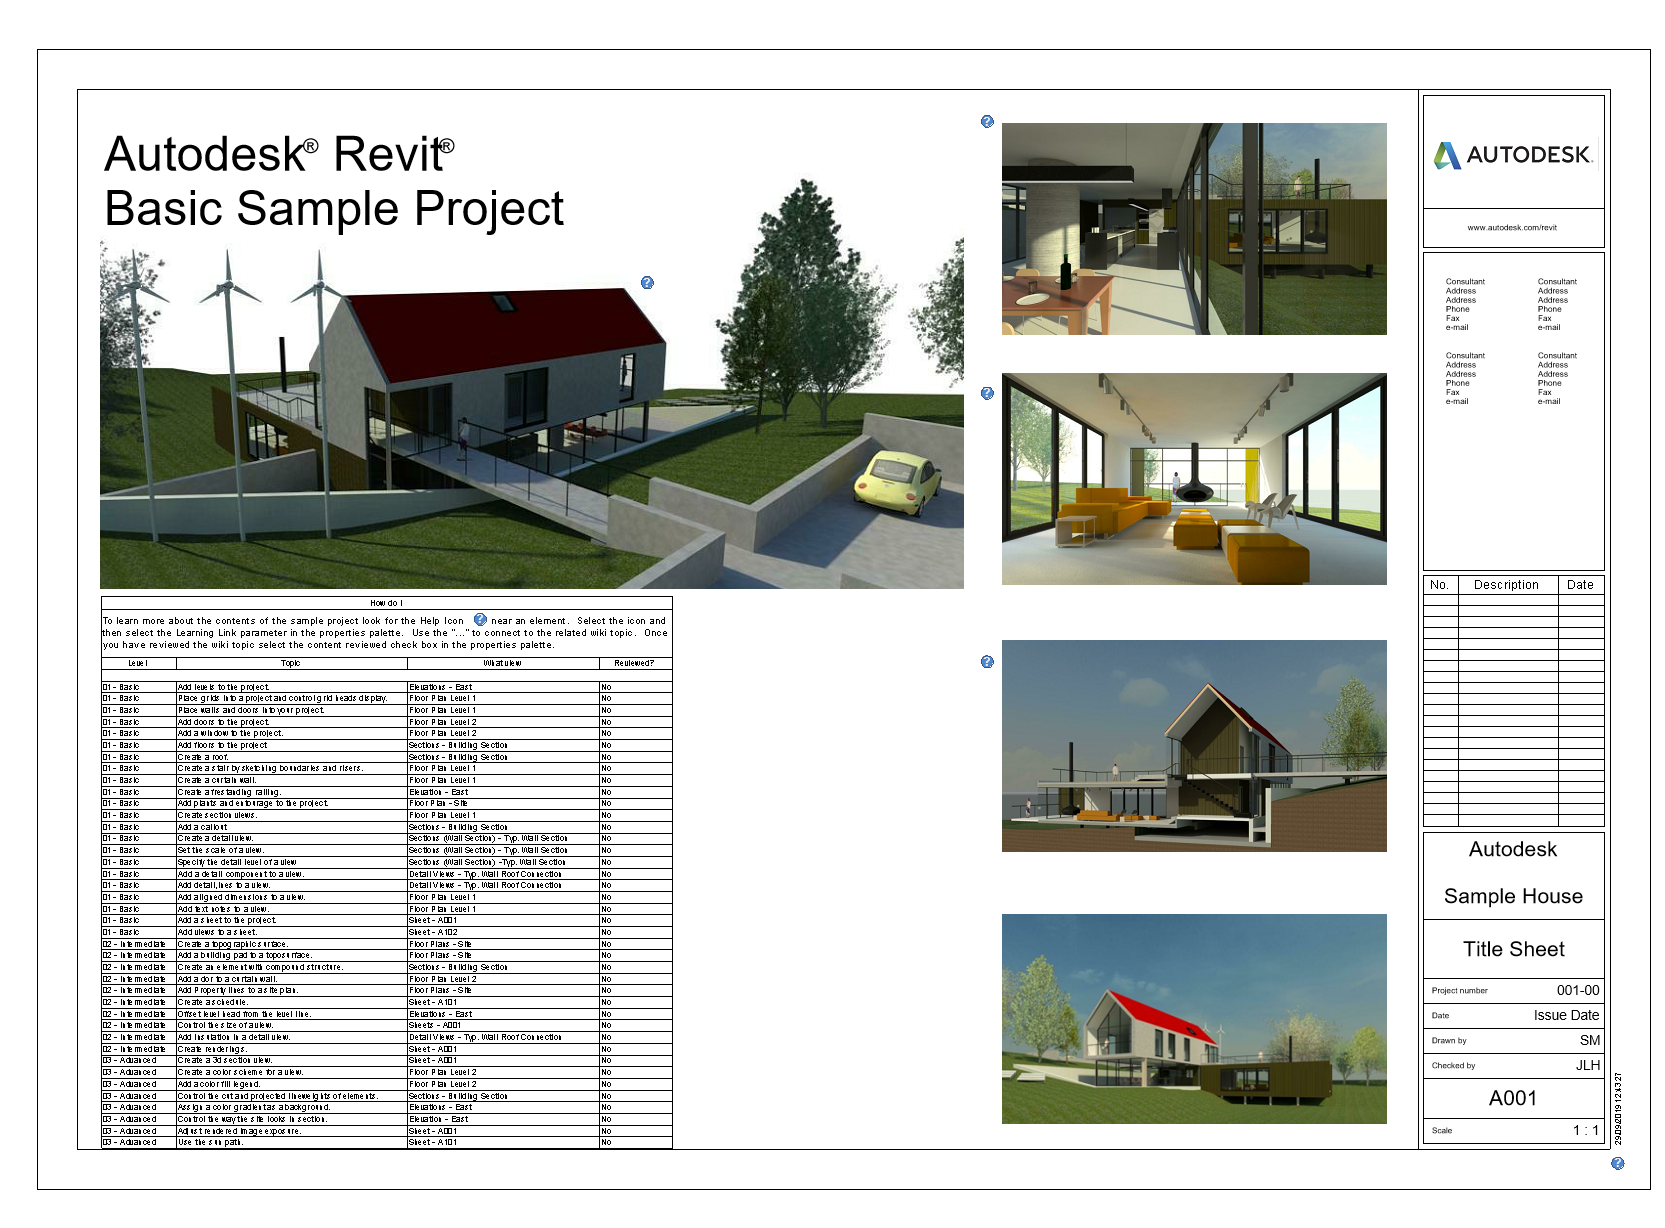
A sheet view in Revit is a layout where you can place:
- A Titleblock
- Multiple drawings (graphic views such as plan views, sections, elevations, details, 3D views)
- Multiple schedules
- Images
- Texts
- External elements
Since the project is a database, sheet lists can be managed from the model itself by the use of schedules, making it not necessary to use an external spreadsheet to organize them.
Procedure
1 Create Sheets
To create a new sheet view go to View Tab > Sheet composition panel > Sheet

Once created sheets are saved and you can open them any time needed like any other view. In the project browser they are listed under their own section: Sheets.
A new sheet can also be created right clicking on the heading of the project browser section:
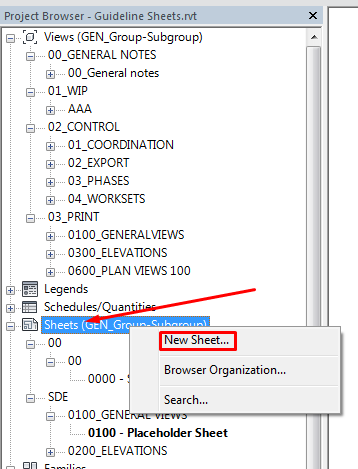
When we select to create a new sheet a menu will appear. In this menu we can:
- Select one titleblock family for the sheet format
- Select no titleblock (not recommended)
- Select one existing sheet placeholder to create the sheet (see Sheet List Section).
Sheet will be then created:
- It is automatically numbered. It can be renumbered by user. Sheet number system parameter must be unique.
- It has to be renamed. Sheet names must not be unique.
2 Insert views on sheets
2.1 Insert graphic views
Views can be inserted from View tab > Sheet composition panel > Place View

Or drag it from the project browser to the sheet and click to fix it to the wanted position.
- One view can be placed only in once, in one sheet. If for any reason we want the same view in more than one sheet, we have to duplicate it.
- Views are shown as they are configured by their properties. If we change anything in the view it will be updated on sheet and vice versa. Editing a view from the sheet or from the project browser have same results.
- Scale
- Cropped area
- Graphical settings
- In project browser each sheet will have drop-down tree where we can see which views are placed in it.
- Size of views depend on the scale and the cropping. Even for 3D Views.
- Size of Camera Views depend on the size crop not on the scale. They act like images.
- When placing a view on a sheet it becomes a Viewport (similar to viewports in AutoCAD on paper space), that is a system element that includes:
- ViewTitle: it is a custom family that can includes selected about the view such as Name, Scale, Detail Number on Sheet. It can be moved independently from the view location by selecting it and not the whole viewport.
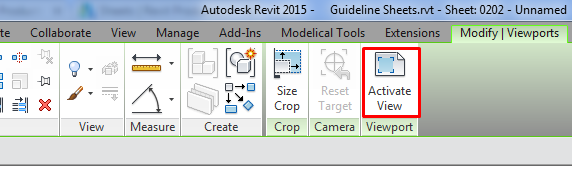
- View: You can edit it in the same way you were editing it from the project browser by activating it. Select it and select Activate View (or double click on it).
2.2 Insert schedules
A schedule can be placed on a sheet like any other view, but with some specific points:
- We can drag it to the sheet and place it into the right position
- We can do it in the View tab > Sheet Composition Palette > Place View
- Schedules can be placed in more than one sheet.
- If the same schedule (same contents and configuration) must be placed in different sheets with different graphical appearance, the schedule has to be duplicated.
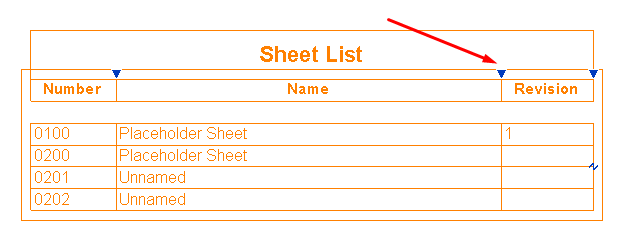
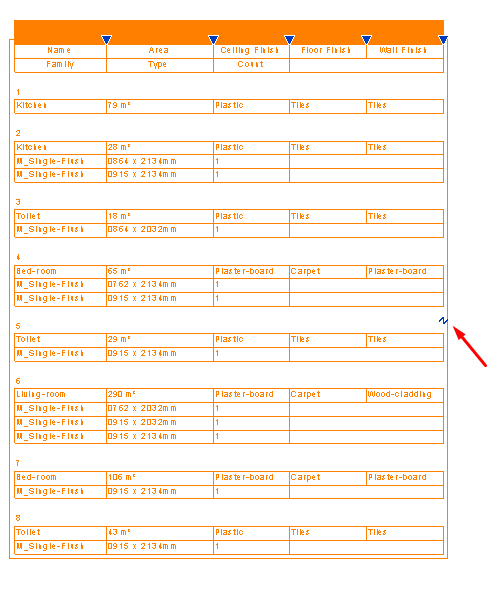
- Column width can be adjusted in schedules once the are are placed on sheets. Select the schedule and drag the blue handles on the edges of column headings:
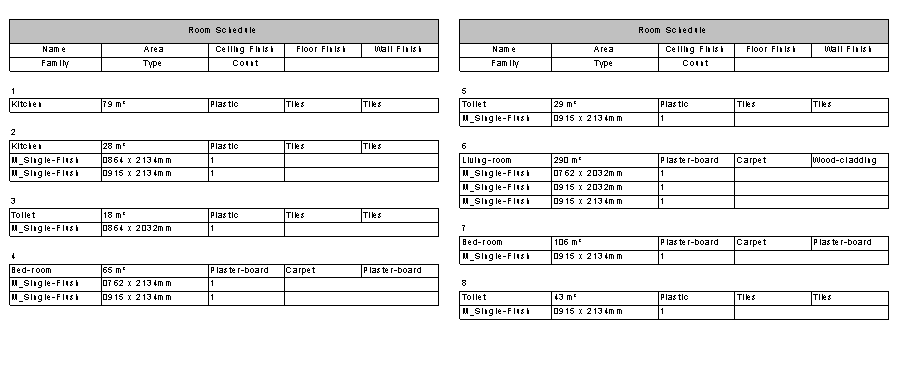
- Schedules on sheets can be split if they are too long:
2.3 Insert images
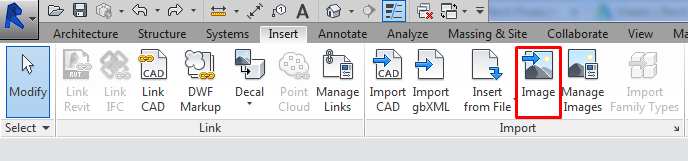
Go to Insert Tab > Import panel > Image
Keep in mind that images should be placed with the right format and graphics since when they are placed on a sheet they cannot be edited (colour, crop…). They can only be resized maintaining proportions (size crop).
2.4 Sheet layout tools
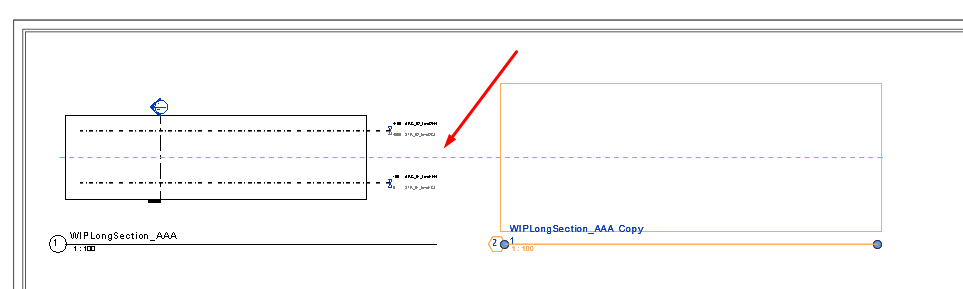
- View internal reference: when we place two plane views that are coincident on a sheet there is an automatic tool that helps to align them horizontally or vertically. Same occurs with View Titles if we want to move them from their initial position.
- Guide Grid: It can be activated on the View tab > Sheet Composition > Guide Grid
We can create more than one guide grid (with different spacing between grid lines) and assign a different one (or none) or the same on each sheet to arrage views so that views appear in the same location sheet to sheet.

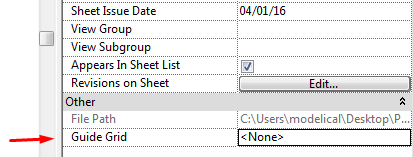
When we try to move a view on a sheet to place it to the final placement, notice that we can snap only to certain elements inside views:
- Crop region
- Levels
- Grids
- Reference planes
3 Titleblock
Title Blocks are elements that inside Revit have their own category (same name: Title Blocks).
They are custom annotation families with one special feature: the external lines of the format define the boundaries or borders of the sheet. They generally include information about the design firm, client, and about the project.
As custom families we can create them with any appearance that is required in project, and they are formed by:
- External boundary lines (can not be deleted but can be moved)
- Annotation lines. With any graphic appearance.
- Images (for logos, key plans)
- Title Block data:
- Fix text. They are created as Texts.
- System Project info parameters can be shown in Titleblocks (See Parameters Guideline). They are shown by Labels.
- Custom Shared parameters can be shown in Titleblocks. They are shown by Labels.
When creating a title block and inserting information in it to be shown later, we can think as if it were the tag in model for two categories: Project Info and Sheets. This can help to understand how to add parameters and labels in the family.
Title block is inserted in sheets when we create them or can be done later. It is recommended to have different types of title blocks loaded in models and play with types to create sheets with different settings.
4 Manage Sheets
For the sheet management we have to rely mainly on the info that they include. That info is stored in models in form of parameters. For sheets we will find system project parameters, custom project parameters and custom shared project parameters. (See Parameters Guideline)
- System parameters: will show in title blocks, will show in schedules.
- Custom Project parameters: will show in schedules but not in titleblocks.
- Custom Shared project parameters: will show both in schedules and in title blocks if required.
4.1 Project browser organization
In any project we can have a large number of sheets. To be able of working in an orderly way with all that information that will be living in the model, that specific section in the project browser can be organised according with some criteria.
For that we will use the ability to organise the project browser:
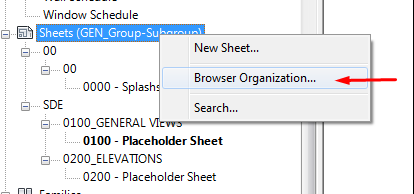
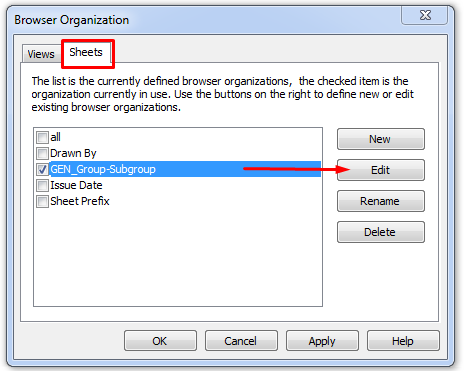
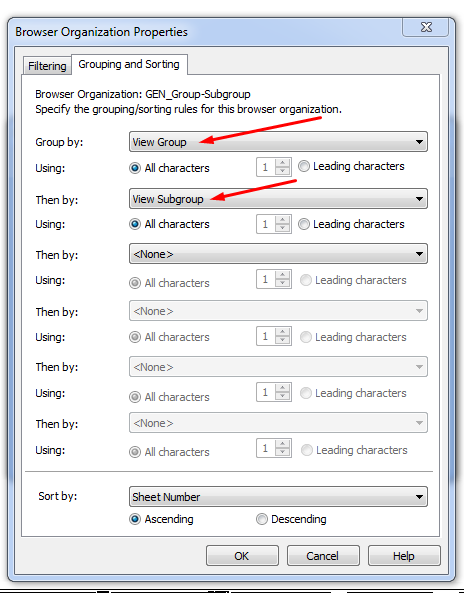
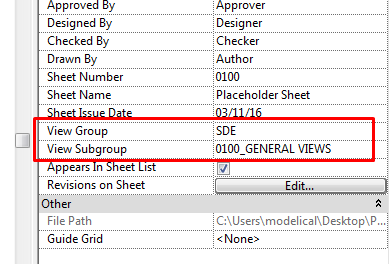
When defining the rules that we will use to sort and organise sheets, it has to be clear which parameters that already exist for sheets we are going to use.
They can be, as always, system parameters, project parameters, or shared parameters.
4.2 Sheet list
It is a schedule of the sheets in the project. It can be used also to create placeholder sheets prior to creating actual sheets.
(See Schedule Guideline).
The best way to manage sheets is using the Sheet List.
View tab > Create panel > Schedules drop down menu > Sheet List
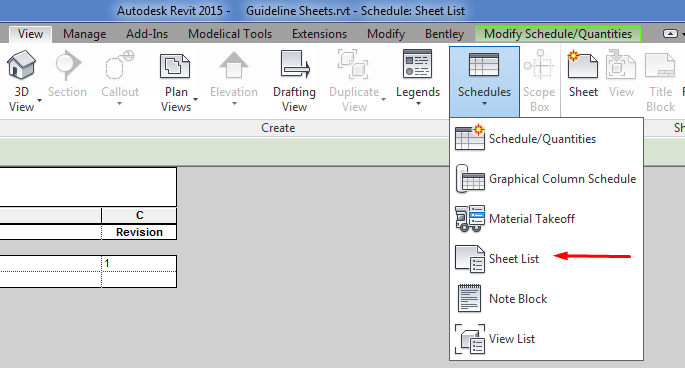
Add to the schedule any sheet parameter that need to be controlled in model.
We can have more than one Sheet list, for different purposes:
- Have a Sheet List to be placed in the front page of the construction set, with some of the information.
- Have a Sheet List to manage the information that should appear in Title Blocks across sheets.
In Sheet lists we can:
- Fill in all the info for sheets
- Create placeholders for sheets and fill the information before creating the actual sheet. Then we can have in advance the complete sheet list and have control over the documentation that has been completed and know what is still missing.
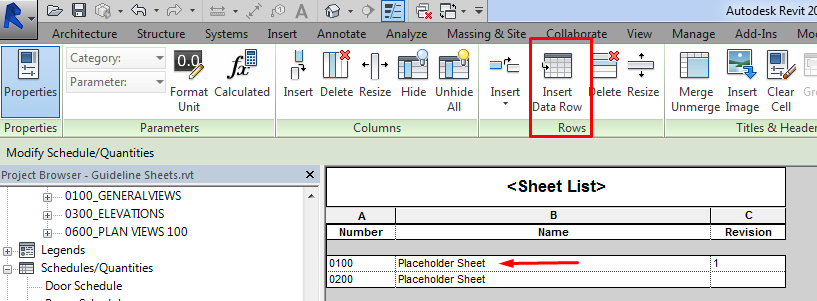
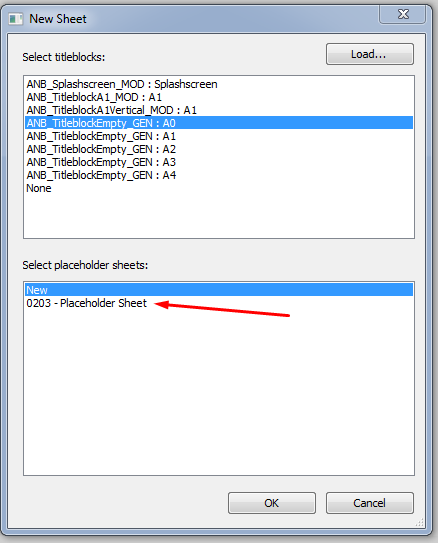
That placeholder sheet will be available to select it when we create a new sheet, and its parameter will be automatically filled in with the values that were previously defined in the schedule.
5 Print sheets
Go to main Revit Menu > Print > Current Window/Selected views sheets
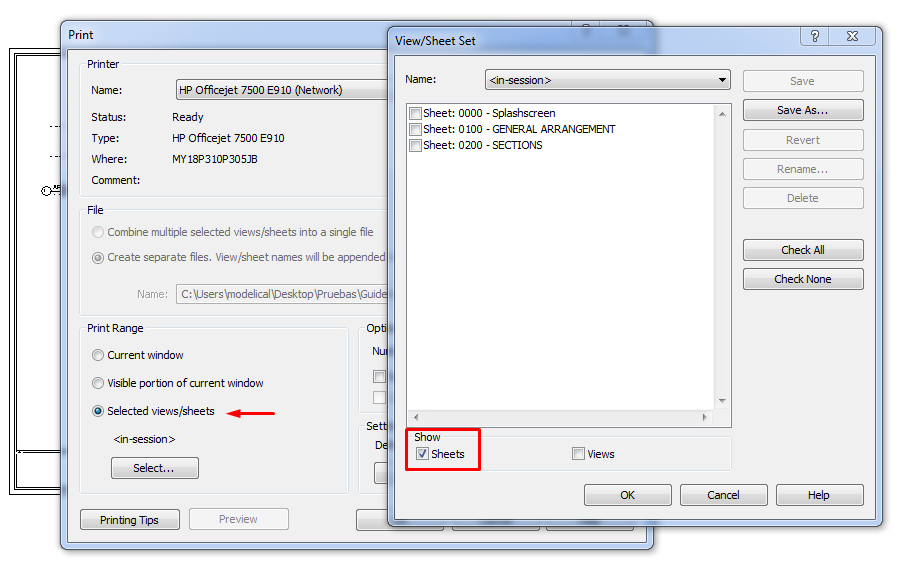
You can print:
- Only the current view (current sheet then).
- A set of sheets
Change the printing setup:
- Select printer (or to PDF)
- Select paper size/orientation/placement
- Use options: Hide ref/work planes, Hide Scope boxes, hide corp boundaries…
- Select if print in Vector or Raster processing.
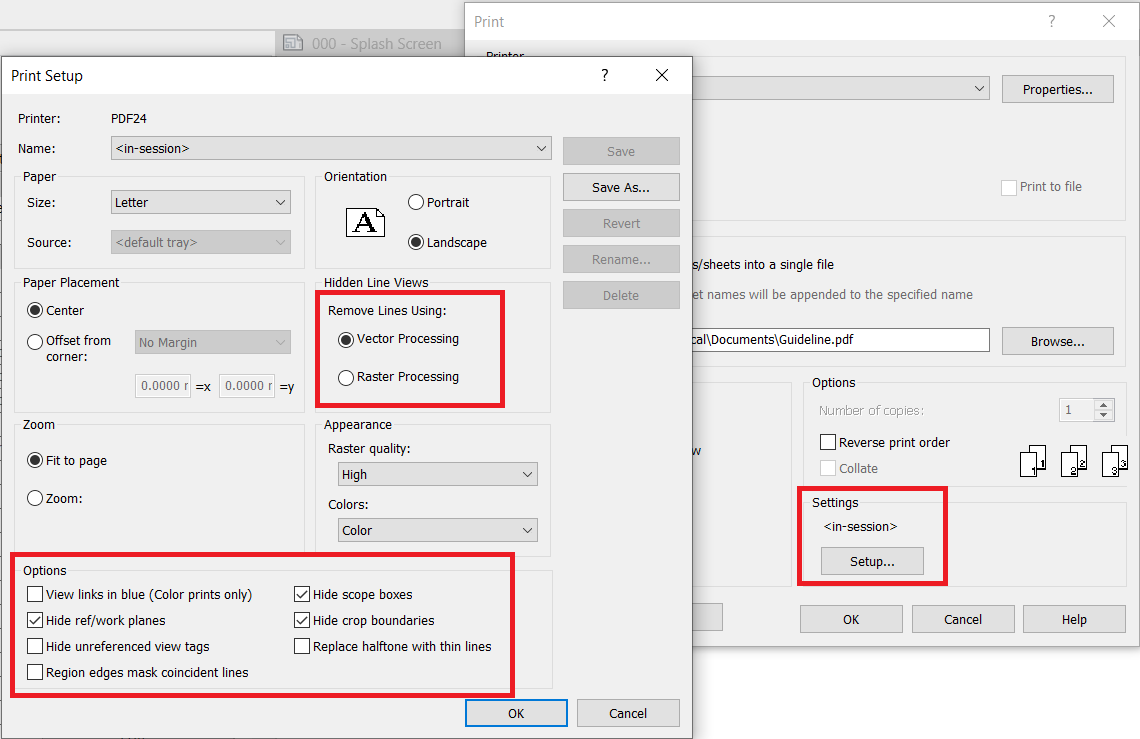
One of the options that most influences the quality of the printing will be its processing. There are two options for this: raster or vector image.
A raster image is made up of pixels, so the resolution of the image, and therefore its quality, depends on the number of pixels to which the image is printed.
A vectorised image stores coordinates of the vertices of each geometric element and its control points.
Programs such as Illustrator or Corel draw work vectorially, and the practical effect of inserting a vector image into a vector program is that the lines and points of the image become the native lines and points of the editing program. However, if a raster image is entered, the editing program only inserts it as an image and cannot control its points.
With a vector image, we will always have better quality, however, Revit has a limitation when it comes to printing, and that is that by default it rasterises those views that contain shadows, gradients, sketch lines, images or point clouds, making it impossible to print in a vectorised way, even if this has been selected.
Therefore, when we have a sheet that contains any of the elements mentioned above, we will have two options to get a good quality image.
1- Print in a raster way playing with your print quality options to achieve an optimal result.
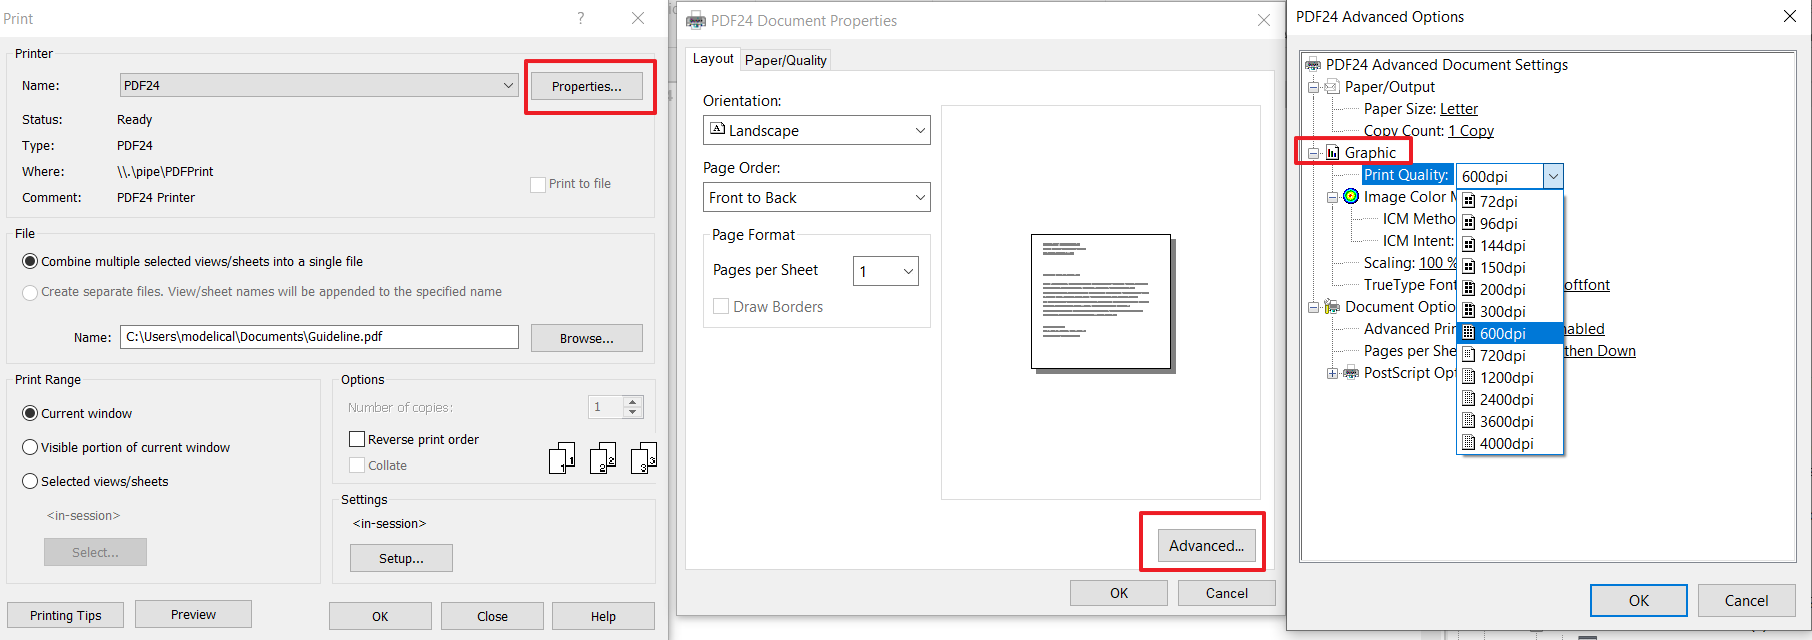
2- If you need the image to be vector, in order to go through post-processing in other software, you will have to turn off all the elements mentioned above, print vectorially, and apply shading etc. directly in the publishing software.
Tips&Tricks
- Use the “Itemize every instance” schedules in Sorting/Grouping Tab in schedules to populate at once same values in many sheets.
- Sheet Number must be unique for sheets. Sometimes this is not convenient for project sheet numbering, and it is required to create additional custom parameters that can play that role in title blocks, and leave OOTB Sheet Number to just identify drawings in model.
- Sheets cannot be duplicated with the standard functionality. It can be achieved with some programming in the API though.
- When it comes to printing, our recommendation is to always have vector printing selected by default, as the plans will be of higher quality, especially now that deliveries are in digital format and unlimited zoom is possible. In a raster image, if you zoom in too much, you will end up seeing the pixels, but in a vector image, you will always see lines. In addition, the weight of the pdf files will be much less. Which is also a relief for our data storage system.
Bottom-line
When we create a BIM Model we cannot forget that the documentation process is maybe so important than the modelling phase. It is not recommended to focus only in modelling tasks and aspects when actually the sheet creation and description of the model will consume at least as much time as the modelling part.
Muy buen artículo….
Muy buen artículo.
Quería preguntarle una cosa: ¿hay alguna manera de que el recorte de anotación coja la misma forma que el recorte de vista?
Se trata de un proyecto que necesito hacer recortes de vista con quiebros y el recorte de anotación necesito que sea igual que el de vista por otras razones, y no un paralelepípedo como crea el recorte de anotación.
Gracias!!!
Hola Nur, no, no es posible, pero puedes usar varias vistas para componer el plano o colocar una máscara en un corte normal. Espero haberte ayudado.
Un saludo